background image

15

Note:

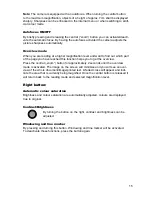
 The camera is equipped with an autofocus. When turning the central button 

to the maximum magnification, objects of a height of approx. 7cm shall be displayed 

sharply. Sharpness can be enhanced in the internal menu or when switching to artifi-

cial colour mode.

Autofocus ON/OFF

By briefly pressing and releasing the central (“zoom”) button you can activate/deacti-

vate the automatic focus. By having the autofocus activated the camera adjusts the 

picture sharpness automatically.

Overview mode

When you are reading at a higher magnification level and want to find out which part 

of the page you have reached this function helps you to get the overview.
Press the central („zoom“) button for approximately 2 seconds until the overview 

mode is activated. The image on the screen will minimise and you will see an over-

view of the whole document/image/printed text. A faded cross will appear and indi-

cate the area that is currently being magnified. Once the central button is released it 

will return back to the reading mode and selected magnification level.

Right button:

Automatic colour saturation

Brightness and colour saturation are automatically adjusted, colours are displayed 

true to original.

Contrast/Brightness


By turning the button on the right, contrast and brightness can be  


adjusted.

Windowing and line marker

By pressing and turning this button, Windowing and line marker will be activated.  

To deactivate those functions, press the button again.

Summary of Contents for mezzo vario

Page 1: ...d maintenance for your own safety and in order to avoid damages on your video magnifier Please read this user manual carefully prior to installation use and maintenance for your own safety and in order to avoid damages on your video magnifier mezzo vario EN User manual ...

Page 2: ...2 ...

Page 3: ...3 ...

Page 4: ...2 96 EEC 8 Power supply 8 Safety instructions 9 II Instructions for the reading system mezzo vario 10 Delivery content 10 Optionally available 10 Installation of the system 10 Connection of the unit 11 Alignment of monitor 12 Description of the control elements 13 Control panel base plate 13 ON OFF power switch 13 Light ON OFF Dimm 13 Indicator for rechargeable battery 13 Control panel monitor 14 ...

Page 5: ...tery 17 Replace the rechargeable battery 17 Use of battery 17 Battery charging 18 Operating time once the battery had been fully charged 18 Liability for defects on the battery 18 Description of the menu settings 18 Menu selection 18 Adjust menu settings 19 Explanation of the menu content 19 Menu settings 19 Check list in case problems occur 23 Technical characteristics 24 Warranty Information 25 ...

Page 6: ...ded the operator of these devices has to be informed that it is necessary to observe the performance of the system to control the conventional use of the system in the chosen set up Electronic devices are sensitive towards electric discharge and towards high frequency electro magnetic fields Attention In order to avoid high frequency disturbances the operator should respect a minimum distance of o...

Page 7: ...t sys tems The device may not be used in the patients environment This device should not be operated in explosion endangered environments This opto electronic device should only be installed in conjunction with modern electrical circuitry It is a device of protection class II The openings in the casing ensure opti mum cooling and must not be covered Combination with other products Warning This rea...

Page 8: ...s in the original packing The following conditions for transport and storage have to be respected Air pressure 700 1000 hPa Temperature range 5 to 50 Relative air humidity 30 to 80 Disposal of the unit according to EU directive 2002 96 EEC mezzo vario contains electronic components In order to avoid damage to the envi ronment the country specific rules have to be respected Power supply Only use th...

Page 9: ...arm the picture quality 6 Do not use this device below 5 C or above 40 C 7 No liquids must reach the interior of the system Only use the device in a dry environment 8 The device may not be used next to medical devices patients environment 9 Do not lean on the screen touch the screen with any object or lay heavy objects on the device This may cause damage to the device 10 Do not try to repair or to...

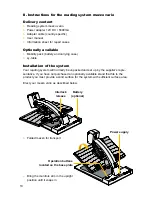
Page 10: ...of the system Your reading system will normally be unpacked and set up by the supplier s repre sentative If you have not purchased an optionally available stand that fits to the product you must provide a solid surface for the system with sufficient surface area Erect your mezzo vario as described below Folded mezzo for transport Bring the monitors arm in the upright position until it snaps in Int...

Page 11: ...ower cable is to be used exclusively in connection with the mezzo vario Once the device is plugged in it is ready to use Camera Release the locking lever in order to move the monitor into the upright posi tion Use the integrated grip to do so LED Light open close The locking lever can be brought into the desired position by pulling it out Control panel locking lever Electrical outlet Power supply ...

Page 12: ...rm enables the user to adjust the monitors height and angle according to their best ergonomic position The monitor can be rotated anticlock wise by 90 degrees in order to make column reading easier The image will adapt automatically to the monitors position The monitor can be moved vertically up and down The monitor can be tilted up or down rotatable by 90 degrees ...

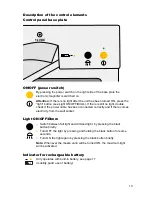
Page 13: ...heck if the power cable has been connected correctly and if there comes electricity from the wall socket Light ON OFF Dimm Switch between full light and dimmed light by pressing the black button briefly Turn OFF the light by pressing and holding the black button for some seconds Turn ON the light again by pressing the black button briefly Note Whenever the mezzo vario will be turned ON the maximum...

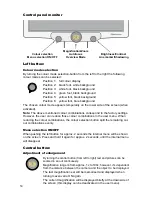
Page 14: ...lection button split the remaining col our combinations evenly Menu selection ON OFF When pushing the left button for approx 2 seconds the internal menu will be shown on the screen Press and hold it again for approx 2 seconds until the internal menu will disappear Central button Adjustment of enlargement By turning the central button from left to right text and pictures can be zoomed in an out con...

Page 15: ...helps you to get the overview Press the central zoom button for approximately 2 seconds until the overview mode is activated The image on the screen will minimise and you will see an over view of the whole document image printed text A faded cross will appear and indi cate the area that is currently being magnified Once the central button is released it will return back to the reading mode and sel...

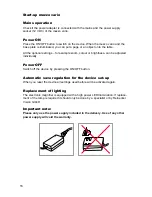
Page 16: ...r or brightness can be adjusted individually Power OFF Switch off the device by pressing the ON OFF button Automatic save regulation for the device set up When you reset the device all settings used before will be activated again Replacement of lighting The electronic magnifier is equipped with a high power LED Illumination If replace ment of the lamp is required it should only be done by a specia...

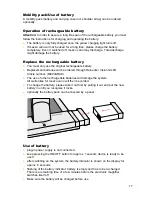
Page 17: ...ry Replacement batteries can be ordered through Reinecker Vision GmbH Article number MEZVARAK The use of other rechargeable batteries will damage the system All warranties for mezzo vario will then be voided To change the battery please take it out first by pulling it out and put the new battery in until you recognize it locks optionally the battery pack can be covered by a panel Use of battery pl...

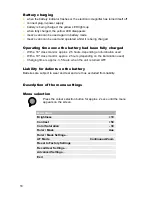
Page 18: ... approx 2 5 hours depending on illumination used With a 19 class monitor approx 2 hours depending on the illumination used Charging time is approx 3 5 hours when the unit is turned OFF Liability for defects on the battery Batteries are subject to wear and tear and are thus excluded from liability Description of the menu settings Menu selection Press the colour selection button for approx 2 secs un...

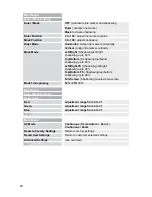
Page 19: ...ressed for approx 2 secs until the menu will disappear from screen Explanation of the menu content The image shows in detail how the menu is structured Menu settings Main Menu Brightness adjustment range from 50 to 50 Contrast adjustment range from 50 to 50 Color Saturation adjustment range from 50 to 50 Ruler Mask OFF deactivate line marker and shadowing Ruler activate line marker Mask activate s...

Page 20: ...p Bottom Shadowing top bottom shadowing up to 50 Left Right FS Shadowing left right shadowing up to 90 Top Bottom FS Shadowing top bottom shadowing up to 90 Full Screen Shadowing covers whole screen Mask Transparency 50 25 0 Main Menu Ruler Mask Settings Ruler Color Red adjustment range from 0 to 31 Green adjustment range from 0 to 31 Blue adjustment range from 0 to 31 Return Main Menu AF Mode Con...

Page 21: ... Black Red Green Blue Yellow Magenta Cyan White User 1 User 2 Background Black Red Green Blue Yellow Magenta Cyan White User 1 User 2 Swap Fore Background invert foreground and background colours Return Main Menu Advanced Settings Color Combination Setup User colors User color 1 Red adjustment range from 0 to 31 User color 1 Green adjustment range from 0 to 31 User color 1 Blue adjustment range fr...

Page 22: ...Real Color Sharpness adjustment range from 0 to 24 False Color Sharpness adjustment range from 0 to 24 Return Main Menu Advanced Settings OSD Messages ON OFF Special Settings see overview Return Overview Special Settings Zoom Extension ON Max Digital Zoom 3 5x Customize Buttons Store User Settings Recall User Settings Reset to Factory Settings Expert Settings Monitor size 19 Return Main Menu Advan...

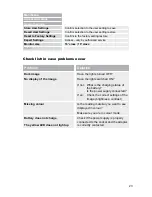
Page 23: ...st in case problems occur Problem Solution Dark image No display of the image Have the lights turned OFF Have the lights switched ON If not What is the charging status of the battery Is the power supply connected If so Check the correct settings of the image brightness contrast Missing colour Is the reading material you want to see displayed in colour Make sure you are in colour mode Battery does ...

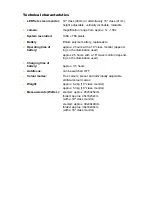
Page 24: ...19 class monitor depend ing on the illumination used approx 2 5 hours with a 16 class monitor depend ing on the illumination used Charging time of battery approx 3 5 hours Autofocus can be switched OFF Colour modes True colours preset and individually adjustable artificial colour modes Weight approx 6 2kg 19 class monitor approx 5 3kg 16 class monitor Measurements WxHxL erected approx 45x50x52cm f...

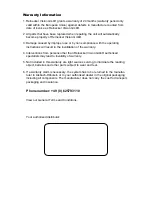
Page 25: ...idation of the warranty 4 Interventions from persons other than Reinecker Vision GmbH authorised specialists may lead to invalidity of warranty 5 Not included in this warranty are light sources serving to illuminate the reading object batteries and other parts subject to wear and tear 6 If a warranty claim is necessary the system has to be returned to the manufac turer in Alsbach Hähnlein or to yo...

Page 26: ...Notes ...

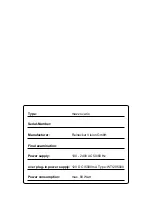
Page 27: ...Type mezzo vario Serial Number Manufacturer Reinecker Vision GmbH Final examination Power supply 100 240VAC 50 60 Hz over plug in power supply 12V DC 5000mA Type WTI205000 Power consumption max 80 Watt ...

Page 28: ...cker Vision GmbH Zentrale Deutschland und Export Vertrieb Kundenberatung Sandwiesenstraße 19 64665 Alsbach Hähnlein Kundendienst Erlenweg 3 64665 Alsbach Hähnlein Tel 0 18 05 54 56 65 Fax 0 62 57 25 61 Email info reineckervision de www reineckervision de Festnetzpreis 14 ct min Mobilfunkpreis max 42 ct min Reinecker Vision GmbH International Contact sales department customer relations Sandwiesenst...

Reviews: