background image

2

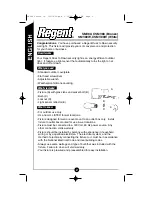
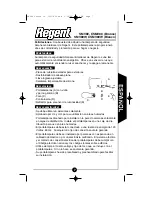
Congratulations

. You have purchased a Regent Dusk to Dawn security

wall light.  This fixture will provide years of convenience and protection
for your home or business.

How it works

Your Regent Dusk to Dawn security light is an energy efficient outdoor
light.  It features a light sensor that automatically turns the light on at
dusk and off at dawn.

What you need

• Standard outdoor coverplate
• Flat head screwdriver
• Adjustable wrench
• Weatherproof silicone caulking

What’s included

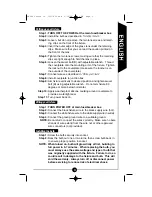
• Fixture (A) with glass lens and swivel bolt (B)
• Bulb (C)
• Locknut (D)
• Light sensor reflector (E)

What to know

• For outdoor use only.
• UL and cUL LISTED for wet locations.
• Fixture designed for wall or eave mount to an outlet box only.  Install

fixture to outlet box marked for use in wet locations.

• Fixture must be connected to a 120 Volt, 60 Hz power source.  Any

other connection voids warranty.

• Fixture should be installed by persons with experience in household

wiring or by a qualified electrician.  The electrical system, and the
method of electrically connecting the fixture to it, must be in accordance
with the National Electrical Code and local building codes.

• Always use same wattage and type of bulb that was included with the

fixture.  Failure to do so will void warranty.

• Your fixture is prewired and preassembled for easy installation.

What to know

What’s included

What you need

How it works

SMV80, CSMV80 (Bronze)

SMV80W, CSMV80W (White)

A

B

C

D

E

SMV80 Series IS. 325-1436.qxd  2/16/04  4:38 PM  Page 2

Summary of Contents for CSMV80

Page 1: ...SMV80 SMV80W CSMV80 CSMV80W Instruction Manual Instrucciones Directives SMV80 Series IS 325 1436 qxd 2 16 04 4 38 PM Page 1...

Page 2: ...ions Fixture designed for wall or eave mount to an outlet box only Install fixture to outlet box marked for use in wet locations Fixture must be connected to a 120 Volt 60 Hz power source Any other co...

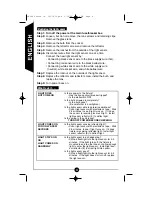
Page 3: ...rproof silicone caulking around coverplate to provide a watertight seal Step 11 Turn power back on Wiring your fixture Step 1 TURN POWER OFF at main fuse breaker box Step 2 Connect the black fixture w...

Page 4: ...the bulb screwed in completely Is the bulb good Be careful not to overtighten Is the light sensor able to determine darkness Cover light sensor with electrician s tape Wait 2 3 minutes to see if light...

Page 5: ...ies except as described above THE COMPANY SHALL NOT BE LIABLE FOR INCIDENTAL SPECIAL OR CONSEQUENTIAL DAMAGES RESULTING FROM THE USE OF THE PRODUCT OR ARISING OUT OF ANY BREACH OF THIS WAR RANTY ALL I...

Page 6: ...led damage that is made in transit should be reported at once to the carrier making the delivery and a claim filed with them Customer First Center 1121 Highway 74 South Peachtree City GA 30269 USA www...

Page 7: ...n en reas h medas Portal mparas dise ado para instalar en la pared o alerones solamente en cajas de distribuci n Instale el portal mparas en una caja de dis tribuci n para uso en rea h medas El porta...

Page 8: ...leado del portal mparas Paso 8 Instale la placa de cubierta a la caja de conexiones Paso 9 Ponga el portal mparas verticalmente en la posici n deseada y apriete el perno giratorio B con la llave ajust...

Page 9: ...iguiente manera Conecte el cable negro del fotosensor al cable negro de alimentaci n activo Conecte el cable rojo del fotosensor al cable negro del equilibrador Conectando el cable blanco del sensor a...

Page 10: ...a para retirar o instalar los portal mparas Esta garant a se extiende nicamente al comprador original del producto Antes de comenzar a realizar cualquier trabajo bajo esta garant a se requerir el reci...

Page 11: ...s en ingl s e instruc ciones completas para devolver los productos Todos los productos devuel tos estar n acompa ados por un n mero de autorizaci n de devoluci n de art culos emitido por la Compa a y...

Page 12: ...e dis tribution seulement Installer la pi ce fixe la bo te de distribution mar qu e pour usage dans les endroits mouill s Le dispositif doit tre branch une source d nergie de 120 Volts 60 Hz Tout autr...

Page 13: ...sition d sir e et ser rez le boulon pivotant B en utilisant la clef r glable Ne pas pr senter l appareil 60 degr s ou plus sous l horizontale Etape 10 Appliquer du produit de calfatage la silicone r s...

Page 14: ...d alimentation chaud Branchant le fil rouge du d tecteur au fil noir du ballast Branchez le fil du d tecteur blanc au fil d alimentation blanc neutre au fil de douille blanc et au fil de ballast blan...

Page 15: ...de marques autres que celle de la Soci t et ceux caus s par la corrosion ou la d coloration des com posants en laiton ne sont pas couverts par cette garantie Il n existe aucune garantie explicite aut...

Page 16: ...ise avec des instruc tions sur la fa on de retourner le produit Tous les produits retourn s doivent tre accompagn s d un num ro d Autorisation pour produits retourn s mis par la Soci t et doivent tre...

Reviews: