background image

6

FG39-2 Freestanding Gas Stove

installation

IMPORTANT: 
SAVE THESE 
INSTRUCTIONS

The REGENCY Room Sealed Freestanding Gas 
Stove must be installed in accordance AS/NZS 
5601 and with these instructions. Carefully read 
all the instructions in this manual first. Consult 
the building authority having jurisdiction to de-
termine the need for a permit prior to starting 
the installation.

Note: Failure to follow the instructions 

could cause a malfunction of the 

heater which could result in death, 

serious bodily injury, and/or property 

damage.  Failure to follow these 

instructions may also void your fire 

insurance and/or warranty.

Note: These instructions take precedence 

over Simpson Dura-Flue instruc-

tions.

SPECIFICATIONS

Fuels: 

FG39-NG2 is approved for use with NG.

    FG39-LPG2 is approved for use with 

liquified petroleum gases (LPG).

Electrical:

  240V  A.C. system.

Circulation Fan: 

 3 speed fan

Log Sets: 

 Ceramic fibre, 7 per set.

Flue System:

  Coaxial rigid flue and termina

-

tion cap.

BEFORE  YOU  START

Safe  installation  and  operation  of  this  appli-
ance requires common sense, however, we are 
required by the ANSI Standards to make you 
aware of the following:

MORE FREQUENT CLEANING MAY 

BE REQUIRED DUE TO EXCESSIVE 

LINT FROM CARPETING, ETC.  IT IS 

IMPERATIVE THAT THE CONTROL 

COMPARTMENT, BURNERS AND 

CIRCULATING AIR PASSAGEWAYS 

OF THE APPLIANCE BE KEPT CLEAN.

INSTALLATION AND  REPAIRS 

SHOULD BE DONE BY AN AUTHOR-

IZED SERVICE PERSON. THIS AP-

PLIANCE SHOULD BE INSTALLED, 

REPAIRED, INSPECTED BEFORE 

USE AND AT LEAST ANNUALLY BY 

AN AUTHORISED SERVICE PERSON.  

4.  This appliance is Listed for bedroom  instal-

lations  when  used  with  a  Listed  Millivolt 
Thermostat. Some areas may have further 
requirements,  check  local  codes  before 
installation.

5.  This appliance is Listed for Alcove installa-

tions, maintain minimum Alcove clearances 
as follows,   minimum width of 1219mm, a 
maximum depth of 914mm, and minimum 
ceiling height of 1626mm.

6.  We recommend that you plan your instal-

lation on paper using exact measurements 
for  clearances  and  floor  protection  before 
actually installing this appliance.  Have an 
authorised  building  inspector  review  your 
plans before installation.

GENERAL SAFETY
INFORMATION

1.  The appliance shall be installed in accord-

ance  with  the  manufacturer's  installation 
instructions,local  gas  fitting  regulations, 
municipal  building  codes,  water  supply 
regulations,  electrical  wiring  regulations, 
with AS/NZS 5601.

2. 

Installation and repair should be done 
ONLY by an authorised person.  

3. 

DO NOT CONNECT TO MASONRY FLUE.

4. 

This appliance must be connected to the 
specified flue and termination cap to the 
outside of the building envelope. Never 
flue to another room or inside a building. 
Make sure that the flue is fitted as per 
Flueing instructions.

5.  Inspect the flueing system annually for block-

age and any signs of deterioration.   

6.  Flueing terminals shall not be recessed into 

a wall or siding.

7.  Any safety glass removed for servicing must 

be replaced prior to operating the appliance.

8.  To prevent injury, do not allow anyone who 

is unfamiliar with the operation to use the 
fireplace.

9.  Wear gloves and safety glasses for protection 

while doing required maintenance.

10. Be  aware  of  electrical  wiring  locations  in 

walls  and  ceilings  when  cutting  holes  for 
termination.

1.   Provide adequate clearances for servicing, proper 

operation and around the air openings into the 
combustion chamber. 

2.  The appliance may be installed on a flat, solid, 

continuous surface (e.g. wood, metal, concrete). 
This may be the floor, or it can be raised up on 
a  platform  to  enhance  its  visual  impact. The 
appliance may be installed on carpeting, tile, 
wood  flooring  or  other  combustible  material, 
because the appliance's metal pedestal base 
extends the full width and depth of the appli-
ance. The Regency Room Sealed Freestanding 
Gas Stove can be installed in a wide variety of 
ways and will fit nearly any room layout. It may 
be installed in a recessed position, framed out 
into the room, or across a corner.

3.  The Regency Room Sealed Freestanding Gas 

Stove  is approved for alcove installations, which 
meet the clearances listed on page 7. This unit 
is approved for manufactured home installations, 
see page 10 for the required flue arrangements. 
If installed into a manufactured home the unit 
must be bolted down to the floor. 

DUE TO HIGH TEMPERATURES, THE 

APPLIANCE SHOULD BE LOCATED 

OUT OF TRAFFIC AND AWAY FROM 

FURNITURE AND DRAPERIES.

WARNING: FAILURE TO INSTALL THIS 

APPLIANCE CORRECTLY WILL VOID 

YOUR WARRANTY AND MAY CAUSE 

A SERIOUS HOUSE FIRE.

CHILDREN AND ADULTS SHOULD 

BE ALERTED TO THE HAZARDS OF 

HIGH SURFACE TEMPERATURES, 

ESPECIALLY THE FIREPLACE GLASS, 

AND SHOULD STAY AWAY TO AVOID 

BURNS OR CLOTHING IGNITION.  

YOUNG CHILDREN SHOULD BE 

CAREFULLY  SUPERVISED WHEN 

THEY ARE IN THE SAME ROOM AS 

THE APPLIANCE.  

CLOTHING OR OTHER FLAMMABLE 

MATERIAL SHOULD NOT BE PLACED 

ON OR NEAR THE APPLIANCE.

Summary of Contents for FG39-NG2

Page 1: ...e agency or the gas supplier FOR YOUR SAFETY Do not store or use gasoline or other flam mable vapours and liquids in the vicinity of this or any other appliance Installation and service must be performed by an authorised installer service agency or the gas supplier PLEASE KEEP THESE INSTRUCTIONS FOR FUTURE REFERENCE Owners Installation Manual LISTINGS AND CODE APPROVALS These gas appliances have b...

Page 2: ...ces has been designed to provide you with all the warmth and charm of a woodstove The models FG39 NG2 and FG39 LPG2 of this series has been approved by AGA As it also bears our own mark it promises to provide you with economy comfort and security for many trouble free years to follow Please take a moment now to acquaint yourself with these instructions and the many features of your Regency Room Se...

Page 3: ...FG39 2 Freestanding Gas Stove 3 DIMENSIONS dimensions 762mm 825mm 448mm 432mm 432mm 432mm 660mm 660mm gas line in 127mm 330mm gas line 89mm 273mm Rear View ...

Page 4: ...Locating Your Regency Gas Stove 7 Combustion and Ventilation Air 7 Louver Installation 8 Flueing Introduction 8 Installation Precautions 8 Safety Precautions for the Installer 8 Exterior Flue Termination Locations 9 Flueing Arrangements Horizontal Terminations All Systems 10 Flueing Arrangements Vertical Terminations 10 Straight Vertical 10 Offset Vertical 10 Flue Restrictor Position 10 Direct Flu...

Page 5: ...sumption High 40MJ h 38MJ h Gas Consumption Low 20MJ h 19MJ h Manifold Pressure High 0 94 kPa 2 55 kPa Manifold Pressure Low 0 27 kPa 0 72 kPa Injector Size 1x 32 1x 50 Model AGA 6240 G AS 5263 0 AS NZS 5263 1 3 261 Distributed by Western Australia Air Group Australia 28 Division St Welshpool WA 6106 Eastern Australia Fireplace Products Australia Pty Ltd 1 Conquest Way Hallam VIC 3803 New Zealand ...

Page 6: ...g codes water supply regulations electrical wiring regulations with AS NZS 5601 2 Installation and repair should be done ONLY by an authorised person 3 DO NOT CONNECTTO MASONRY FLUE 4 This appliance must be connected to the specified flue and termination cap to the outside of the building envelope Never flue to another room or inside a building Make sure that the flue is fitted as per Flueing inst...

Page 7: ... your gas appliances checked annually 13 Do not slam shut or strike the glass door 14 Under no circumstances should any solid fuels wood paper cardboard coal etc be used in this appliance 15 The appliance area must be kept clear and free of combustible materials gases and other flammable vapours and liquids INSTALLATION CHECKLIST 1 CheckClearancestoCombustibles location of unit and flueing require...

Page 8: ...Thelocationoftheterminationcapmustconform totherequirementsintheExteriorFlueTermina tion Locations diagram on page 9 INSTALLATION PRECAUTIONS Theseflueingsystemsareengineeredproducts that have been designed and tested for use with the FG39 NG2 and FG39 LPG2 The warranty will be voided and serious fire health or other safety hazards may result from any of the fol lowing actions 1 Installation of an...

Page 9: ...ening into a building with the exception of sub floor ventilation see also Note I Appliances up to 150 MJ h input 500 Appliances over 150 MJ h input 1500 k Vertically below an openable window door or non mechanical air inlet or any other opening into a building with the exception of sub floor ventilation see also Note I see table below Clearance k in mm Space Heaters All Other Appliances Up to 50 ...

Page 10: ...mbina tions of vertical runs with horizontal terminations Maximum one 90O elbow two 45o elbows equal one 90o elbow LPG and NG The flueing arrangements diagrammed below have a minimum of 75 flue loss efficiency with Fan Off as required for manufactured homes Actual efficiency may be as high as 85 Horizontal Run Metres 1 5m Min 1 8m 1 5m 0 9m Min 0 3m 3 7m Max 4 0m 1 1 Vertical Height metres 6 2m Ma...

Page 11: ...ed end up then sealed and fixed together also 5 If required fix outer flue in the ceiling space using non combustible brac ing to stop movement On penetration of roof fit an appropriate flashing or weather seal to suit the roofing material ensure all joints outside are sealed with appropriate sealer 6 Fit gas cowl or flomet cap 946 651 ensuring inner and outer flue pipes are sealed 7 Start heater ...

Page 12: ... 216 includes parts needed to install the Freestanding Direct Vent unit with minimu horizontal and vertical vent dimensions For Installations that require longer vertical dimensions For installations that require longer vertical and or horizontal vents sue the Dura Vent system as shown in the unit manual 360 Part 946 523 P 102mm inside diameter ...

Page 13: ...FG39 2 Freestanding Gas Stove 13 installation 1 2m 8 x 13mm Self Tapping Stainless Steel 8 x 13mm Self Tapping Black 8 x 38mm Drill Point Stainless Steel 8 x 38mm Drill Point Black 8 x 25mm Wood Screws ...

Page 14: ...14 FG39 2 Freestanding Gas Stove installation 241mm x 241mm square hole 241mm x 241mm 610mm vertical FG39 1518mm 8 X 25mm ...

Page 15: ...FG39 2 Freestanding Gas Stove 15 installation 1 2m 13mm 13mm 102mm 04 19 18 a ...

Page 16: ...16 FG39 2 Freestanding Gas Stove installation 102 152mm 13mm to the 102mm dia flex liner ensuring that 13mm 04 19 18 a ...

Page 17: ...s Stove 17 installation 13mm 38mm 13mm 38mm 13mm 04 19 18 a A bead of non hardening silicon sealant should be run around the Astrocap to prevent water from entering and to ensure a tight seal between the cap and the standoff ...

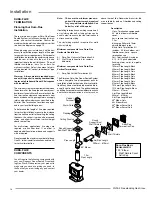
Page 18: ...rminations and two 45o for vertical termination DURA FLUE COMPONENTS You will require the following components with your new Regency Room Sealed Freestand ing Gas Stove Please review your product to make sure you have everything you need In the flue that you are missing any part contact your dealer Note These are the minimum pieces re quired Other parts may be required for your particular installa...

Page 19: ...it in its desired location Check to determine if wall studs or roof rafters are in thewaywhentheflueingsystemisattached If this is the case you may want to adjust the location of the unit 2 RoomSealedpipeandfittingsaredesigned with special twist lock connections to con nect the flueing system to the appliance flue outlet A twist lock appliance adaptor is installed on the unit at the factory Assemb...

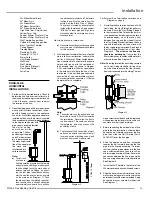
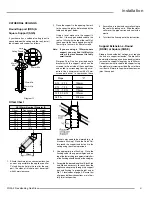
Page 20: ...to 8 12 0 61 over 8 12 to 9 12 0 61 over 9 12 to 10 12 0 76 over 10 12 to 11 12 0 99 over 11 12 to 12 12 1 22 over 12 12 to 14 12 1 52 over 14 12 to 16 12 1 83 over 16 12 to 18 12 2 13 over 18 12 to 20 12 2 29 over 20 12 to 21 12 2 44 firestop spacer framing 254mm square hole Diagram 10 Diagram 9 Diagram 8 Diagram 7 Diagram 6 or other nearby combustible surfaces Do not pack air spaces with insulat...

Page 21: ...ing as re quired Use a minimum of four 8 x 13mm screws per bracket In some cases these brackets may need to be trimmed e g to fit under a flashing Place the Finish Col lar around the support and fasten it to the ceiling using the screws provided 3 Use appropriate roof flashing Place the flashing under the upper shingles and on top of the lower shingles approximately half oftheflashingshouldbeunder...

Page 22: ...d out with the unit burning and the setting should be within the limits specified on the safety label 6 When finished reading manometer turn off the gas valve disconnect the hose and tighten the screw clockwise with a 3mm flat screwdriver Screw should be snug but do not over tighten AERATION ADJUSTMENT The burner aeration is factory set but may need adjusting due to either the local gas supply or ...

Page 23: ...er orifice with a 13mm wrench and discard Use a wrench to hold on to the elbow behind the orifice 5 Reinstall new burner orifice LPG stamped 50 and tighten Burner Orifice 6 Pull out the pilot hood by hand Pilot Hood Pilot Hood removed 7 Remove the pilot orifice with the Allen key Pilot Orifice 8 Put in the new LPG orifice with the Allen key Then put back the pilot hood 9 Place the pilot hood back on 10 A...

Page 24: ...necessary that the plastic cap A is returned to its original location Cable Electric Modulator 21 Adjusting the Outlet Pressure All the adjustments must be carried out in the following order Removethemodulatorplasticcap A using needle nose pliers Maximum pressure Turn the unit ON to its highest input rating Screw in the nut B to increase the outlet pressure and screw it out to decrease it Use a 10...

Page 25: ... Note Install Optional Brick Panels prior to installing logs Lava Lava Log ID 1 Carefully remove the logs from the box and unwrap them The logs are fragile handle with care do not force into position 2 Place the Lava rock on either side of the burner DO NOT place lava rock anywhere on the actual burner 3 Install Log A onto the 2 pins on the rear log bracket in locations shown below Pins on Rear Lo...

Page 26: ...shaped Log onto the pin on Log B set the other end of Log E on the burner 8 Install Log F across Log C as shown Log F will rest in a flat spot on Log C 9 Install Log G top end sits in the notch at the top of Log F and the bottom end of Log G rests against the bracket on the burner as shown Bracket 10 Test fire to ensure proper light off make sure flame flows smoothly from one end of burner to the ...

Page 27: ...r The latch plate must be centered around the alignment pin See Diagram 2 If the latch plate interferes with thecornerofthestoveyoumaywanttoangle the plate slightly so the door closes easier OPTIONAL REMOTE CONTROL Use the Regency Remote Control Kit Part 910 086 approved for this unit Use of other systems may void your warranty The remote control kit comes with a hand held transmitter and a wall m...

Page 28: ...pped with a three pronged grounding plug for your protection against shock hazard and should be plugged directly into a properly grounded three prong receptacle Do not cut or remove the grounding prong from this plug This heater does not require a 240V A C supply for the gas control to operate A 240V A C power supply is needed for the fan blower operation Caution Ensure that the wires do not touch...

Page 29: ...re there are no gas leaks 4 Never operate the appliance with the glass removed or with the door open 5 Verify that all flueing and the cap is unob structed 6 Verify log placement LIGHTING INSTRUCTIONS 1 Plug the power cord into a power outlet 2 Press and release the ON OFF button once to start the unit 3 After approximately 3 seconds the spark ignition system will spark for 40 seconds to light the...

Page 30: ...and and contract at different rates resulting in some cracking and ticking sounds will be heard throughout the cycling process SUMMARY OF CONTROLS On Off Button If the unit is switched off pressing and releasing this button once will switch the unit on The unit will resume its last settings If the unit is switched on pressing and releasing this button once will switch the unit off Flame Increase I...

Page 31: ... DO NOT SPRAY AEROSOLS IN THE VICINITY OF THIS APPLIANCE WHILE IN OPERATION Part 918 332a for ECS units except for FG38 Colours Black on Grey except for parts indicated as being Red Size 100 Feb 8 06 Changed AG 601 to AS5601 2004 as per Paul Watters AS NZS 5601 Apr 19 18 Changed to AS NZS 5601 as per R D ...

Page 32: ...control compartment clean by brushing and vacu uming at least once a year When cleaning the logs use a soft clean brush as the logs are fragile and easily damaged 2 Clean glass never when unit is hot appli ance louvres and door with a damp cloth Never use an abrasive cleaner The gold louvres and optional gold door may be scratched if abrasives are used to clean them The heater is finished in a hea...

Page 33: ...ound the motor and around the grills on the back of the stove IMPORTANT Disconnect power supply before servicing WARNING Electrical Grounding Instructions This appliance is equipped with a three pronged grounding plug for your protection against shock hazard and should be plugged directly into a properly grounded three prongreceptacle Donotcut or remove the grounding prong from this plug 13mm 22mm...

Page 34: ...nhook chain You may want to put a soft cloth on the base of the unit so that when the pedestal door is open it doesn t scratch the paint See diagram below 5 Remove the front plate by undoing the 6 screws 6 Disconnect the manual switch cable and reset cables 7 Disconnect the gas pipe line at the valve 8 Remove the pedestal back cover by remov ing the 4 Philips screws 9 Disconnect the 5 pin molex co...

Page 35: ...A N A N A 910 082 Direct Spark Ignitor N A N A N A N A N A N A N A N A 910 089 Flame Cable N A N A N A N A N A N A N A N A 910 088 Spark Cable N A N A N A N A N A N A N A N A 910 084 Control Box N A N A N A 911 101 Control Box N A N A N A N A N A N A 910 527 Manual Control Switch N A N A N A N A N A N A 910 080 Valve 910 521 Control Box Cable 1 910 522 Control Box Cable 2 910 523 Control Box Cable...

Page 36: ...oor Assy 21 560 031 Side Panel Door Hinge 23 904 258 Side Panel Door Magnet 24 948 255 Door Latch 25 Flex Pipe 3 ID 26 Clamp for Flex Pipe 29 Air Deflector 30 730 019 Rear Panel 31 630 021F Fan Access Panel 32 730 028 Firebox Baffle 33 630 520 False Top Assembly 34 923R Starter Collar 36 936 194 Gasket Starter Collar Air Passage 37 936 197 Gasket Flue Collar 38 820 058F Pedestal Base Cover 39 Gask...

Page 37: ...FG39 2 Freestanding Gas Stove 37 PARTS LIST parts list 11 1 12 8 41 29 30 24 38 16 21 32 4 21 23 23 24 20 31 17 18 15 1 SEPARATE ILLUSTRATION ON OTHER GLASS DOOR FRONTS 19 33 26 26 25 39 36 37 25 26 34 ...

Page 38: ...8 Gasket Burner Tray Firebox 69 732 930 Log Set 92 Rear Log 93 Left Top Log 94 Center Log 95 Middle Right Log 96 Middle Left Log 97 Front Right Log 98 Front Left Log Not available as a replacement part Part Description Not Shown 910 037 Novasit Pilot Orifice LP 910 036 Novasit Pilot Orifice NG 910 432 Pilot Tube 910 096 3 Way Pilot Hood 911 137 Pilot Clip 911 121 Module SIT 230V DV 0 579 204 911 0...

Page 39: ...01 111 107 208 111 105 WRAP DOOR 732 943 Black Wrap Door Complete 101 732 570 Door Gasket Kit 105 Ceramic Paper 107 936 243 Glass Gasket 111 Door Frame Fibre Paper 208 940 325 P Wrap Glass 209 732 020 Door Mounting Bracket N S 948 255 Ojop Latch ea Not available as a replacement part 209 ...

Page 40: ...components Ignition Control Boards Wiring Switches Fans Fan Control Module Battery Pack Remote Control Systems 1 Enamel Panels 1 Venting Venting Components 1 All Stainless steel surrounds 1 All Firebox Media Crystals Fire beads Volcanic Ceramic Spa Stones 1 All hardware 1 Mesh Glass Safety Barriers 1 Accent Light Bulbs 1 Glass Crazing 1 After the original warranty coverage for any of the parts abo...

Page 41: ...general practice of FPI to charge for larger higher priced replacement parts and issue credit once the replaced component has been returned to FPI and evaluated for manufacturer defect If a consumer has a unit installed outside an accredited distributor dealer or pre approved service agent s service area or the closest approved service agent is situated more than thirty 30 kilometres from the inst...

Page 42: ... movement expansion and contraction of the steel is normal and is not covered under the terms of this warranty Freight damages for products or parts are not covered under the terms of the warranty Porcelain Enamel Absolute perfection is neither guaranteed nor commercially possible Any chips must be reported and inspected by the authorised selling dealer within three 3 days of installation Any dama...

Page 43: ...to at the option of the supplier one or more of the following i replacement of the goods or the supply of equivalent goods ii the repair of the goods iii the payment of the cost of replacing the goods or of acquiring equivalent goods or iv equivalent goods or v the payment of the cost of having the goods repaired b To the extent that services supplied by the supplier are services other than servic...

Page 44: ...ervices Fireplace Products Australia Pty Ltd 1 3 Conquest Way Hallam VIC Australia 3803 Phone 61 3 9799 7277 Fax 61 3 9799 7822 To obtain warranty service in Western Australia and or New Zealand please contact one of our authorised distributors in those areas Western Australia Air Group Australia 28 30 Division St Welshpool WA Australia 6106 Phone 08 9350 2200 Fax 08 9353 4225 New Zealand Aber Hol...

Page 45: ... in order for us to serve you better Warranty Registration Form or Register online immediately at the above Web Site Warranty Details Serial Number required Purchase Date required mm dd yyyy Product Details Product Model required Dealer Details Dealer Name required Dealer Address Dealer Phone Installer Date Installed mm dd yyyy Your Contact Details required Name Address Phone Email For purchases m...

Page 46: ...46 FG39 2 Freestanding Gas Stove ...

Page 47: ...FG39 2 Freestanding Gas Stove 47 ...

Page 48: ...__________________________________ ___________________________________________________________________ Installer ____________________________________________________________ Phone ____________________________________________________________ Date Installed _______________________________________________________ Serial No ___________________________________________________________ ...

Reviews: