background image

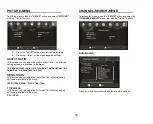
PICTURE-MENU   


To OK the menu, press the 

"SETUP"

 button and select 

"PICTURE"


with the 

"◄ / ►"

 buttons. 


1. 

Press the 

"▲ / ▼"

 buttons to select the menu items. 

2. 

Press the 

"◄ / ►"

 buttons to change the settings. 

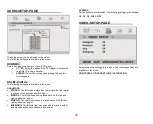
ASPECT RATIO: 

In this menu you can adjust the picture aspect ratio. The following 
setting options are available in the menu: 

16:9 Wide Screen / Auto / 16:9 PillarBox / 16:9 Pan&Scan / 4:3 
Letter Box / 4:3 Pan&Scan / 4:3 Full   

RESULOTION: 

In this menu you can adjust the resolution. The following setting 
options are available in the menu: 

1080i / 1080P(50Hz) / 576i / 576p / 720p  

TV-Format:


In this menu you can adjust the TV format. The following setting 
options are available in the menu:


PAL / NTSC 


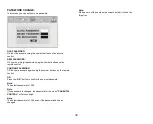
CHANNEL-SEARCH-MENÜ 


To access the menu, press the 

"SETUP"

 button and select the 

"CHANNEL SEARCH"

 menu item with the 

"◄ / ►"

 buttons. 


Auto-Search: 


Press the menu item to start the automatic station search.


35

Summary of Contents for DVD1217

Page 1: ...Sie diese Bedienungsanleitung sorgf ltig und vollst ndig durch bevor Sie dieses Produkt anschlie en in Betrieb nehmen oder einstellen BEDIENUNGSANLEITUNG DVD1217 ANGLE SOURCE BACKLIGHT DISPLAY MUTE R...

Page 2: ...MEN NAVIGATION DVD MODUS 9 ALLGEMEINE SETUP SEITE 9 AUDIO EINSTELLUNGS SEITE 10 VIDEO EINSTELLUNGS SEITE 10 BEVORZUGTE EINSTELLUNGEN 11 PASSWORT SETUP MEN 11 MEN NAVIGATION DIGITAL TV MODUS 13 PROGRA...

Page 3: ...G Die Batterie Batteriepack oder eingesetzte Batterien d rfen keinen hohen Temperaturen ausgesetzt werden Vermeiden Sie Hitzequellen wie z B direkte Sonneneinstrahlung Feuer usw WARNUNG Eine zu hohe L...

Page 4: ...r tzungsgefahr Wenn die Knopfzelle verschluckt wird k nnen schwere innere Verbrennung in nur 2 Stunden entstehen die zum Tot f hren k nnen Neue und gebrauchte Batterien von Kindern fernhalten Falls da...

Page 5: ...Leiser 8 MEN 9 SETUP DVD Men Setup Men ffne schlie en 10 ZOOM DVD Zoom Modi ausw hlen 11 AUDIO Tonspuren ausw hlen 12 SUBTITLE Untertitel ausw hlen 13 PLAY PAUSE 14 STOP 15 16 OK 17 OPEN DVD Laufwerk...

Page 6: ...Nochmal dr cken Wiedergabe fortsetzen 9 STOP Einmal dr cken Wiedergabe unterbrechen Play Pause Taste dr cken um Wiedergabe fortzusetzen Nochmal dr cken Wiedergabe Punkt l schen 10 STEP TV RADIO DVD M...

Page 7: ...Kapitel Titel Aus VCD CD Single Alle Aus MP3 Single Ordner Aus 23 VOL Lautst rke verringern 24 SETUP Setup Einstellungs Men ffnen 25 SLOW EXIT Wiederholtes dr cken um die verschiedenen Geschwindigkeit...

Page 8: ...int folgendes Einstellungsmen auf dem Bildschirm 1 W hlen Sie die OSD Sprache aus 2 W hlen Sie das Aufstellungsland f r den DVB T T2HD Tuner aus 3 Dr cken Sie die Taste OK um den Automatischen Senders...

Page 9: ...en gegenw rtig eingestellten Blickwinkel an der rechten Ecke des Bildschirms an falls auf der DVD verf gbar BILDSCHIRMSPRACHE Stellen Sie die Men Sprache des Setup Men s ein UNTERTITEL F R SCHWERH RIG...

Page 10: ...rd auf dem linken und der rechte Mono Ton wird auf dem rechten Lautsprecher bzw Ausgang wiedergegeben MONO L Der linke Mono Ton wird auf dem linken und rechten Lautsprecher bzw Ausgang wiedergegeben M...

Page 11: ...s Standard eingestellte Untertitel Sprache aus Disk Men W hlen Sie die f r Disk Men als Standard eingestellte Men Sprache aus Elternkontrolle Einige DVDs k nnen ein Kontrollniveau f r einige Szenen od...

Page 12: ...sswort mit den Zifferntasten der Fernbedienung ein OK Dr cken Sie die Taste OK um das neue Passwort zu speichern Hinweis Das Standard Passwort lautet 1369 Hinweis Wird das Passwort angepasst ndert sic...

Page 13: ...k nnen Sie verschiedene Voreinstellungen f r die Standard Sendersortierung festlegen LCN Sortiert die Kan le in aufsteigender Reihenfolge NAME Sortieren Sie die Kan le in alphabetischer Reihenfolge SE...

Page 14: ...er nicht mehr zu sperren navigieren Sie zu den markierten Sendern und dr cken Sie erneut die Taste SPERREN GELB Blau L schen 1 Dr cken Sie die Taste um einen Sender zu markieren der gel scht werden so...

Page 15: ...PillarBox 16 9 Pan Scan 4 3 Briefkasten 4 3 Pan Scan 4 3 Vollst ndig Aufl sung In diesem Men k nnen Sie die Aufl sung anpassen Folgende Einstellungsm glichkeiten stehen in dem Men zur Verf gung 1080i...

Page 16: ...s 3 Dr cken Sie die Taste OK 4 Dr cken Sie die Tasten um in dem Men zu navigieren 5 Dr cken Sie die Tasten um die Men punkte zu ver ndern 6 Dr cken Sie die Taste SETUP um in die Men leiste zur ck zu k...

Page 17: ...zuzugreifen dr cken Sie die Taste SETUP 2 Dr cken Sie die Taste und w hlen Sie den Men punkt System aus 3 Dr cken Sie die Taste OK 4 Dr cken Sie die Tasten um in dem Men zu navigieren 5 Dr cken Sie d...

Page 18: ...s 4 Nun k nnen Sie auf Daten die auf den USB Stick vorhandenen sind zugreifen Hinweis Der Men punkt kann auch ber die Taste SOURCE Medien erreicht werden FEHLERL SUNG Problem M gliche Gr nde Was ist z...

Page 19: ...IF Bandwidth 7MHz und 8MHz Modulation QPSK 16QAM 64QAM 128QAM T2 256QAM T2 VIDEO Decoder Format MPEG4 AVC H 264 HP 4 HEVC H 265 HT L4 MPEG2 MP ML HL Output Format 480i 480p 576i 576p 720p 7080i 1080p...

Page 20: ...rien bei den entsprechenden Sammelstellen abgeben Auf diese Weise stellen Sie sicher dass die Batterien entsprechend der Gesetzgebung recycelt werden und keine Umweltsch den anrichten St dte und Gemei...

Page 21: ...e Fernbedienung das Netzteil etc gew hren wir eine Gew hrleistung von 6 Monaten ab Kaufdatum Beachten Sie unbedingt die Warnhinweise in der Bedienungsanleitung Im Gew hrleistungsfall senden Sie das Ge...

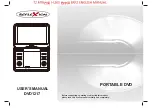
Page 22: ...connecting operating or adjusting this product please read this user s manual carefully and completely USER S MANUAL DVD1217 ANGLE SOURCE BACKLIGHT DISPLAY MUTE REPEAT SETUP ZOOM AUDIO SUBTITLE PORTAB...

Page 23: ...e only with the same or similar type of battery WARNING The battery battery pack or batteries inserted must not be exposed to high temperatures Avoid heat sources such as direct sunlight fire etc WARN...

Page 24: ...bustion can occur in only 2 hours which can lead to death Keep new and used batteries away from children If the battery compartment does not close properly stop using the remote control and keep it aw...

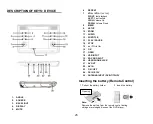
Page 25: ...OM 11 AUDIO 12 SUBTITLE 13 PLAY PAUSE 14 STOP 15 16 OK 17 OPEN 18 USB INPUT 19 SD CARD SLOT 20 HEADPHONE JACK 21 AV OUT 22 AV IN 23 ON OFF 24 DC IN 9 12V 25 ANTENNA INPUT DVB T T2HD Inserting the batt...

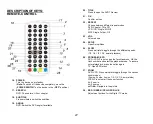
Page 26: ...Mix Stereo 8 PLAY PAUSE Press once to pause playback Press again to resume playback 9 STOP Press once to stop playback Press Play Pause button to resume playback Press again to delete the playback po...

Page 27: ...Title Off VCD CD Single All Off MP3 Single Folder Off 23 VOL Volume down 24 SETUP Open Setup Menu 25 SLOW Press multiple to toggle through the different speeds 1 2 1 4 1 8 1 16 normal playback 26 PRO...

Page 28: ...or has been reset the following settings menu appears on the screen 1 Select the OSD language 2 Select the installation country for the DVB T T2HD tuner 3 Press the OK button to start the automatic c...

Page 29: ...9 Wide Squeeze ANGLE MARK Display the currently set angle at the right corner on the screen if available on the DVD OSD LANGUAGE Set the menu language of the setup menu CLOSED CAPTIONS Closed captions...

Page 30: ...e left mono is played on the left and the right mono is played on the right speaker or output MONO L The left mono sound is played back on the left and right speakers or output MONO R The right mono s...

Page 31: ...guage for audio if available SUBTITLE Selects a language for subtitle if available DISC MENU Selects a language for disc menu if available PARENTAL Some DVDs may have a parental level assigned to the...

Page 32: ...ol CONFIRM PASSWORD OK the new password again using the number buttons on the remote control OK Press the OK button to confirm the new set password Note The default password is 1369 Note If the passwo...

Page 33: ...ort LCN Sort In this menu you can specify different default sorter presets LCN Sort the channels in ascending order ONID Sort the channels in alphabetical order SERVICE ID Sort the channels according...

Page 34: ...annels navigate to the selected stations and press the YELLOW button again BLUE DELETE 1 Press the button to mark a station to be deleted 2 Press the BLUE key to delete a highlighted station 3 Confirm...

Page 35: ...o 16 9 PillarBox 16 9 Pan Scan 4 3 Letter Box 4 3 Pan Scan 4 3 Full RESULOTION In this menu you can adjust the resolution The following setting options are available in the menu 1080i 1080P 50Hz 576i...

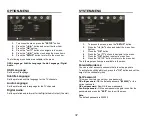
Page 36: ...menu item 3 Press the OK button 4 Press the buttons to navigate in the menu 5 Press the buttons to change the menu items 6 Press the SETUP button to return to the menu bar Time Offset Set whether the...

Page 37: ...t Coaxial SYSTEM MENU 1 To access the menu press the SETUP button 2 Press the button and select the menu item System 3 Press the OK button 4 Press the buttons to navigate in the menu 5 Press the OK bu...

Page 38: ...ata that exists on the USB stick Note The menu item can also be accessed via the SOURCE button ERROR SULUTION Problem Possible reasons What should I do No picture Electricity is not connected Connect...

Page 39: ...vel 79db Bm T 75dBm T2 IF Bandwidth 7MHz und 8MHz Modulation QPSK 16QAM 64QAM 128QAM T2 256QAM T2 VIDEO Decoder Format MPEG4 AVC H 264 HP 4 HEVC H 265 HT L4 MPEG2 MP ML HL Output Format 480i 480p 576i...

Page 40: ...atteries to the appropriate collection points In this way you ensure that the batteries are recycled according to the legislation and do not cause any environmental damage Cities and municipalities ha...

Page 41: ...wer supply etc we grant a warranty of 6 months from the date of purchase It is essential to observe the warnings in the operating instructions In the event of a warranty claim send the device if possi...

Reviews: