


41
d) Setting front and rear axle camber
The camber is the inclination of the wheel level as viewed from the front (vertical).
Negative camber
Positive camber
(Top wheel edge points inwards)
(Top wheel edge points outwards)
The setting of the wheel in the two figures is exaggerated in order to make the difference between nega-
tive and positive cambers more obvious. The setting on the model vehicle should of course not be as
extreme as shown!
A negative camber on the front wheels increases the cornering force of the wheel when driving in bends, the steering
reacts more directly, the steering force required is reduced. At the same time the wheel is pushed onto the axle stub in
the direction of the axle. This stops any axial bearing clearance, the handling is steadier.
A negative camber on the rear wheels reduces the tendency of the rear of the vehicle to swerve/slide out on bends.
Positive camber however reduces the cornering force of the wheels and should not be used.
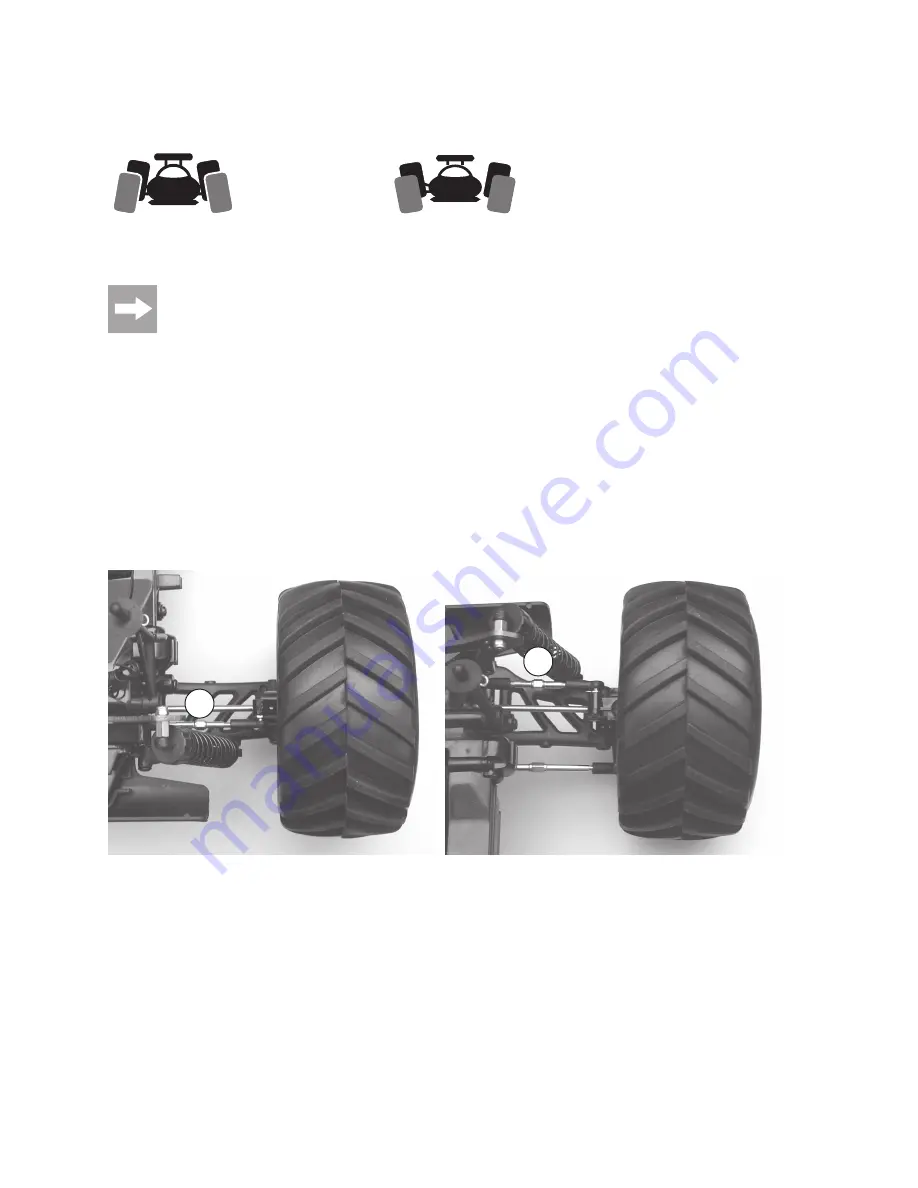
At the rear axle the setting is carried out by turning the threaded rod (A) on the upper transverse link. As the threaded
rod has a left and right hand thread at either end, the transverse link does not need to be dismantled to be adjusted
Adjustment is possible with a small flat spanner. Make sure to adjust both threaded rods (left and right wheel) evenly
and be careful to observe the correct turning direction of the threaded rods.
Figure 7: Front axle
Figure 8: Rear axle
A
A


