Fig. 1
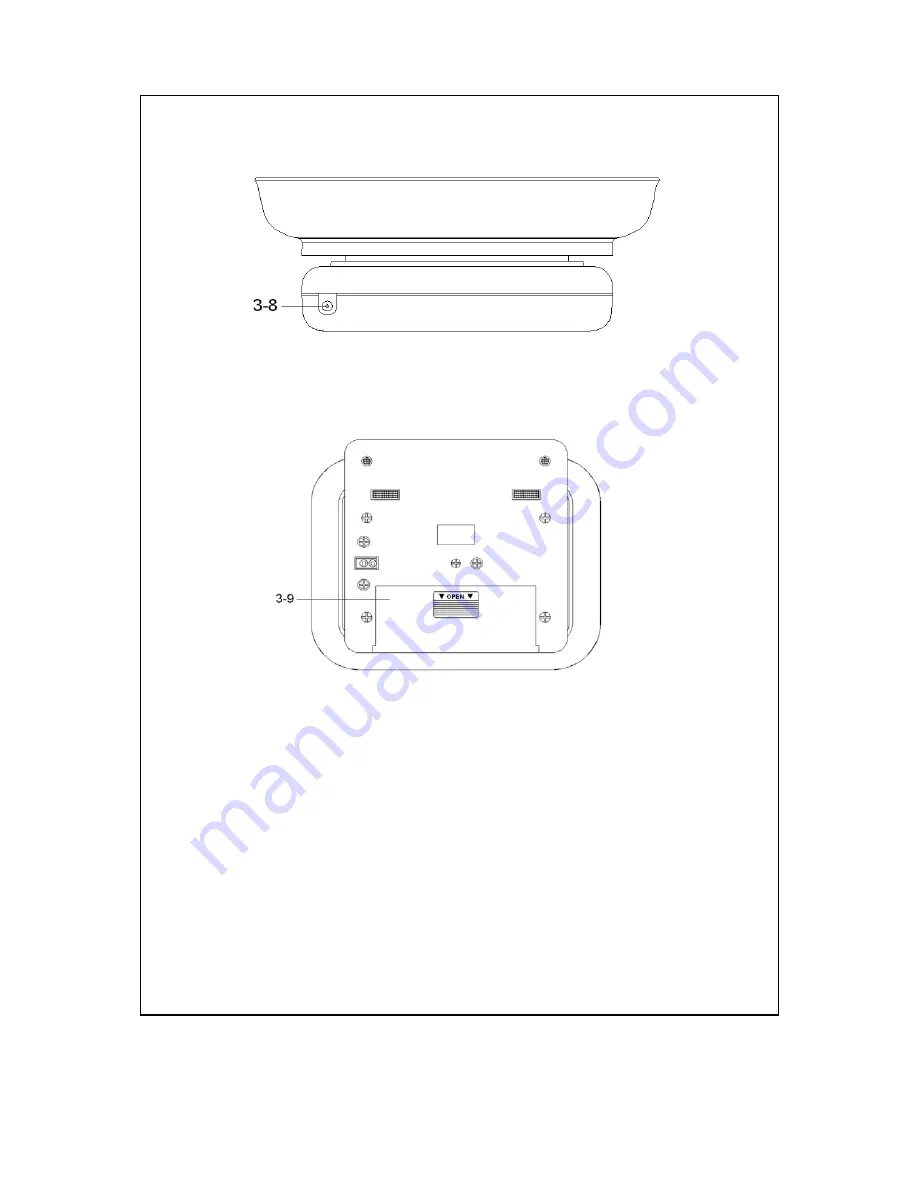
3-1 Display3-2 N/G Button ( Net/Gross Weight Button )3-3 TARE Button3-4 Power Button3-5 MODE Button3-6 Platform3-7 Power Slide Switch3-8 DC 9V receptacle3-9 Battery Cover/Compartment
4
Page 1: ...SCALE marks a step forward for you into the field of precision measurement Although this DIGITAL SCALE is a complex and delicate instrument its durable structure developed Please read the following i...
Page 2: ...N G Button Net Gross Weight Button 4 3 3 TARE Button 4 3 4 Power Button 4 3 5 MODE Button 4 3 6 Platform 4 3 7 Power Slide Switch 4 3 8 DC 9V receptacle 4 3 9 Battery Cover Compartment 4 4 MEASURING P...
Page 3: ...ay With counting scale function Digital display easy measurement Back light LCD display Gram pound display unit Auto power off Auto calibration capability Durable portable housing plastic case LOAD CE...
Page 4: ...ct g or oz Function Weight scale Counting scale Sampling Time Approx 0 8 second Tare Control Full capacity Transducer Load cell Circuit Exclusive LSI circuit Over Load Show EEEEE Indicator Cabinet Siz...
Page 5: ...3 FRONT PANEL DESCRIPTION Fig 1 3...
Page 6: ...Fig 1 3 1 Display 3 2 N G Button Net Gross Weight Button 3 3 TARE Button 3 4 Power Button 3 5 MODE Button 3 6 Platform 3 7 Power Slide Switch 3 8 DC 9V receptacle 3 9 Battery Cover Compartment 4...
Page 7: ...ng the environment satiability before the operation it should let the scale stay the measurement environment at least 10 minutes 2 a If intend to measure the weight of small particle or liquid then it...
Page 8: ...sh the first load weight measurement push the Tare Button 3 3 Fig 1 and release the display will show Zero weight value If the first load weight value is 20 gram after push the TARE Button LCD will sh...
Page 9: ...value the TARE indicator will show on LCD again 6 Counting Scale a Press the MODE Button 3 5 Fig 1 once until the indicator show to the PCS b Press the N G Button 3 2 Fig 1 once can select the countin...
Page 10: ...receptacle 3 8 Fig 1 3 Now the scale is ready for ACV operation 7 CALIBRATION PROCEDURES 1 Set the Power Slide Switch 3 7 Fig 1 to the ON position 2 Let the scale not power ON LCD is not light Press t...