Plumbers, please ensure a copy of the installation
instructions is left with the end user for future reference
INSTALLATION INSTRUCTIONS
Note:
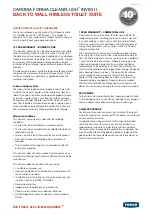
All height dimensions to underside of pan, make allowance for bedding.
Bedding:
The pan should be fixed to the floor with a sand cement mixture of 3:1 to a depth of 60mm. Do not use lime or
fast drying cement in the bedding mixture. When bedded the back of the foot of the pan should be approximately 10mm
above the finished floor.
Screw fixing:
The pan should be bedded with an acetic cured silicone sealant and fixed to the floor using the supplied D82
Concealed Fixing Bracket.
CAROMA FORMA CLEANFLUSH
™
INVISI II
BACK TO WALL RIMLESS TOILET SUITE
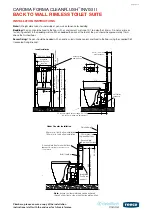
Under Counter Installation
Invisi II cistern
Finished wall
Access plate
Top mount buttons
45mm max. for
top push buttons
90mm min. front button installation
100mm min. top button installation
Integrated
flush pipe
support
Note:
access to cistern internals can be achieved
through either front or top mount button plate option.
940
(adjustable fr
om 812 – 982)
55 min.
Access plate front mount buttons
Note:
Seat will partially cover push button in
this installation
Integrated
isolating valve
supplied
400 – 420 Frame
90
min
440
400
centr
e of inlet
582
(adjustable fr
om 412 – 582)
982
(adjustable fr
om 812 – 982)
185
Uni-Orbital
®
connector
90 recommended setout, range 60 – 120
(up to 50mm sideways adjustment)
25
570
45
Inwall Installation
Access plate
and buttons
55
210
110
25 to top of flush pipe support noggin
55 min. to underside of noggin
6 min. – 45 max.
wall thickness
page 2 of 3


