


16
The base of the container for wet cleaning is equipped with micro-hooks that secure the
attachment.
DO NOT use the container for wet cleaning without water.
DO NOT use attachment for wet cleaning on carpets, it will disrupt the vacuum cleaner's movement.
2.
Press the
button on the device or the ON/OFF on the remote. It will make a sound, the
device will start working automatically. During the operation the button indicator will
be lit a blue constantly.
3.
If necessary, change the mode (see “Choosing mode with remote control” section).
4.
To go into waiting mode, press the button on the device or the ON/OFF on the remote;
it will make a sound, the button indicator will flash a blue. Cleaning will not take place
during the waiting mode.
5.
To put the appliance into sleep mode, press and hold the button until a beep sounds
and the button indicator turns off. During sleep mode, the device will not react to the remote
control unless the ON/OFF button is pressed. To exit sleep mode, press the button on
the device or ON/OFF on the remote, it will make a sound
.
If the device is inactive for a 5 minutes it will go into sleep mode.
6.
When work is completed, the device will return to its charging station. You can also press
the
HOME
button on the remote control (the indicator will light up on the display) to
force the device to return to the charging station; the button will be lit a red.
The maximum period of continuous use is 120 minutes, depending on the floor and positioning
of furniture in the cleaning area.
Choosing mode with remote control
You can choose the mode using the corresponding buttons on the remote control while the
device is operating:
•
one click – (MODE 1 indicator lights up on the display)
•
two click – (MODE 2 indicator lights up on the display);
•
three click – (MODE 3 indicator lights up on the display);
•
four click — (MODE 4 indicator lights up on the display).
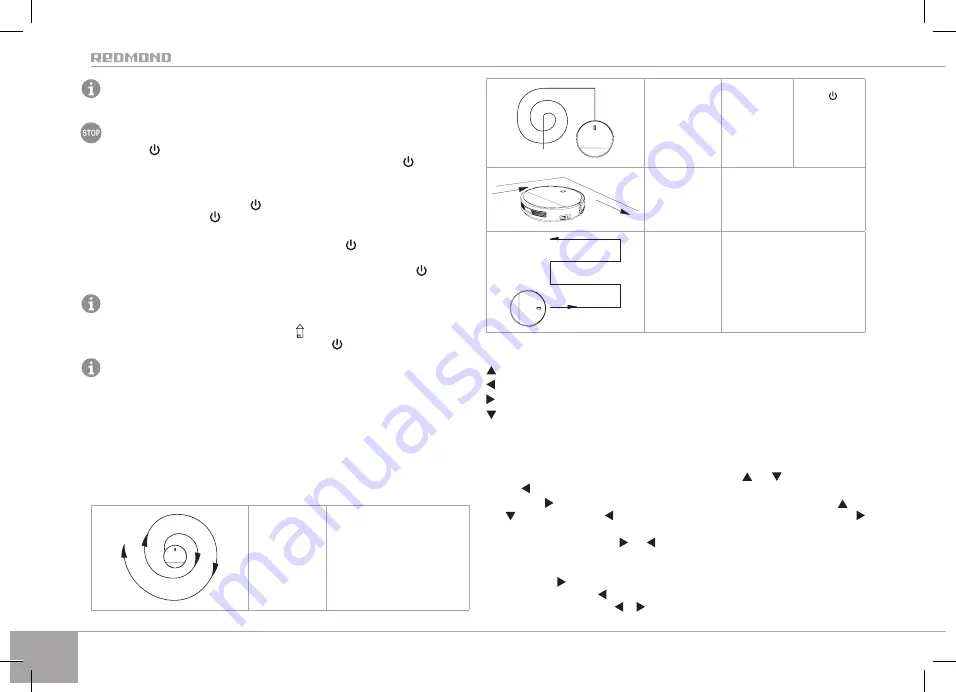
Spiral cleaning mode
(MODE 1)
The device will move in a spiral, gradually
increasing trajectory. For cleaning a particu-
larly dusty area
Automatic mode
(MODE 2)
The device will then
clean the whole
area, building a
route according to
that individual room
Press the button
on the appliance
body or the ON/OFF
button on the remote
control to quickly
start automatic op-
eration
Corner cleaning mode
(MODE 3)
The device will move along the wall and
past obstacles, cleaning the edges of the
room
Режим «зигзаг»
(MODE 4)
The device automatically switches to this
mode in large spaces with a small number
of obstacles.
To control the device manually, press and hold the movement direction buttons while the device
is in waiting mode or operating:
– forward. The device will move forward while the button is held down;
– turn left. The device will turn left on its axis while the button is held down;
– turn right. The device will turn right on its axis while the button is held down;
– backwards. The device will move backwards while the button is held down.
To use the high suction power (turbo) mode, press the MAX button.
Clock setting
1.
Press and hold the CLK button on the remote. The current time indicator and the hour
value will flash on the display. Set the hour value with the
and
buttons. By pressing
the button, you can proceed to setting the week day (see part 3).
2.
Press the button to move to setting the minutes. Set the minute value with the
and
buttons. Pressing the button will return you to setting the hours, by pressing the
button, you can proceed to setting the week day.
3.
Set the day of the week with
and
buttons, the corresponding indicator will be flashing
on the display: SUN – Sunday, MON – Monday, TUE – Tuesday, WED – Wednesday, THU –
Thursday, FRI – Friday, SAT – Saturday.
4.
Pressing the button when you reach the end of the week days will return you to setting
the hours, pressing the button will return you to setting the minutes. To return to setting
day of the week, press the or button.
Summary of Contents for RV-R150
Page 1: ...ENG UKR KAZ Robot Vacuum Cleaner RV R150 User manual ...
Page 3: ...3 1 3 4 43 7 10 11 12 12 14 15 13 13 16 2 5 8 9 6 25 28 A1 ...
Page 5: ...5 b a b a 1 3 2 A2 ...
Page 6: ...6 a b 1 2 4 3 A3 ...
Page 7: ...7 A4 1 2 5 6 4 7 3 a b ...
Page 8: ...8 A5 a b a b 1 2 5 4 3 ...
Page 9: ...9 a b c c b a 1 1 2 3 4 1 5 6 1 8 9 10 11 7 A6 ...
Page 10: ...10 A7 1 1 1 4 1 5 1 6 2 7 3 ...
Page 11: ...11 a b c c b a 1 1 2 3 1 5 6 7 4 8 A8 ...
Page 12: ...12 A9 1 1 1 2 1 3 1 4 5 8 7 6 ...


