www.altronics.com.au
Redback® Proudly Made In Australia
8
Redback® A 4505
Lockdown Timer
2.0 SETUP GUIDE
2.1 INITIAL SETUP
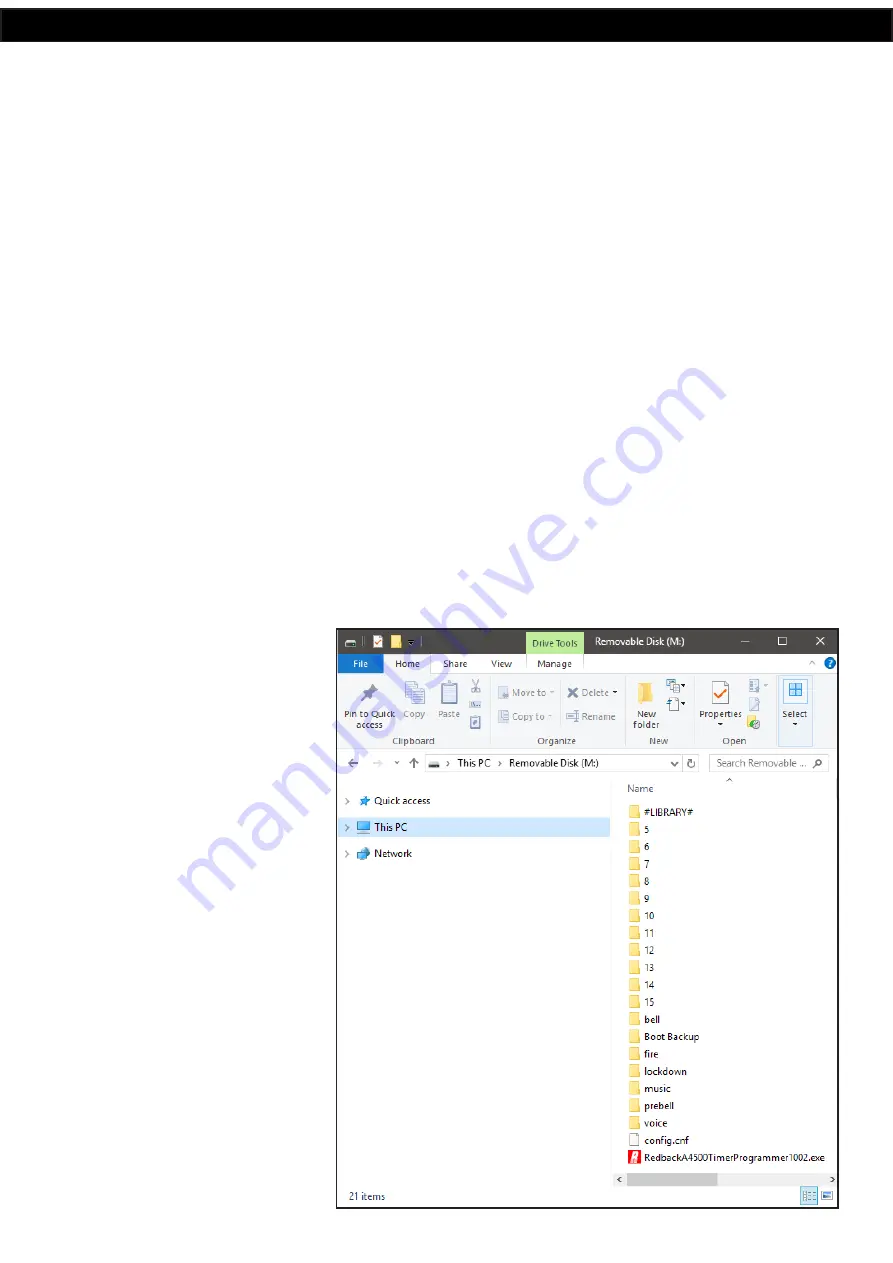
For the unit to function correctly, the supplied SD card must be installed and have MP3 files in each of the Lockdown, Fire,
Bell, Prebell and Music folders as shown in Fig 2.1.
NOTE: The unit will display an MP3 error message on the screen if any of these folders on the SD card are left empty. I.e. the
Lockdown, Bell, Fire, Music and Prebell folders must all have an MP3 file inside.
The SD card should have the following folders already installed “Lockdown, Bell, Fire, Music, Prebell, Voice and 5-15”. If
these folders don’t exist they will have to be created.
Inside each of these folders (except the 5-15 folders) there will be a sample MP3 audio file. A library of sample MP3 files is
supplied (in the #LIBRARY# folder).
NOTE: All folders except the “Prebell” and “Music” folders must have only one MP3 file installed. The “Prebell” and “Music“
folders can have unlimited MP3 files (depending on available storage) and will then randomly play the MP3 files in the folder
each time the corresponding prebell or music contact is triggered.
In order to put MP3 files onto the SD card, or move the sample MP3’s to their relevant folders, the SD card will need to be
connected to a PC. You will need a PC or laptop equipped with an SD card reader to do this. If an SD slot is not available
then the Altronics D 0371A USB Memory Card Reader or similar would be suitable (not supplied).
You will first need to remove power from the Redback
®
A 4505 and then remove the SD card from the front of the unit.
To remove the SD card push the card in and it will eject itself.
Step by step guide to install an MP3 into it’s associated folder with a Windows installed PC.
Step 1:
Make sure the PC is on and card reader connected and correctly installed. Then insert the SD card into the reader.
Step 2:
Go to “My Computer” or “This
PC”and open the SD card which is usually
marked “Removable disk”.
In this case it is named “Removable disk
(M:)”.
Select the removable disk and then you
should get a window that looks like figure
2.1.
Fig 2.1


