background image


Scout 1000 PMD System™ Introduction

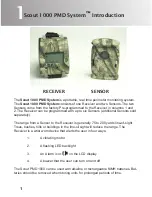
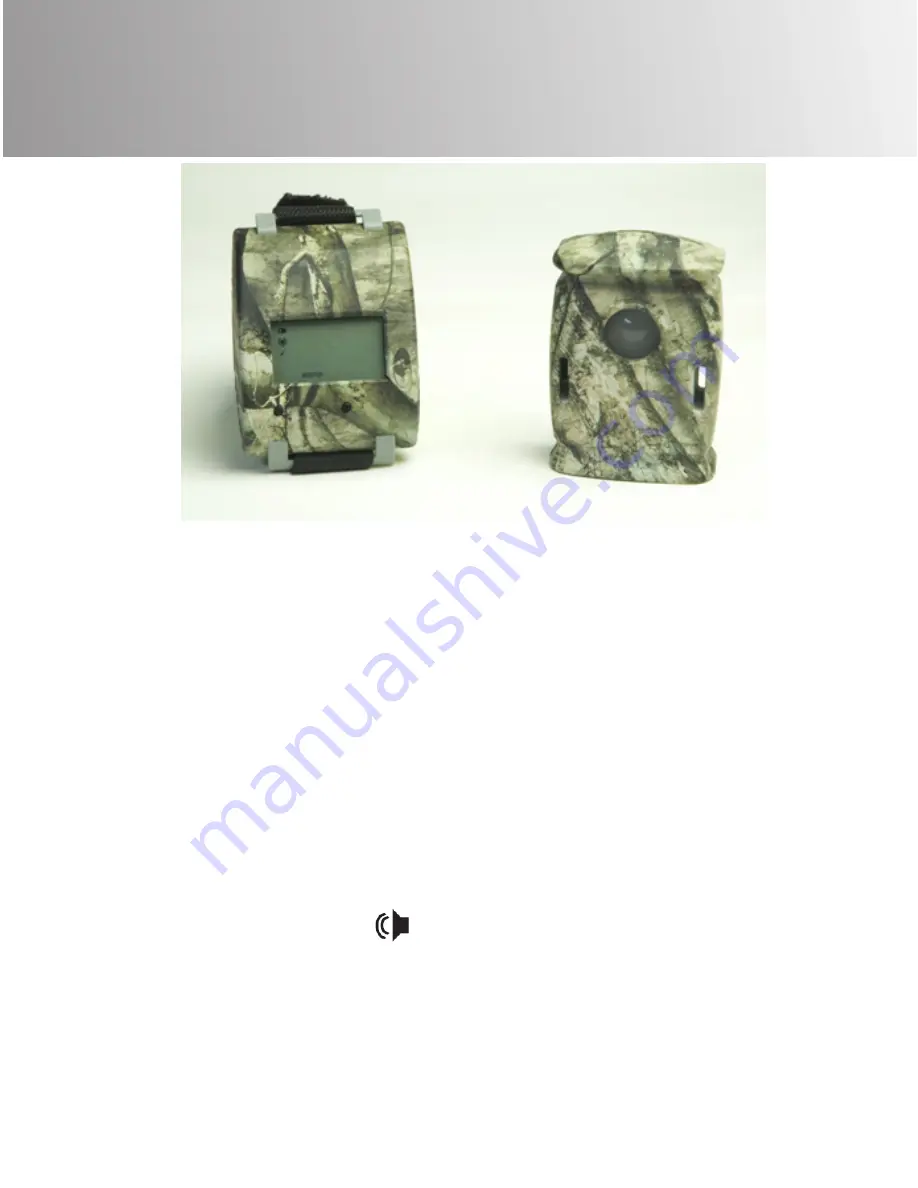
RECEIVER                   SENSOR

The 

Scout 1000 PMD System

 is a portable, real time perimeter monitoring system.

The 

Scout 1000 PMD System

 consists of one Receiver and two Sensors. The two 

Sensors come from the factory Pre-programmed to the Receiver in columns 1 and 

2. The Receiver can be programmed with up to six Sensors (additional Sensors sold 

separately). 

The range from a Sensor to the Receiver is generally 75 to 200 yards line-of-sight. 

Trees, bushes, hills or buildings in the line-of-sight will reduce the range. The 


Receiver is a wrist worn device that alerts the user in four ways:


1. 

A vibrating motor


2. 

A flashing LED backlight


3. 

An Alarm  icon   

on the LCD display


4. 

A buzzer that the user can turn on and off

The Scout PMD 1000 can be used with alkaline or rechargeable NiMH batteries. Bat-

teries should be removed when storing units for prolonged periods of time.

1

1

Summary of Contents for Scout PMD 1000

Page 1: ......

Page 2: ...i ...

Page 3: ...Scout 1000 PMD System Introduction 1 2 Sensors 2 3 Receivers 3 LCD Display Icon Definitions 3 Turning the Receiver On and Off 4 Programming Erasing the Receiver 5 Turning the Buzzer On and Off 5 4 LCD Display Examples 6 ii ...

Page 4: ...tional Sensors sold separately The range from a Sensor to the Receiver is generally 75 to 200 yards line of sight Trees bushes hills or buildings in the line of sight will reduce the range The Receiver is a wrist worn device that alerts the user in four ways 1 A vibrating motor 2 A flashing LED backlight 3 An Alarm icon on the LCD display 4 A buzzer that the user can turn on and off The Scout PMD ...

Page 5: ... passes through the detection zone from left to right or right to left The detection range from the Sensor varies with the difference in temperature between the target and air temperature During winter a target may be detected at a distance of 75 feet or more from the Sensor However during hot weather this distance may be reduced to less than 30 feet The Sensors should be set to a height that is a...

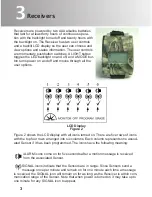
Page 6: ...hows the LCD display with all icons turned on There are five rows of icons with the top four rows arranged into six columns Each column represents one associ ated Sensor if it has been programmed The icons have the following meaning ALARM icons come on for five seconds after a motion message is received from the associated Sensor SIGNAL icons indicate that the Sensors are in range Since Sensors se...

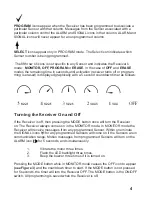
Page 7: ... timer as follows Turning the Receiver On and Off If the Receiver is off then pressing the MODE button once will turn the Receiver on The Receiver always comes on in the MONITOR mode In MONITOR mode the Receiver will receive messages from any programmed Sensor Within one minute the SIGNAL icons for any programmed Sensors will come on if the Sensors are in communication range Motion messages from p...

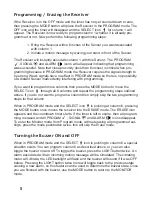
Page 8: ...through all 6 columns and repeat the programming steps outlined above If you do not want to program a column then simply skip the two programming steps for that column When in PROGRAM mode and the SELECT icon is pointing at column 6 pressing the MODE button once moves the receiver into the ERASE mode The ERASE icon appears and the countdown timer starts If the timer is left to expire then all prog...

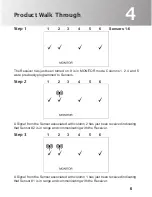
Page 9: ...rogrammed to Sensors Step 2 1 2 3 4 5 6 A Signal from the Sensor associated with column 2 has just been received indicating that Sensor 2 is in range and communicating with the Receiver Step 3 1 2 3 4 5 6 A Signal from the Sensor associated with column 1 has just been received indicating that Sensor 1 is in range and communicating with the Receiver 4 ...

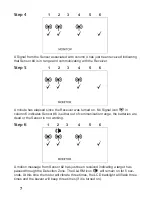
Page 10: ...al icon in column 6 indicates Sensor 6 is either out of communication range the batteries are dead or the Sensor is not working Step 6 1 2 3 4 5 6 A motion message from Sensor 2 has just been received indicating a target has passed through the Detection Zone The ALARM icon will remain on for 5 sec onds At this time the motor will vibrate three times the LCD backlight will flash three times and the...

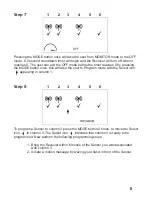
Page 11: ...ton once this will take the user to Program mode with the Select icon appearing in column 1 Step 8 1 2 3 4 5 6 To program a Sensor to column 3 press the MODE button 2 times to move the Select icon to column 3 The Select icon indicates that column 3 is ready to be programmed Now perform the following programming steps 1 Bring the Receiver within 6 inches of the Sensor you want associated with colum...

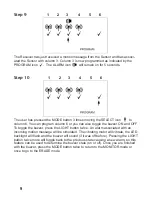
Page 12: ... you can also toggle the buzzer ON and OFF To toggle the buzzer press the LIGHT button twice An alarm associated with an incoming motion message will be simulated The vibrating motor will vibrate the LED backlight will flash and the buzzer will sound if it was off before Pressing the LIGHT button twice more will toggle back to the previous state causing a new alarm so this feature can be used to d...

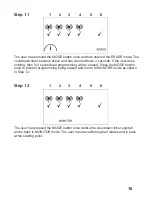
Page 13: ...ser does nothing then in 3 seconds all programming will be erased Press the MODE button once to prevent programming being erased and return to MONITER mode as shown in Step 12 Step 12 1 2 3 4 5 6 The user has pressed the MODE button once before the countdown timer expired and is back in MONITOR mode The user has moved through all modes and is back at the starting point ...

Page 14: ...eature changes on or to its products without any liability to incorporate such changes on or to the Products Excluded from this limited warranty and not warranted by Recon Outdoors in any fashion either express implied or by statute are a products and accessories not manufactured by Recon Outdoors and or not bearing the RECON OUTDOORS brand label the warranty coverage for products and accessories ...

Page 15: ...es made by any person including but not limited to dealers representatives salespersons or agents of Recon Outdoors which are inconsistent or in conflict with or in addition to the terms of this limited warranty shall not be binding upon Recon Outdoors unless reduced to writing and approved by an expressly authorized officer of Recon Outdoors This limited warranty is the complete and exclusive sta...

Page 16: ...y This policy applies only to Recon Outdoors products returned to our factory in Huntsville Alabama This Service Policy is subject to change without notice Returning Your Unit for Service Please contact our Customer Service Department either by telephone or email to obtain a Return Authorization Number before returning your unit for repair Please have your product model name and serial number avai...

Page 17: ...r WARNING This product contains lead a chemical known to the state of California to cause cancer birth defects and other reproductive harm Contacting Recon Outdoors Contact the Recon Outdoors Customer Service Department in any of the following ways By telephone Monday Friday 8 00 am to 5 00 pm Central Standard Time 866 647 3266 By e mail typically we respond to your email within three 3 business d...

Page 18: ...de reasonable protection against harmful interference in a residential installation This equipment generates uses and can radiate radio frequency energy and if not installed and used in accordance with the instructions may cause harmful interference to radio communications However there is no guarantee that interference will not occur in a particu lar installation If this equipment does cause harm...

Page 19: ......

Page 20: ......

Reviews: