


- 11 -
4.3 Menu Mode (listed by Menu order)
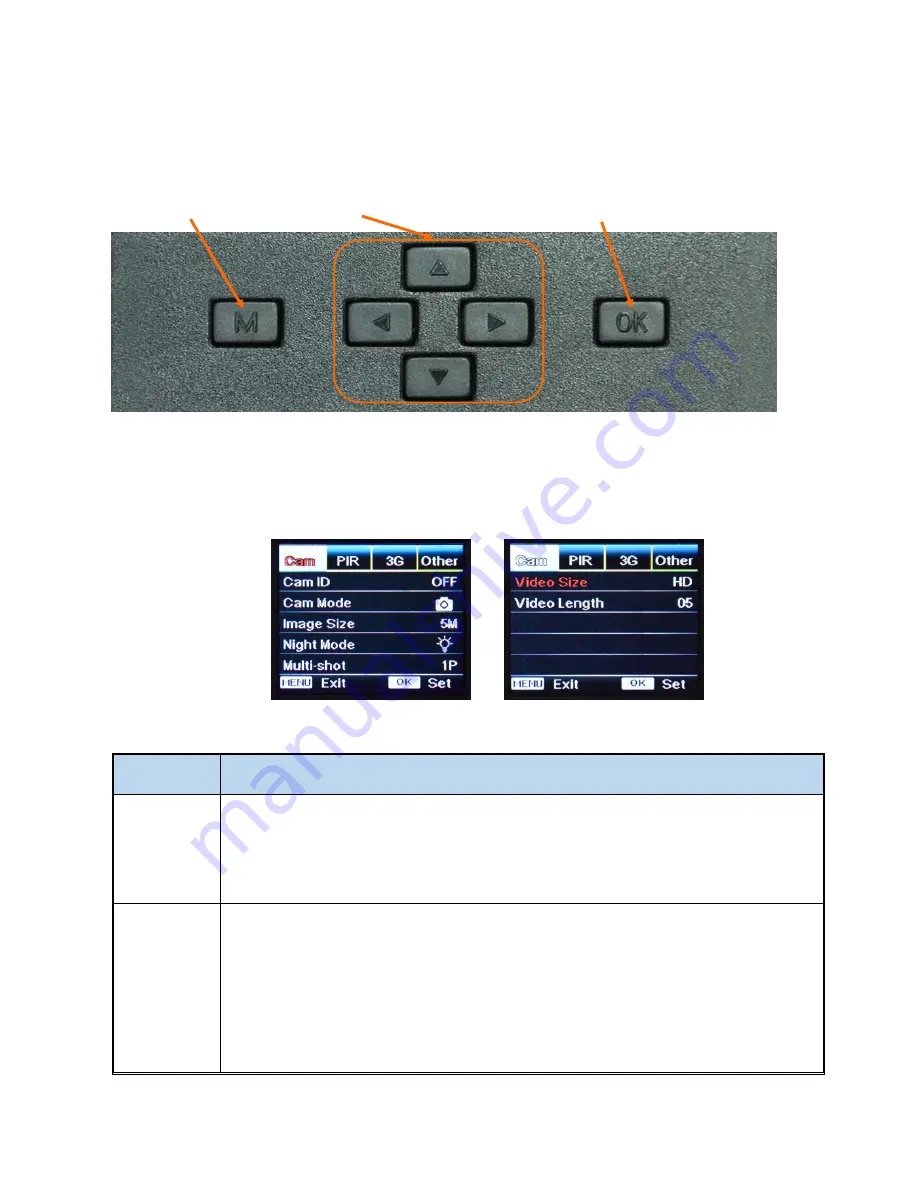
Turn Power to ON; press “OK” button once to turn on display; press “M” (Menu) to enter Menu Mode. T
o navigate
setting interface press “←”, “↑”, “→”, or “↓”
;
press “OK” for selection
. P
ress “Menu” to exit to
previous page, and
“Menu” to switch alpha
/ digits / symbols.
Menu Menu Navigation
OK / Operating and Menu Mode
Note: To save changes to settings,
after pressing “OK” to confirm
, press
“Menu” button (may require
multiple “Menu” button
presses depending upon menu location) until Status Screen is shown.
•
Cam
Settings
Programmable Options
Cam ID
To label photos with four-digit alpha numeric characters:
Select “ON”, press “OK”, to set
a 6-digit alphanumeric ID for the camera. The camera ID will be
displayed at the bottom of captured photos (with “Stamp” turned ON).
Cam Mode
Sets the camera to take photos only or video along with photos at a trigger event:
1)
Switch ON “Photo/Video Switch” to
Pic
icon
—
Photographing mode, or PIC + Video mode;
2)
Select “PIC+VIDEO”, camera shoots photo(s) first, then video upon same trigger event
based on Video Length and Multi-shot user configured.
3)
Switch Down “Photo/Video Switch” to Video icon—
Video Recording only