TonerRefillKits.com
RechargX™ RX022
Mon - Fri 8am - 5pm ET © 1995-2011 ReChargX™, EmptyX, TonerRefillKits and TonerRefillKits.com, the TonerRefillKits logo, the
2011.05.20
800.527.3712 or 352.343.7533 ReChargX™ and EmptyX logos are trademarks owned by TonerRefillkits, LLC. All rights reserved.
Page 5 of 7
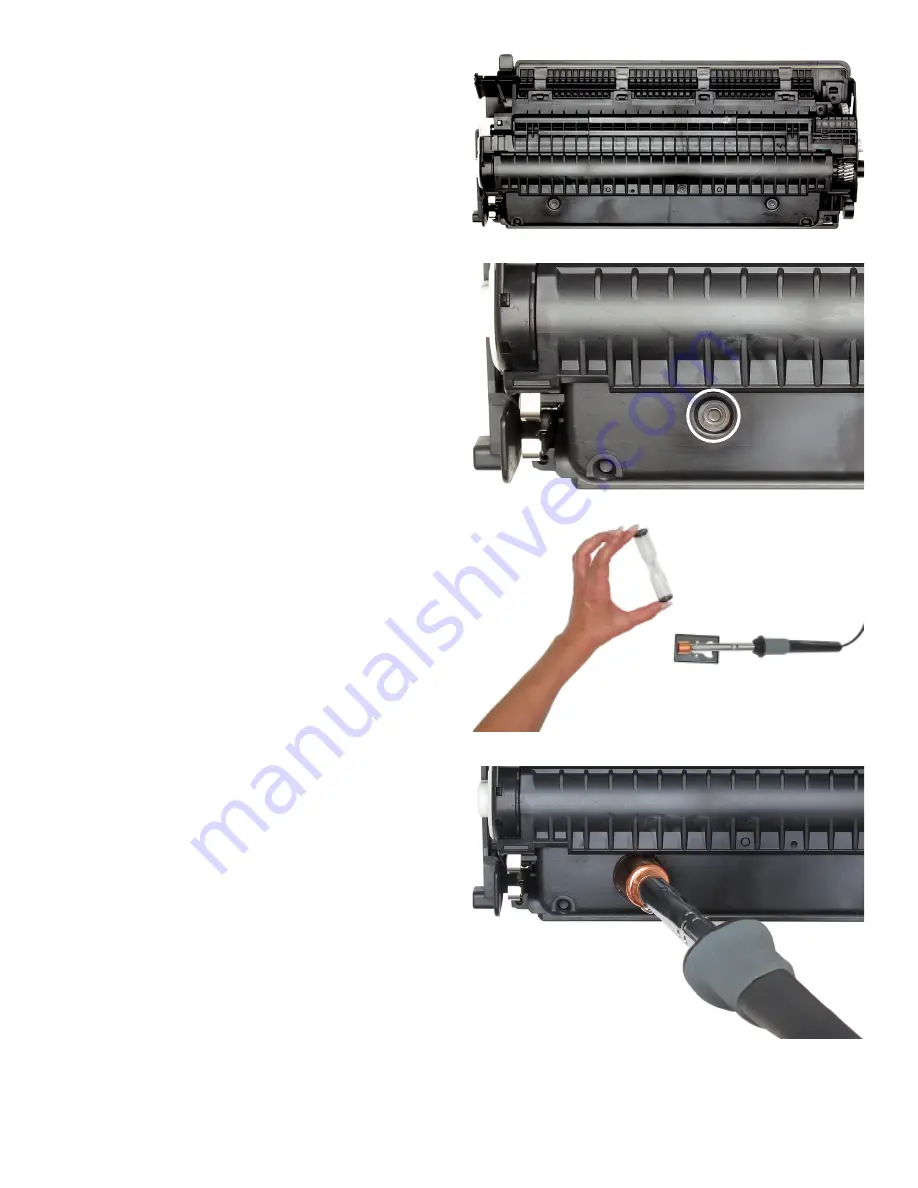
Step 10: Orient the Toner Cartridge
Orient the toner cartridge so the top of the
cartridge is laying on the work surface and the
underside is facing upward, shown in fig 11.
Step 11: Waste Hopper Hole Location
The waste hopper hole will be placed on the
bottom-left of the toner cartridge, below the
ribbed ridge and on top of the small indent,
shown by the white circle in figure 12.
Step 12: Plug in the Hole-Making Tool
Plug in the hole-making tool included with the
ReChargX™ Tool Kit.
Wait the full 3 minutes (as indicated using the
sand timer). Allowing the tool to heat up for 3
minutes will ensure the tool is hot enough to
penetrate the cartridge more easily, as shown
in figure 13.
Step 13: Create the Waste Hopper Hole
Hold the ReChargX™ hole-making tool directly
over the location for the hole and press the
copper hole-making bit against the cartridge
allowing the heat of the tool to create the hole
(there is no need to use excessive force, let
the tool do the work with a minimal amount of
pressure), as shown in figure 14.
Note
:
Once the copper tip of the hole-making tool
slowly penetrates the top of the toner cartridge,
immediately withdraw the tool and unplug it
from the wall.
Figure 11
: Cartridge oriented with underside exposed
Figure 12
: The waste hopper location
Figure 13
: Wait for the hole-making tool to heat up
Figure 14
: Create the waste hopper hole


