


4
START A SIMULATION
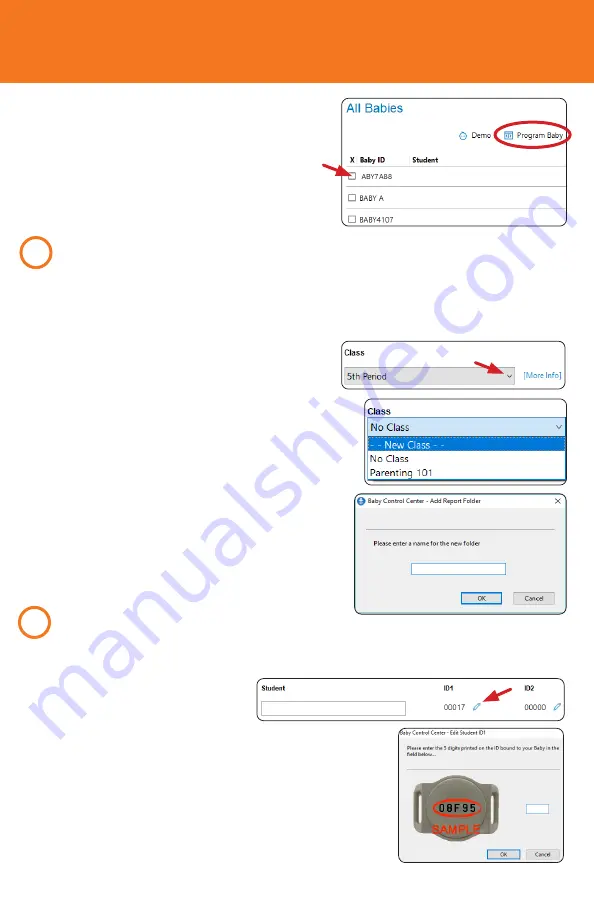
On the Main Screen, check the box for
each Baby to be programmed. Start by
doing one Baby first. Select
Program
Baby
at the top. On the Program Baby
Screen, use the
Previous
and
Next
buttons to toggle between Babies.
1
Assign Class Name
(optional)
When Baby completes a simulation, the Control Center software
downloads a final report. The report appears in the Reports folder with
the class name. Reports with no class name go in the No Class folder.
1. On the Program Baby screen, click the
Class field down arrow.
2. Select a folder name by clicking an
existing name in the dropdown menu or
click --New Class-- to create a new class.
3. Clicking --New Class-- opens the Add
Report Folder dialog window.
4. Enter the new folder name into the text
field. The class folder name can be no
longer than 15 characters (letters,
numbers, and spaces).
5. Click
OK
to save the folder name.
2
Assign Student ID
Before starting a simulation, Baby needs to be assigned a Student ID.
This unique identification
number on each ID allows
Baby to recognize and record
the caregiver’s performance.
Each Baby has the option of one or two IDs.
1. Click the pencil icon below ID1 or ID2.
2. Enter the five digits printed on the ID disc.
3. Click
OK
to save the ID number.