


- 4 -
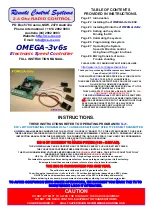
SETTING UP THE
#
OMEGA-3v6s
ESC
.
THESE INSTRUCTIONS REFER TO THE
RCS TX-20 & TX-21+
2.4 GHz 5 CHANNEL R/C.
FOR BINDING, CALIBRATING & USING WITH A PLANET OR SPEKTRUM STICK RADIO REFER TO:
http://www.rcs-rc.com/app/webroot/PDF/OMEGA-3/ESC-TEXT/OMEGA-3v3.pdf
Unless the TX and RX have already been bound and the system calibrated prior to using this system,
there are two procedures that must be carried out by the operator,
1. “BINDING”.
The 1
st
procedure is to “BIND” the receiver (RX) to the Transmitter (TX).
“AUTOMATIC BINDING”.
Our # DSM2-EM(AB) has this feature.
1.1 Switch on Rx. LED will flash once every 2 seconds. Wait 20
seconds until Rx LED flashes rapidly.
1.2 Then press & hold TX bind button & switch TX on. TX LED will
flash more slowly for several seconds. When Rx LED starts flashing let
go of both TX buttons.
1.3 Bind is complete when Rx LED stays On.
1.4 If the system has been calibrated the ESC LED & both loco lights
will immediately blink three times
If LED does not come on within 10 seconds or continues flashing every
2 seconds (= scanning), the bind has failed. Switch TX and RX off,
move them closer together or further apart and retry.
Binding is most reliable when no other 2.4 GHz R/C systems are on.
& then go to solid ON.
“MANUAL BINDING”. Simply insert the binding plug into the bind
socket on the regular DSM2 RX. When the RX flashes rapidly follow
the RX binding procedure above. Remove the binding plug before
commencing operation.
When “BINDING” is complete the RX LED will change to solid ON. If
the system has been calibrated the ESC LED & both loco lights will
immediately blink three times & then go to solid ON.
N.B. If manually binding, the “BINDING” plug
MUST
be removed
BEFORE
the SYSTEM is turned OFF.
Once the “BINDING” plug is removed & stored safely. The R/C system
is now ready for speed calibration. Not necessary if already done.
Please note the LED’s on the ESC pcb & the front and rear lights (if fitted) will stay OFF until “BINDING” is completed.
The loco will always give a very slight jerk at switch ON. This is normal. See Page # 9.


