10
CUSTOMIZE AND USE!
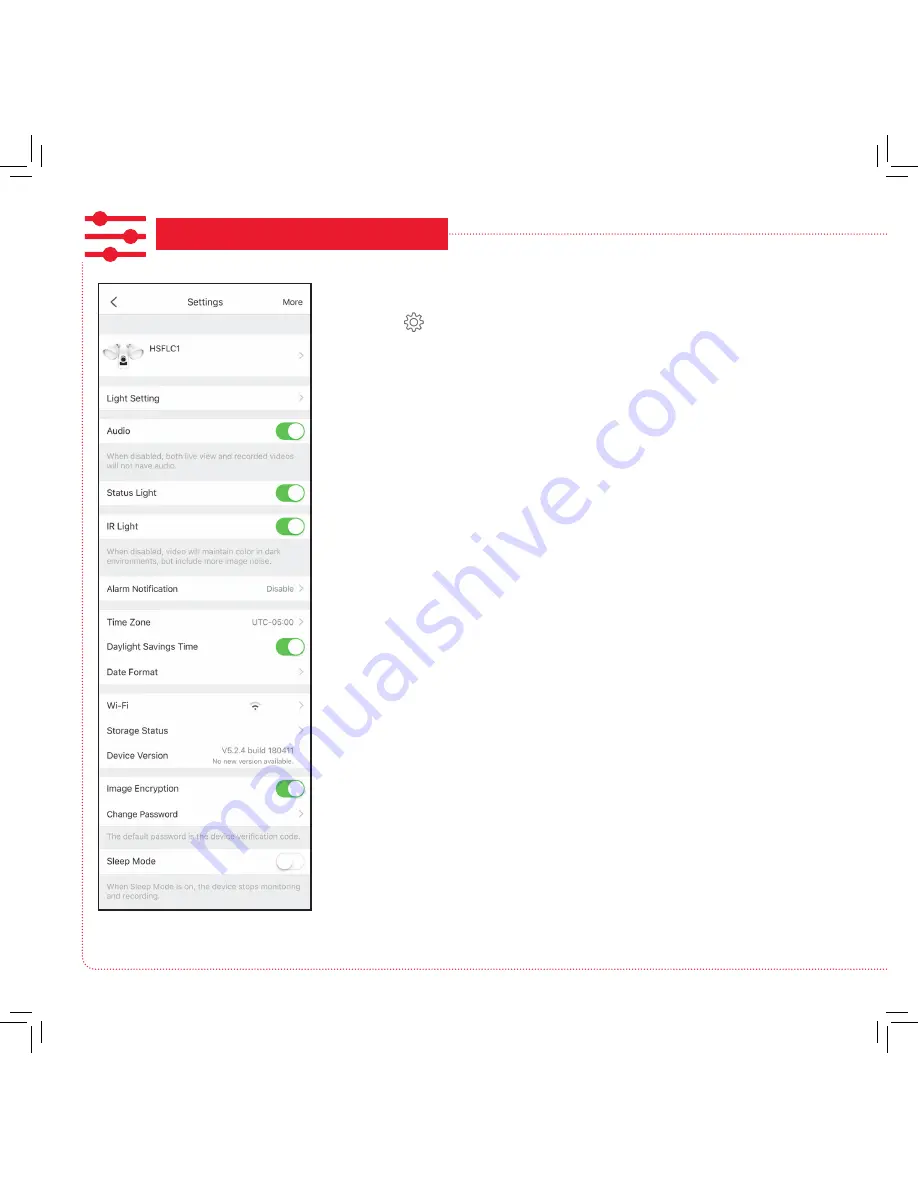
Using the Settings Menu
Press the icon in the Live View screen to access the following
customizable parameters of your floodlight camera.
Light Setting lets you adjust the brightness of the floodlight and enable
motion detection (Light Linkage) for the lights, including setting the areas
of the camera’s vision where motion detection is active.
Audio turns audio on/off for recording and live viewing.
Status Light turns the camera’s indicator light on/off.
IR Light turns the camera’s night vision feature on/off.
Alarm Notification lets you set notification schedules for when you want
to receive alerts. Also lets you set the motion detection area for alerts and
the detection sensitivity, as well as the sound the floodlight camera makes
when motion is detected.
Time Zone, Daylight Savings Time, and Date Format let you adjust the
time zone, daylight savings time, and date format settings you made during
setup.
Wi-Fi lets you change WiFi network information for your floodlight camera
and keep the device active on the new network. This is a convenient option
if you get a new wireless router, for example.
Storage Status lets you format the inserted memory card. A dot next to this
item in the menu means that the SD card requires attention.
Device Version shows you the firmware version of the floodlight camera. A
dot next to this item in the menu means that a firmware update is available.
Choose this option and following the instructions to update.
Image Encryption increases the security of the video from the floodlight
camera. This option is on by default.
Change Password lets you change the floodlight camera’s device
password (not your WiFi password). The default password is the verification
code next to the QR code on the side of the camera.
Sleep Mode lets you put the floodlight camera to sleep. The App will
prompt you to wake the floodlight camera again when you try to view it in
the Live View screen.


