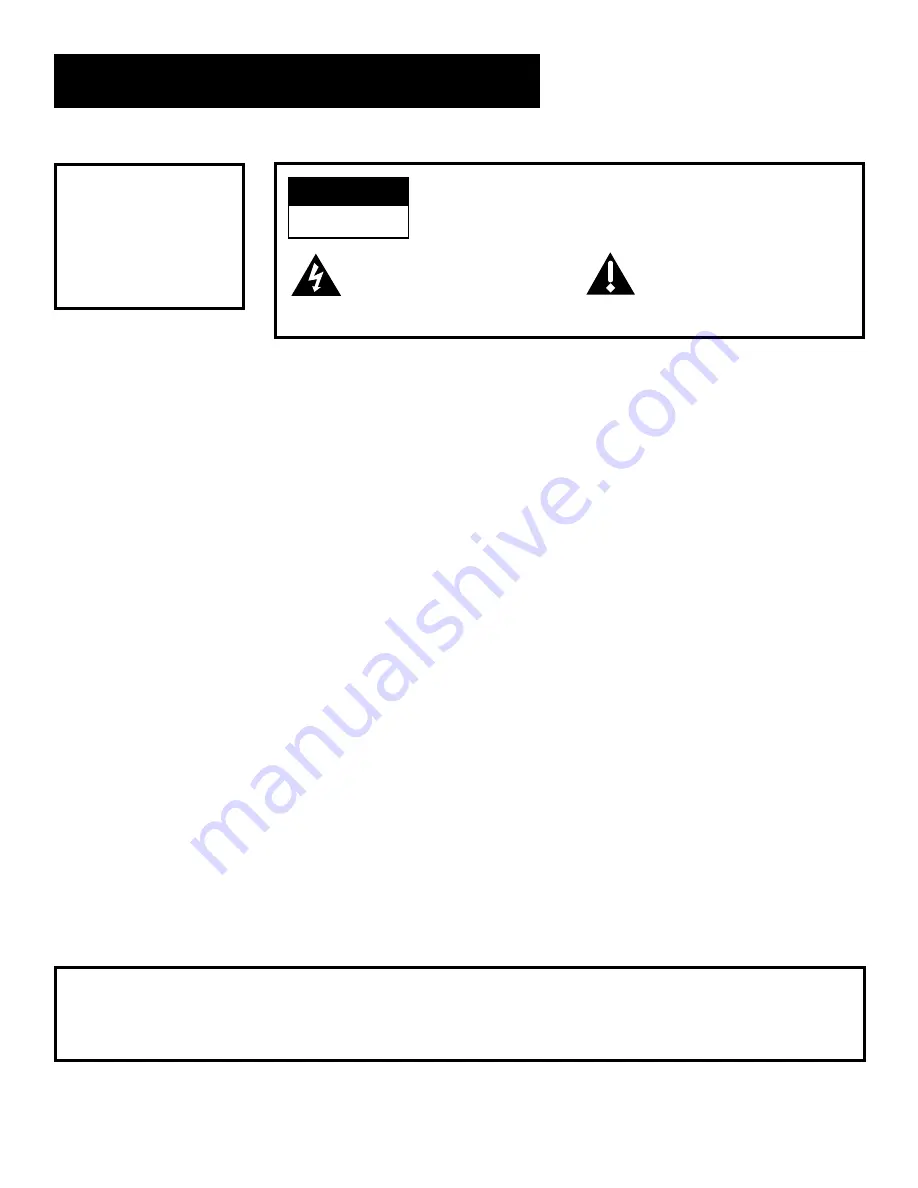
RCA DRD302RA Owner'S Manual Download Page 2

Safety Information

WARNING

TO REDUCE THE RISK OF ELECTRIC SHOCK, DO NOT REMOVE
COVER (OR BACK). NO USER SERVICEABLE PARTS INSIDE.
REFER SERVICING TO QUALIFIED SERVICE PERSONNEL.

This symbol indicates
“dangerous voltage” inside the
product that presents a risk of
electric shock or personal injury.

This symbol indicates
important instructions
accompanying the product.

RISK OF ELECTRIC SHOCK

DO NOT OPEN

WARNING

To reduce risk of fire or
shock hazard, do not
expose this receiver to
rain or moisture.

Cautions

Do not stack electronic components or other objects on top of
the DSS Receiver.

 The slots on top of the receiver must be left

uncovered to allow proper airflow to the unit. Blocking the airflow to
the unit could impair performance or damage your receiver and other
components.

Do not stack the DSS receiver on top of a “hot component” such as an
audio power amplifier.

Refer to the accompanying "Important Safeguards" pamphlet for
additional information concerning the safe use of this product.

FCC Regulations state that unauthorized changes or modifications to
this equipment may void the user’s authority to operate it.

Note to Cable TV Installer:

This reminder is provided to call your attention to Article 820-40 of the
National Electrical Code (Section 54 of the Canadian Electrical Code,
Part 1) which provides guidelines for proper grounding and, in
particular, specifies that the cable ground shall be connected to the
grounding system of the building as close to the point of cable entry as
practical.

Note to Satellite Dish Installer:

This reminder is provided to call your attention to Article 810 and in
particular article 810-15 of the National Electrical Code which covers
proper installation and grounding of television receiving equipment as
well as to article 820-40 of the National Electrical Code which specifies
that the satellite dish cable ground shall be connected to the
grounding system of the building as close to the point of cable entry as
practical.

IMPORTANT NOTICE:

This device incorporates an anticopy process technology that is
protected by U.S. patents and other intellectual property rights. The
anticopy process is licensed for non-commerical, home use only. Reverse
engineering or disassembly is prohibited.

DSS

®

 is a registered trademark of DIRECTV, Inc., a unit of GM Hughes Electronics

StarSight-Licensed: The manufacture and sale of the television schedule feature of this product was licensed under one or
more of the following patents of StarSight Telecast, Inc.; U.S. Patent Nos. 4,706,121; 4977,455; 5,151,789; and 5,353,121.

Summary of Contents for DRD302RA

Page 1: ...DRD302RA OWNER S MANUAL SATELLITE RECEIVER ...

Page 2: ...to call your attention to Article 820 40 of the National Electrical Code Section 54 of the Canadian Electrical Code Part 1 which provides guidelines for proper grounding and in particular specifies that the cable ground shall be connected to the grounding system of the building as close to the point of cable entry as practical Note to Satellite Dish Installer This reminder is provided to call your...

Page 3: ...orting the Grid and Info Guides 14 Using the Themes Button 15 Exiting A Program Guide 15 The Menu System 17 Using the Menu System 18 Exiting a Screen 18 Using Help 18 Menu Descriptions 19 Lists Limits 21 Setting the Ratings Limit 22 Setting Up Spending Limits 23 Creating Favorite Channel Lists 23 Parent Approved Channel List 25 Selecting a Channel List to Use 25 Locking the System 25 Unlocking the...

Page 4: ...ve Setup 44 Disabling Interactive Setup 44 Reference 45 Parts of the DSS System 46 World View 46 Home View 47 Front Panel Controls 48 Back Panel 48 Remote Control Buttons 49 Programming the Remote to Control Your TV 50 Using the Remote Buttons to Control Your TV 50 Remote Codes 51 Glossary 52 Troubleshooting 54 Running the System Test 54 Appendix A Warranty Information 55 To receive a replacement ...

Page 5: ...us Reading these sections gives you the basic information you need to navigate the DSS system Putting You in Control The fifth section of the book introduces you to the Lists Limits feature which lets you control the way you watch DSS programming by creating favorite channel lists and by setting ratings limits and spending limits What s Left The rest of the book highlights the remaining features a...

Page 6: ...hat about the things you don t know For instance The DSS system works like your TV Pick up the DSS remote and push the DSS button Press the Channel Up Down buttons to scan through the channels Press the number keys to go directly to a channel There is an on screen Program Guide The Program Guide is like a TV listing in the newspaper It is designed to help you select regular programs and pay per vi...

Page 7: ...H DISPLAY GUIDE MENU SELECT CLEAR 0 8 7 9 5 4 6 CHAN 2 1 3 ANT MUTE ALT AUD DSS TV OFF ON VOL Remote Control Installing Batteries In the Remote Control Follow these steps whenever you need to install or change the batteries in your DSS remote 1 Pull off the cover of the battery compartment 2 Place four AAA batteries as shown matching the and end of each battery in each compartment 3 Replace the co...

Page 8: ...ccess card is installed in your DSS receiver Your access card has been matched to your receiver and should already be installed when you take the receiver out of the packing box The access card should only be taken out of the DSS receiver when you are issued a new card by your programming providers 4 The DSS remote control has batteries and can be programmed to control both your DSS receiver and y...

Page 9: ...f a guideline for using the on screen displays If you understand this one thing you have enough knowledge to get around the menuing system and program guides Once you understand Point and Select you can do just about anything you want with the menuing system Lists Limits 1 The Only Rule Point and select 2 3 4 The Menu System 5 ...

Page 10: ...een press the down arrow To point right press the right arrow 2 Select Once you have pointed to an item on the screen select it by pressing the MENU SELECT button on the remote or front panel Selecting an item tells the menu system to go ahead and make the change you have indicated For example the instructions in the User s Manual might tell you to Point to the Help button and press MENU SELECT On...

Page 11: ... types of guides each presenting the schedule in a different format Using the Program Guide is easy as long as you remember the Point and Select rule Point to items on the screen by pressing the arrow keys on the remote or front panel Then press MENU SELECT to tune to that program 1 2 3 4 5 Take some time to explore the different types of Program Guides and use the one that best suits your viewing...

Page 12: ...ion Getting Around in the Program Guide This section describes how to change channels and move around the Program Guide Changing Channels with the number keys 0 9 You can point quickly to any channel in the Program Guide by entering the channel number with the number keys 0 9 For example to point to the first listing for Channel 128 press the numbers 1 2 8 on the remote To point to Channel 102 pre...

Page 13: ...program details If you choose a pay per view event a second screen allows you to buy the program find out more information or return to the Guide Selecting A Program Guide from the Main Menu When you access the program guides through the Main menu you have more available options 1 Press MENU SELECT to bring up the Main menu 2 Point to Program Guide and press MENU SELECT The Program Guide menu scre...

Page 14: ...ar to a TV schedule listed in a newspaper The seven channel Grid Guide The Info Guide Shows you five channels and includes a brief description of the selected program The five channel Info Guide gives you a brief program description By default the Grid Guide appears when you press the GUIDE button on the remote Go to the Preferences menu located within the Assistance Menu to change the default gui...

Page 15: ...ts The Topic guide The Channel Guide Displays the programming schedule in a channel by channel format The Channel guide The Attractions Guide Displays coming attractions and special events information The Attractions guide See the section on purchasing pay per view programs for more information on the Attractions guide ...

Page 16: ...g the Sorting Buttons The remaining buttons at the bottom of the guide are called sorting buttons These buttons allow you to simplify the guide to show specific types of information such as movies or sports The Movies button lists movies only After selecting Movies point to the Theme button that appears and press MENU SELECT to sort the guide to list specific types of movies such as comedies or th...

Page 17: ...ter you select one of the sorting buttons the name of that button changes into the Themes button Use the Themes button to further sort the Grid or Info Guide to show subtopics themes For example you could simplify the guide to show baseball under the Sports sorting button or comedies under Movies Exiting A Program Guide There are two ways to exit a Program Guide Point to a channel and press MENU S...

Page 18: ......

Page 19: ... as a restaurant menu is divided into sections such as appetizers entrees and desserts the on screen menus are also separated into sections to help you find the information you need Don t Forget Point and Select As with all of the on screen displays you use Point and Select to navigate Use the MENU SELECT button to bring up the Main Menu and then use Point and Select to choose a menu option 5 1 3 ...

Page 20: ...o exit a menu Point to Exit and press MENU SELECT Press the CLEAR button on the remote control The on screen displays clear from the screen and you return to TV viewing Using Help All menus have a Help button For example selecting the Help button from the Main Menu shows you information about using the Main Menu screen The rest of the Help buttons in the menu system bring up helpful information ex...

Page 21: ...channel lists Options Allows you to run the system test and install a new access card Dish Pointing Use to find your dish pointing coordinates and to access the on screen signal strength meter Assistance Shows you information about using the system and setting the system to your personal preferences Explore Explore Explore Once you ve learned the basics feel free to poke around the menu system bec...

Page 22: ...The Menu System 20 ...

Page 23: ... control of your DSS viewing by letting you create channel lists and set ratings and spending limits which can be password protected Especially for Parents You can set up a parent approved channel list so that selected channels cannot be viewed when the system is locked unless the system password is entered In addition to activating the ratings spending and channel limits the system lock feature k...

Page 24: ...enforced if a program has not been rated if rating information for that program is not transmitted by the program provider or if the system has not been locked 1 Point to Rating Limit and press MENU SELECT Use the arrow keys to move the selector up and down 2 Use the up and down arrows to move the rating selector to the highest rating you want to be able to view In the preceding illustration movie...

Page 25: ... a single program spending limit After a spending limit is set and the system is locked you must enter the system password to purchase a pay per view program that costs more than your spending limit allows Creating Favorite Channel Lists You can create as many as four different channel lists that can be easily accessed by using the FAV INPUT button on the remote control Select the Channel Lists op...

Page 26: ...hannel and press MENU SELECT to remove or replace the check mark After you have set up the channel lists and locked the system you will need to enter the system password before you can modify the existing channel lists Add or Delete All Channels You might be able to save time when creating a channel list by using the Add All Chans option or the Delete All option to either add all channels or delet...

Page 27: ...it defaults to the Normal channel list You can easily change the channel list by pressing the FAV INPUT button on the remote to scroll through the available channel lists Normal FAV A FAV B and FAV C The current channel list is reflected in the channel banner at the top of the screen that appears when you change channels or press DISPLAY on the remote Locking the System You can lock the system in ...

Page 28: ...ock Limits and press MENU SELECT 2 Point to Yes and press MENU SELECT to confirm that you want to unlock the system Session Unlock If your system is locked and you attempt to access a channel or program that is blocked by one or more limits you are asked to enter the four digit system password to override the system lock If you enter the password to override the rating or spending limit all limits...

Page 29: ... use the on screen program guides how to get around in the menu system and how to use the Lists Limits feature This section highlights the rest of the features offered by your DSS system Don t be afraid to use Point and Select to explore all of the features on your own More Features ...

Page 30: ... PPV program while using the channel buttons on the remote to scan through the channel lists Select a PPV program from the Program Guide Select a coming attraction from the Attractions menu Tuning to a PPV Program When you use the channel buttons or digits on the remote to tune to a Pay Per View channel you need to press the DISPLAY button to bring up the Program Details screen in order to purchas...

Page 31: ...currently listed in your Program Guide These events are called coming attractions and can be previewed and purchased through the Attractions Guide Use Point and Select to go to the Attractions Guide located within the Program Guide menu The Attractions Guide is accessed through the Program Guide menu You need to connect your phone line to your satellite receiver to be able to order PPV programs by...

Page 32: ...splay also shows the title channel date time and cost of each program Note that the Past Purchases list might be modified after each billing cycle and still show purchases for which you have already paid Reviewing and Canceling an Upcoming Purchase Use Point and Select to choose an upcoming purchase and review the program description From the Purchase Edit screen you can also cancel an upcoming pu...

Page 33: ...elect a Timer 1 2 3 or 4 and then use the arrow keys to complete the on screen sentence When the sentence is complete select Run Timer Complete the sentence to set up the timer for each of the four available Timer options Editing or Canceling a Timer From the Timers screen select the Timer you want to edit or cancel and then do the following Use the arrows keys to edit the Timer then select Run Ti...

Page 34: ...right corner of the channel marker If the DSS receiver is turned off the power light on the front panel of the receiver flashes Checking your mail Select Mailbox on the Main menu to view your mail 1 Point to a message and press MENU SELECT The message is opened for you to read The Mail menu 2 Press MENU SELECT again to close the letter After you read a message and want to erase it point to Erase a...

Page 35: ...ate Audio from the Preferences menu and press MENU SELECT ALT AUD Remote Button Temporary audio selections are made by pressing ALT AUD on the remote All the available audio types are selected one after another as you continue pressing the ALT AUD button Once selected the chosen audio remains selected until it is changed or until the DSS receiver is turned off Alternate Audio Display Screen When y...

Page 36: ... separate tests signal tuning phone connection and access card A message screen appears telling you whether the system passed each test If your system fails a test run the system test several times before concluding that there is a problem Occasional fluctuations in the phone line or satellite signal can give temporary false readings New Access Card Setup Periodically your program provider may iss...

Page 37: ...elp screens or press MENU SELECT to return to the Help menu Program Guide shows a screen by screen overview of the Program Guide features Menu System shows a screen by screen overview of the DSS menu system Remote Control shows an on screen display of the remote control Point to the different remote buttons to see a brief description of the highlighted button Front Panel shows an on screen display...

Page 38: ...More Features 36 ...

Page 39: ...f straight down the middle after you connect your components Try not to coil any twin lead cables and keep them away from the audio video cables as much as possible Make sure all antennas and cables are properly grounded Refer to the Safety Tips sheet packed with your unit Protect Your Components from Overheating Do not block ventilation holes in any of the components Arrange the components so tha...

Page 40: ...good picture and stereo sound quality and should be used if your TV has no S Video jack Theses jacks are used for most audio video connections between components The DSS receiver audio video jacks are color coded yellow for video red for right audio and white for left audio If your TV has only one input for audio mono connect it to the right red audio jack on the DSS receiver RF Jacks and Coaxial ...

Page 41: ...ts jacks VCR with RF and audio video inputs and outputs S Video coaxial and audio video cables Connection B Provides very good picture and stereo audio quality To use Connection B you must have TV with separate RF and audio video inputs jacks VCR with RF and audio video inputs and outputs Coaxial and audio video cables Connection C Provides good picture and mono audio quality To use Connection C y...

Page 42: ...desired channel To receive off air programming with cable box 1 Turn off VCR and DSS receiver 2 Tune TV to cable box output channel usually CH2 CH3 or CH4 3 Tune cable box to desired channel To record DSS programming 1 Tune TV to receive S Video output from DSS receiver 2 Tune DSS receiver to desired channel 3 Set your VCR to record on line input To view VCR programming 1 Tune TV to VCR output cha...

Page 43: ...nnel To receive off air programming with cable box 1 Turn off VCR and DSS receiver 2 Tune TV to cable box output channel usually CH2 CH3 or CH4 3 Tune cable box to desired channel To record DSS programming 1 Tune TV to record line output from DSS receiver Input1 2 Tune DSS receiver to desired channel 3 Set your VCR to record on line input To view VCR programming 1 Tune TV to VCR output channel usu...

Page 44: ...receive off air programming no cable box 1 Turn off VCR and DSS receiver 2 Tune TV to desired channel To receive cable programming with cable box 1 Turn off VCR and DSS receiver 2 Tune TV to cable box output channel usually CH2 CH3 or CH4 3 Tune cable box to desired channel To record DSS programming 1 Tune TV to the channel on which you receive the DSS signal 2 Tune DSS receiver to desired channel...

Page 45: ...r To receive off air programming no cable box 1 Turn off DSS receiver 2 Tune TV to desired channel To receive cable programming with cable box 1 Turn off DSS receiver 2 Tune TV to cable box output channel usually CH2 CH3 or CH4 3 Tune cable box to desired channel CAUTION Do not stack electronic components or other objects on top of the DSS receiver See Safety Information inside front cover VIDEO D...

Page 46: ...nting coordinates or run the signal strength meter select Dish Pointing from the Main menu Disabling Interactive Setup The Interactive Setup menus automatically appear on screen the first time you plug in your receiver and when power is restored after a power loss The final step of the Interactive Setup allows you to disable the automatic appearance of the Interactive Setup To enable it again sele...

Page 47: ...re to your screen What s It For This section also describes the controlls located on the front and back of the receiver What Else Can it Do Your remote capable of controlling other devices as well This section tells you how to program the remote to controlTVs VCRs Laserdisc players and other equipment The information in this section tells you more about your system and less about how the system wo...

Page 48: ...ure Uplink Center Transmits programming up to the satellite Satellite Relays the programming signals back to your satellite dish The satellite is parked above the equator in geostationary orbit 22 300 miles above the earth DSS Satellite Dish Antenna Receives the satellite signals Because the satellite is so powerful the dish can be as small as 18 inches Program Provider Authorization Center Proces...

Page 49: ...r access card This update only takes a few seconds and ensures that you will have continuous service The system automatically hangs up if you pick up the phone when the DSS receiver is calling out Television If your television is remote controllable you can program the DSS Universal TV Remote to change channels and volume Remote Control included with your DSS system Controls the DSS system as well...

Page 50: ...the CH3 CH4 SWITCH For example to see the DSS signal on TV channel 3 set the switch to 3 S VIDEO Provides the best picture quality If your TV has S VIDEO capability use this jack along with the audio video jacks to connect the DSS receiver to your TV VIDEO Provides better picture quality than the OUT TO TV jack If your TV has audio video capability use this jack to connect the DSS receiver to your...

Page 51: ...nt types of guides PREV CH Moves you back and forth between your last two selected channels CLEAR Removes the on screen displays and return to normal viewing DIGIT KEYS 0 9 Use the digit keys to tune directly to a channel If you are in the menu system use the digit keys to enter numbers for the time date channel and passwords CHAN UP DOWN Use to scan up and down through the channels in the current...

Page 52: ...rol your TV 1 Turn on the TV 2 Look up your brand and code number s on the TV Code list on page 51 3 Press and hold the TV button 4 Enter the three digit code from the code list 5 Release the TV button and press OFF ON or CHAN UP DOWN to see if the TV responds to the remote commands If it doesn t try the next code listed for your brand 6 Repeat these steps until the TV responds to the remote comma...

Page 53: ...38 061 068 Emerson 011 026 027 028 029 030 031 032 037 042 053 064 065 067 075 076 078 079 Envision 011 027 Fisher 017 021 039 041 Funai 064 GE 000 008 009 011 012 027 038 068 086 089 091 Goldstar 003 004 006 011 019 027 037 050 Hallmark 011 027 Hitachi 009 011 027 036 037 040 047 063 080 Infinity 013 JBL 013 Jensen 011 027 JVC 012 024 036 037 040 048 051 074 Kawasho 002 011 027 Kenwood 006 011 01...

Page 54: ...creen provides the number corresponding to an azimuth setting for your location DSS Receiver Receives processes and converts the digitally compressed satellite signals into audio and video Elevation Refers to the up and down positioning of your DSS dish When you enter your zip code or latitude and longitude the display screen provides the number corresponding to the elevation setting for your loca...

Page 55: ...ion of this feature depends upon the availability and accuracy of data supplied from and broadcast by the program provider Signal Meter An on screen display that indicates the relative strength of the satellite signal and sounds a test tone to help you lock in on the satellite signal The signal meter is used when you adjust your DSS dish Spending Limit Provides a means of restricting viewing based...

Page 56: ...cess card is installed in the receiver Running the System Test Follow these steps to run the diagnostics system test on your system 1 Turn on your TV and the DSS receiver 2 Press DSS to put remote in DSS mode then press MENU SELECT to bring up the Main menu 3 Point to and select Options 4 Point to and select System Test Follow the on screen directions after the test is completed 5 If your system d...

Page 57: ...nt will give you an RA number over the phone The representative will also provide you with instructions on where and how to return your unit Write the number in large clear characters on the outside of the box To avoid confusion and misunderstandings shipments without an RA number clearly visible on the outside of the box will be returned to you at your expense Include a brief note describing the ...

Page 58: ...continental USA 2 The exchange location will notify you of its arrival 3 Take your unit and your evidence of purchase date such as a bill of sale to the exchange location and you will be provided the new or refurbished unit Please retain all accessories such as the remote control hand unit 4 If the repairs are covered by your warranty you will not be billed If you are not located near an exchange ...

Page 59: ...outside the USA For units intended for use in Alaska this warranty does not cover the installation or the dish antenna It only covers the DSS receiver Loss of programming Shipping damage if the unit was not packed and shipped in the manner prescribed by Thomson Storage fees may be charged by the exchange point if you fail to pick up the replacement unit in a timely manner Any installation other th...

Page 60: ...ations The telephone company may make changes in its communications facilities equipment operations of procedures where such action is required in the operation of its business and not inconsistent with FCC Rules and Regulations If these changes are expected to affect the use or performance of your telephone equipment the telephone company must give you adequate notice in writing to allow you to m...

Page 61: ...les Tax We are required by law to collect the appropriate sales tax for each individual state country and locality to which the merchandise is being sent Shipping Handling and Insurance Total Amount Enclosed Use VISA or MasterCard preferably Money order or check must be in U S currency only No COD or CASH 5 00 Qty Please complete other side also All accessories are subject to availability Where ap...

Page 62: ...x 8419 Ronks PA 17573 For more information on these accessories or current prices write to the following address Video Accessories Customer Service Thomson Consumer Electronics Inc Distributor Special Products 2000 Clements Bridge Rd Deptford NJ 08096 2088 International Orders This offer is valid only in the 50 United States and Canada For international orders please send your request for quotatio...

Page 63: ...s 19 Movies button 14 N New Access Card Setup 34 O On Line Help 35 ON OFF Indicator Light flashing 32 ON OFF Light flashing 32 Ordering DSS programming 4 Ordering DSS Programming 4 P Password forgetting 26 Past purchases 30 Pay Per View Programs 28 Picture size 34 PPV pay per view 28 Product help line 55 Program Guide 9 All Button 15 Arrow button 14 Attractions Guide 13 bringing up 10 Channel guid...

Page 64: ...he key benefit of these new paints is to significantly reduce air pollution Thomson Consumer Electronics remains committed to improving our manufacturing process through changes like these to help our environment At Thomson on going efforts to maintain our valuable natural resources will continue to be a priority If your DSS system needs service please contact your dealer or the nearest Servicente...

Reviews: