20
Chapter 3
Playing Discs
Using the On-Screen Info Display
The Info Display appears across the left of the screen when you press the INFO button on the remote
while you’re playing a disc. Use the up and down arrow buttons to highlight different icons. Once an
icon is highlighted, follow the on-screen instructions, and use the left and right buttons on the remote
to scroll through the options.
You can only access the Info Display when you’re playing a disc. Also, the Info Display features are only
available if the disc was created with that particular feature. If one of the icons is “grayed out,” that
feature isn’t available for the disc you’re playing.
The invalid symbol appears on the screen when you press a button that doesn’t have any
function. To make the Info Display disappear from the screen, press INFO on the remote.
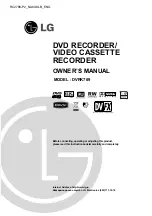
DVD Disc Info Display
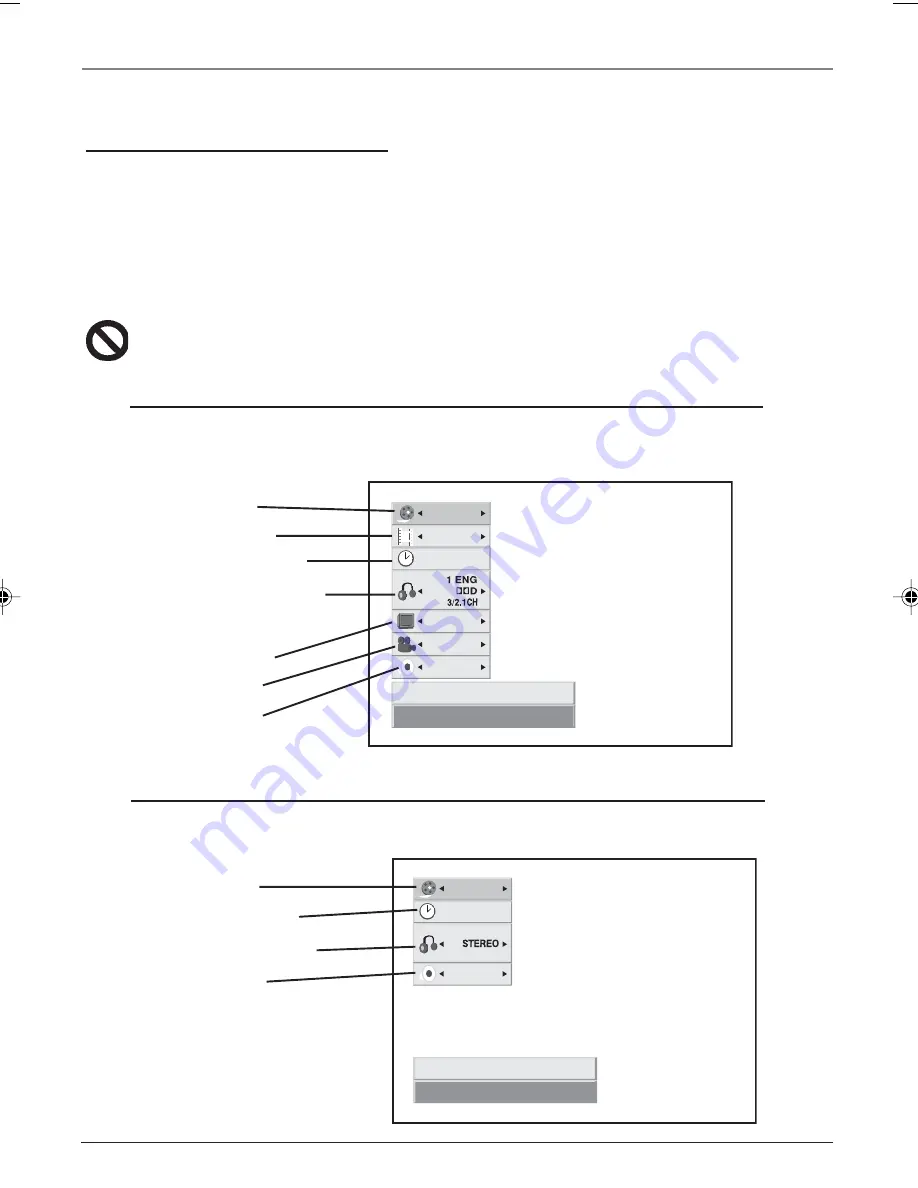
Video CD (VCD) Disc Info Display
1 / 3
1 / 12
0:20:09
ABC
1 ENG
1 / 3
3D SUR
Title
Move
0-9
Input
OK
Enter
Title icon
Chapter icon
Time search icon
Audio language
and Digital Audio
output icon
Subtitle icon
Angle icon
Sound icon
1 / 3
0:20:09
3D SUR
Track
Move
0-9
Input
OK
Enter
Title icon
Time search icon
Audio channel icon
Sound icon
16356770.03 Playing Discs
6/8/04, 4:38 PM
20