background image

21

Graphics are for representation only. Your unit may differ slightly.

Menu System

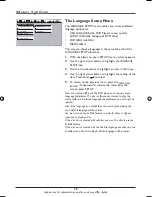
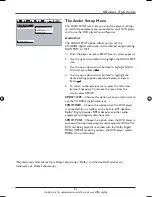
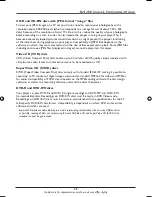
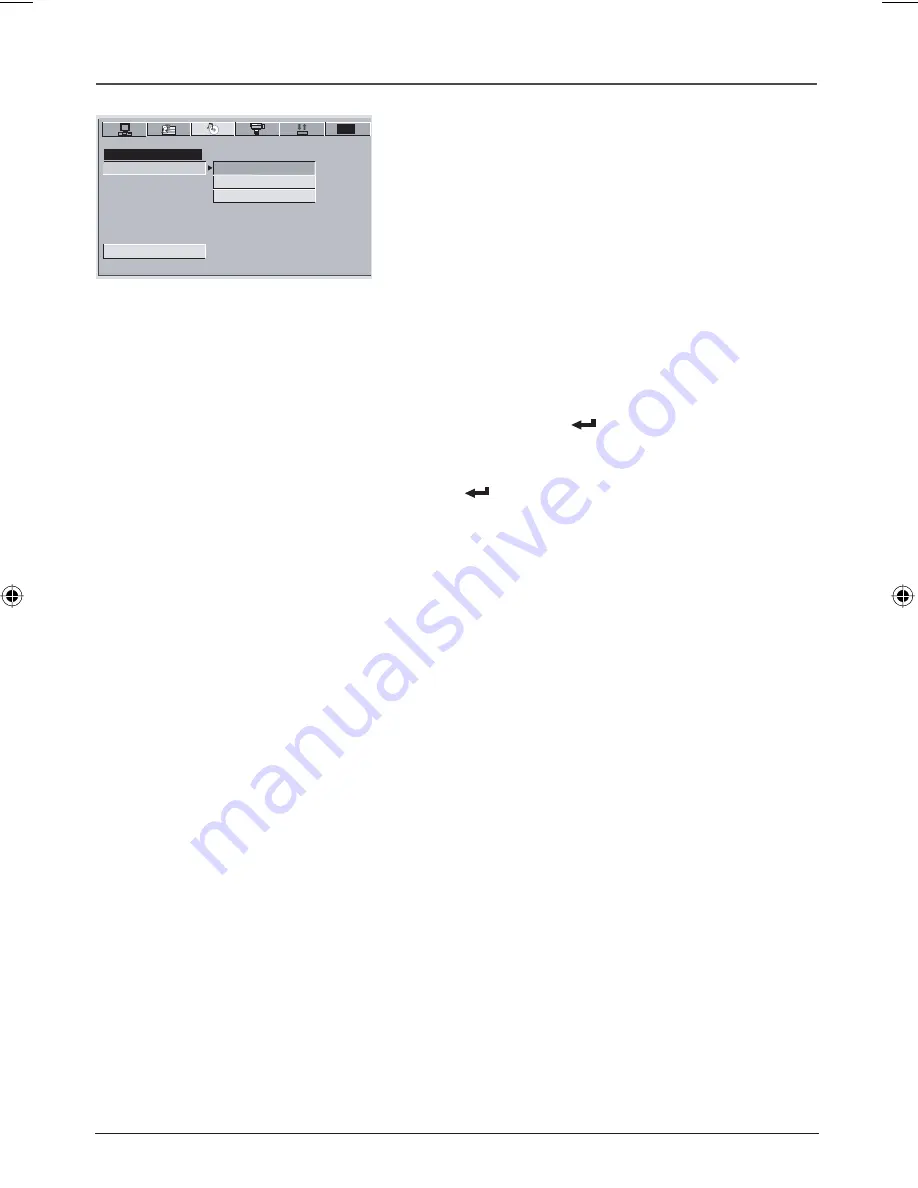
The Audio  Setup  Menu

The 

AUDIO SETUP

 menu lets you adjust the player’s settings 

to match the equipment you connected to your DVD player 
and to use the DVD player’s sound features. 

Audio Out

The 

AUDIO SETUP 

option allows you to set the 

COAXIAL digital audio jack to the desired output setting, 
RAW, PCM, or OFF.

1.  With the player on, press SETUP (menu system appears).

2.  Use the right arrow button to highlight the

 AUDIO SETUP


icon. 

3.  Use the up or down arrow buttons to highlight 

AUDIO 

OUT

 and press Enter 

4.  Use the up or down arrow buttons to highlight the 

desired setting (options explained below) and press 
Enter 

.

5.  To return to the previous menu, press the left arrow 

button if necessary. To remove the menu from the 
screen, press SETUP.

SPDIF / OFF

 – Choose this option when you don’t want to 

use the COAXIAL digital audio jack.

SPDIF/ RAW 

– Choose this option when the DVD player 

is connected to an amplifier with a built-in DTS decoder, 
Dolby* Digital decoder, MPEG decoder, or other audio 
equipment with digital audio input jack.

SPDIF/ PCM 

– Choose this option when the DVD player is 

connected to dual stereo digital audio equipment. When the 
DVD disc being played is recorded with the Dolby Digital, 
MPEG1/MPEG2 recording systems, the DVD player selects 

PCM

 as the audio output.

*Manufactured under license from Dolby Laboratories. “Dolby” and the double-D symbol are 
trademarks of  Dolby Laboratories.

TVG

AUDIO SETUP

EXIT SETUP

AUDIO OUT

SPDIF/RAW
SPDIF/PCM

SPDIF/OFF

DRC620 book file   21

DRC620 book file   21

7/25/05   3:16:55 PM

7/25/05   3:16:55 PM

Summary of Contents for DRC620N

Page 1: ...DVD Player User s Guide DRC620N Changing entertainment Again ...

Page 2: ...ed to respond to the Region Management Information If the Region number of a DVD disc does not correspond to the Region number of this DVD player this DVD player cannot play the disc The Region number for this DVD player is Region No 1 Refer to the identification rating label located on the back panel of your product for its proper operating voltage Caution To prevent electric shock match wide bla...

Page 3: ...p3 WMA and JPEG Files 15 Chapter 3 Menu System The DVD Player Menu System 16 The System Setup Menu 16 TV System 16 TV Type 16 Screen Format DVD Player Display Mode 18 TV Screen 18 Password 18 Rating 19 Default 19 Display Mode 21 The Language Setup Menu 20 The Audio Setup Menu 21 TheVideo Setup Menu 22 The Digital Setup Menu 22 TheTVGuardian Menu 23 Chapter 4 Additional Information Troubleshooting ...

Page 4: ...ox Thank you for purchasing this DVD player Unpack the box completely and tear off any protection films Car bag part 269747 Car adapter part 269750 Remote control with battery CR2025 part 269749 Audio video cables part 269748 AUDIO SUBTITLE ANGLE REPEAT BOOKMARK ZOOM TITLE FWD STEP SLOW PLAY PAUSE REV SLOW REV PREV NEXT STOP SEARCH PROGRAM OSD MENU CLEAR A B RANDOM MUTE 7 4 SHIFT SETUP 1 2 3 C 5 6...

Page 5: ...e only with the type of batteries specified above Do not throw them into fire do not recharge them If you are not using the remote control unit for an extended period several weeks take the battery out CR2025 1 Slide the battery lock on the left side of the unit to the OPEN position to open the battery compartment 2 Slide the battery into the compartment with the battery labeling facing up and the...

Page 6: ...y 1 Install the battery as explained on page 3 Charging the battery and powering the unit 1 Connect the round plug on the power supply cord to the player s DC IN jack The battery takes about 3 hours to fully charge when the unit is turned off and somewhat longer if the unit is on The battery should last about 2 5 hours when fully charged VID IN AUDIO IN OUT COAXIAL POWER OFF ON DC IN 12V VOLUME CO...

Page 7: ...player Connecting Audio Video output to the player If you want to use the player s built in LCD screen to watch pictures from an external source camcorder VCR etc use the supplied Audio Video cables Also make sure the AV SELECT switch on the back of the player is set to IN VOLUME COLOR BRIGHTNESS VIDEO IN OUT AUDIO IN OUT COAXIAL POWER OFF ON DC IN 12V VIDEO IN OUT AUDIO IN OUT COAXIAL VOLUME COLO...

Page 8: ...s playback 4 Previous chapter track button Skips to previous chapter DVD or track CD 5 Next chapter track button Skips to next chapter DVD or track CD 6 Reverse button Reverses playback 7 Forward button Fast forwards playback 8 SUBTITLE button Toggles the available subtitles 9 AUDIO button Toggles the available audio languages 10 Open button Lifts the LCD screen so you can load a disc 2 3 4 5 6 7 ...

Page 9: ...to OUT connects to a component with audio input jacks such as a TV When the switch is set to IN connects to a component with audio output jacks such as a camcorder or video game system 5 VIDEO IN OUT jack When the AV SELECT switch on the back of the unit is set to OUT connects to a component with video input jacks such as a TV When the switch is set to IN connects to a component with video output ...

Page 10: ...on these are the navigation buttons you use to highlight on screen menu items Press Enter to select the item that is highlighted Buttons listed alphabetically 0 9 Use to input information such as chapter numbers and track numbers A B Define a specific segment on the disc that you want to repeat See page 13 for more information ANGLE Toggles the available camera angles AUDIO Toggles the available a...

Page 11: ...at are used for dual functions SLOW REV Accesses reverse slow motion during playback Press several times to change playback speed When playback is paused advances the frame in reverse STEP SLOW Accesses forward slow motion during playback Press several times to change playback speed When playback is paused advances the frame forward SUBTITLE Toggles the available subititles TITLE Toggles the avail...

Page 12: ...utton on the remote control The DVD player s Info Display The Info Display appears as icons across the top of the screen and can only be accessed while you are playing a disc It s turned on and off with the OSD On Screen Display button on the remote control Note The Info Display is for reference information only and can t be modified You ll need to use the remote to change the chapter or title for...

Page 13: ...les on them Before you put a disc in the player make sure it is compatible You can t play the following types of discs Laserdiscs CD I CD ROM computer only discs DVD ROM or discs recorded using other broadcast standards i e PAL or SECAM CD G discs Note Some discs may not be compatible due to laser pickup and design DVD Rewritable How to Load and Play a Disc 1 Slide the Open button to the right the...

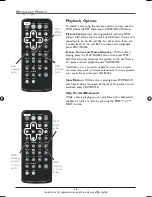
Page 14: ...tton then press STEP SLOW each press advances the picture to the next frame To resume normal playback press PLAY PAUSE Note When a disc is paused or stopped for more than 3 minutes the screen saver mode is activated automatically To resume playback press any button and then press PLAY PAUSE Slow Motion While a disc is playing press STEP SLOW each press slows the speed of the disc To resume normal ...

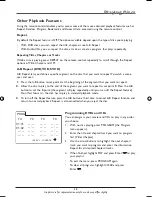
Page 15: ...o set point A at the beginning of the segment that you want to repeat 2 Allow the disc to play to the end of the segment you want to repeat to set point B Press the A B button to set the B point the segment will play repeatedly until you turn off the Repeat feature Don t fast forward the disc has to play in standard playback mode 3 To turn off the Repeat feature press the A B button a third time t...

Page 16: ...vailable on a disc you can toggle the available angles by pressing the ANGLE button Most discs do not have this feature Audio Language You can select an audio language from those included on the disc by pressing the AUDIO button during playback Bookmarks You can create temporary bookmarks to set points on the disc you watch frequently Creating Bookmarks 1 When the disc reaches the scene you want t...

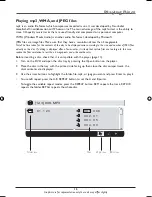
Page 17: ... on the disc If nothing is displayed after a few minutes it is likely that certain files are too large In this case reduce the files resolution to less than 5 megapixels and write another disc Before inserting a disc check that it is compatible with the player page 11 1 Turn on the DVD and open the disc tray by pressing the Open button on the player 2 Place the disc in the tray with the printed si...

Page 18: ...ding on the type of television you have you may want to adjust the screen setting also called the aspect ratio 1 With the player on press SETUP menu system appears 2 Press the down arrow button to highlight TV TYPE and press Enter 3 Use the arrow buttons to highlight your choice options explained below When the item is highlighted press Enter to select it 4 To return to the previous menu press the...

Page 19: ...pect ratio height to width ratio You ll see the entire frame of the movie but it takes up a smaller portion of the screen vertically The movie might appear with black bars at the top and bottom of the screen 16 9 Widescreen Choose this option if your DVD player is connected to a widescreen TV If you choose this setting and you don t have a widescreen TV the images on the screen might appear distor...

Page 20: ... When the item is highlighted press Enter to select it 4 To return to the previous menu press the left arrow button if necessary To remove the menu from the screen press SETUP Password The PASSWORD option allows you to set up the rating limits and lock your player to control the type of content your family watches The parental control feature is a rating system for DVDs like movie ratings When the...

Page 21: ... remove the menu from the screen press SETUP Default The OPTION option allows you to return all the player s setting to the factory defaults 1 With the player on press SETUP menu system appears 2 Press the down arrow button to highlight DEFAULT and press Enter The player s settings return to the factory defaults 3 To return to the previous menu press the left arrow button if necessary To remove th...

Page 22: ...turn to the previous menu press the left arrow button if necessary To remove the menu from the screen press SETUP Discs are created differently The DVD player can t override some language preferences If a disc s software was created to play the movie title in a preferred language the preference you set might be ignored Also if the language isn t available on the movie you re playing the disc s def...

Page 23: ...ained below and press Enter 5 To return to the previous menu press the left arrow button if necessary To remove the menu from the screen press SETUP SPDIF OFF Choose this option when you don t want to use the COAXIAL digital audio jack SPDIF RAW Choose this option when the DVD player is connected to an amplifier with a built in DTS decoder Dolby Digital decoder MPEG decoder or other audio equipmen...

Page 24: ...the screen press SETUP The Digital Setup Menu The DIGITAL SETUP menu lets you adjust the player s audio dynamic range when you have components connected to the player Dynamic Range The DYNAMIC RANGE option allows you to set the compression ratio for the audio line out jack when connected to other components When set to FULL the audio signal peak value has the least amount of compression When set t...

Page 25: ... Use the arrow buttons to highlight the desired setting options explained below and press Enter 4 Use the right arrow button to highlight the setting of the item Press Enter to select 5 To return to the previous menu press the left arrow button if necessary To remove the menu from the screen press SETUP TVGuardian Mode Off No filtering Tolerant Filters only the most offensive foul language Moderat...

Page 26: ... words and phrases that are commonly considered to be offensive It is the parents responsibility to select programming with content suitable for their children TVG will not filter out scenes do voice overs or filter all words and phrases that anyone may consider to be offensive Errors in the CC can cause TVG to miss words or phrases TVG works on media that includes closed captioning information So...

Page 27: ...control and your player They can obstruct the sensor causing the player to malfunction Maybe the batteries in the remote are weak dead or installed incorrectly Replace the batteries and make sure the polarity of the terminals and is correct Disconnect the DC IN plug from your player for a few seconds then plug it back The operating range of the infrared remote control is approximately 9 to 12 feet...

Page 28: ...gues and subtitles may be preset by the DVD disc To change it follow the instructions on page 20 You can also change languages while the disc is playing by pressing the SUBTITLE button This choice applies only to the disc being played If the player s setup menus are not displayed in the language you want check that your language is among those listed in the LANGUAGE SETUP menu page 20 If necessary...

Page 29: ...ing Discs Dirty discs can cause reduced video and audio performance Always keep discs clean by wiping them gently with a soft cloth from the inner edge toward the outer perimeter If a disc becomes dirty wet a soft cloth in water wring it out well Wipe the dirt away gently and remove any water drops with a dry cloth Do not use record cleaning sprays or anti static agents on discs Also never clean t...

Page 30: ...ral recommendations for CD R and CD RW discs but also the following specific recommendations The format of your mp3 files should be ISO 9660 or JOLIET These files are compatible with DOS and Windows applications as well as with Mac OS Your mp3 files must have a name no longer than 12 characters as well as the suffix mp3 They must be recorded in the form title mp3 Ensure that you do not leave space...

Page 31: ...iscs enable up to 74 minutes of VHS quality video associated with still pictures audio tracks and interactive menus to be recorded on a CD Super Video CD SVCD discs SVCD Super Video Compact Disc discs comply with standard IEC62107 making it possible to record up to 70 minutes of digital images and sound at standard MPEG 2 for video and MPEG 1 for audio Compatibility of SVCD discs depends on the MP...

Page 32: ...ranty for the remainder of the original product s warranty period We will bill you a flat exchange charge to replace a defective unit This charge covers the labor cost for its repair How to make a warranty claim Properly pack your unit Include any cables etc which were originally provided with the product We recommend using the original carton and packing materials Proof of purchase in the form of...

Page 33: ...RPOSE ARE HEREBY DISCLAIMED NO VERBAL OR WRITTEN INFORMATION GIVEN BY THOMSON INC ITS AGENTS OR EMPLOYEES SHALL CREATE A GUARANTY OR IN ANY WAY INCREASE THE SCOPE OF THIS WARRANTY REPAIR OR REPLACEMENT AS PROVIDED UNDER THIS WARRANTY IS THE EXCLUSIVE REMEDY OF THE CONSUMER THOMSON INC SHALL NOT BE LIABLE FOR INCIDENTAL OR CONSEQUENTIAL DAMAGES RESULTING FROM THE USE OF THIS PRODUCT OR ARISING OUT ...

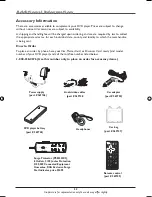
Page 34: ...r Visa MasterCard or Discover Card ready and model number of your DVD player and call the toll free number listed below 1 800 338 0376 Use this number only to place an order for accessory items busy protected wiring reset off Surge Protector PS83202C2 8 Outlets 2100 Joules Protection 100 000 Connected Equipment Guarantee RCA Exclusive Surge Stat Indicator price 34 95 Power supply part 269746 DVD p...

Page 35: ......

Page 36: ...ow or on the carton This will only add delays in service for your product Thomson Inc 10330 North Meridian Street Indianapolis IN 46290 THOMSON Visit the RCA website at www rca com 2005Thomson Inc Trademark s Registered Marca s Registrada s Printed in China TOCOM 1652665A ...

Reviews: