12
Chapter 1
Connections & Setup
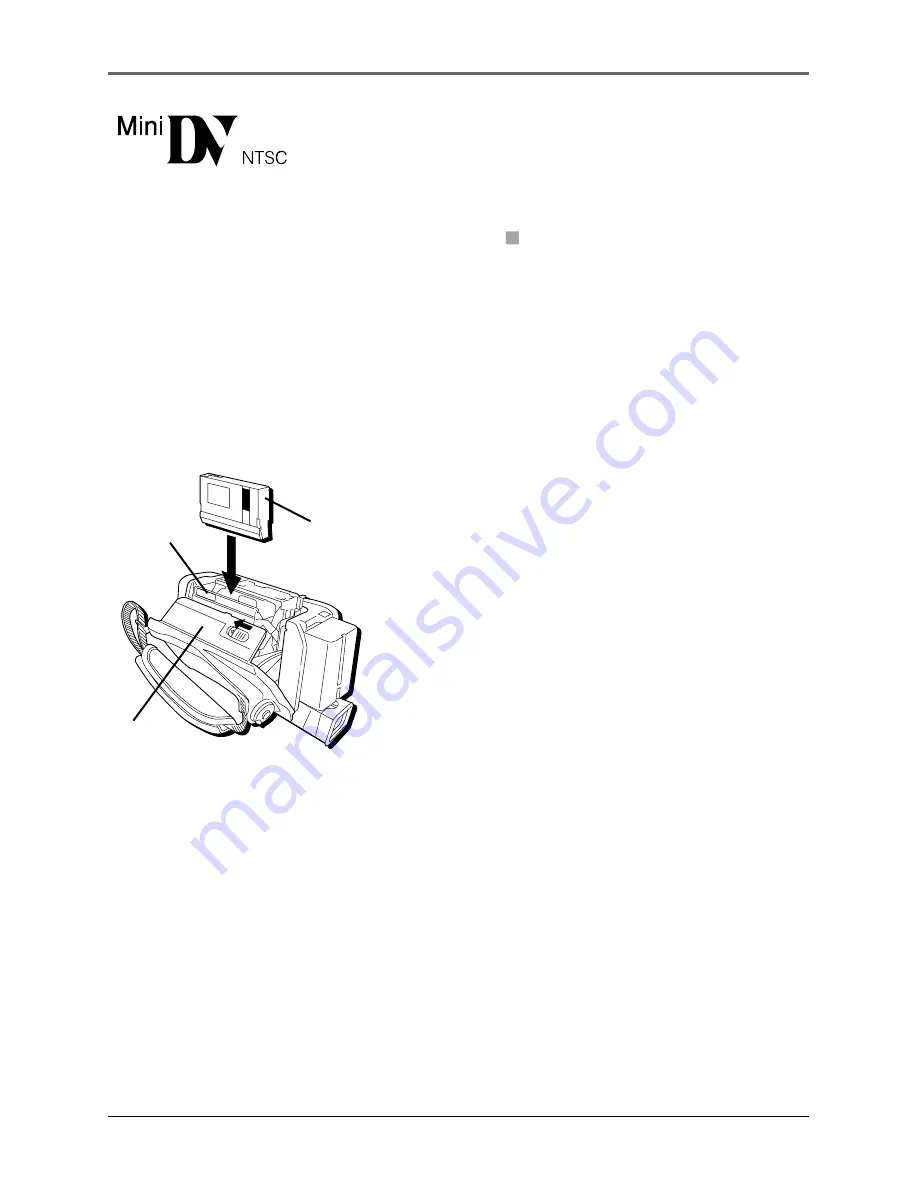
Insert a cassette tape
1.
Make sure the camcorder is connected to a
power supply.
2.
Press in the Lock button while setting the Power
switch to
A
(automatic record).
3.
Slide and hold the OPEN/EJECT switch in the
direction of the arrow then pull the cassette
holder cover open until it locks. Be careful not
to touch the inside of the cassette holder as you
may hurt yourself.
4.
Insert a Mini DV tape with the arrow on the
tape facing down and the tape window facing
out.
Note
: Make sure the Erase Protection tab is in
the position that allows recording. If not,
slide the tab. Some tapes have removable
tabs. If the tab has been removed, cover the
hole with adhesive tape.
5.
Push on the area marked PUSH HERE until the
cassette holder locks into place. (
PAUSE
appears
on the LCD or in the viewfinder.)
Once the cassette holder is closed, it recedes
automatically. Wait until it recedes completely
before closing the cassette holder cover.
6.
To close the cover, slide and hold the OPEN/
EJECT switch in the direction of the arrow again
then close the cover until it firmly locks into
place.
Important:
If the battery is low, you may not
be able to close the cassette holder cover. Do
not apply force. Replace the battery with a
fully charged one or connect the power
supply.
Notes:
•
You can’t open the cassette tape holder
unless a power supply is attached.
•
The cassette tape holder can’t be opened
while the camcorder is in the record
mode.
Mini DV Cassettes
This camcorder is designed to
work exclusively with digital
video cassettes. Only cassettes
marked with a Mini DV logo can
be used with this unit. Also keep
in mind that this camcorder is not
compatible with other digital
media formats.
Mini DV
tape
Cassette
holder
cover
Cassette
holder


