14
Cleaning the Disc
A defective or soiled disc inserted into the unit can
cause sound to drop out during playback.
Handle the disc by holding its inner and outer
edges.
• Do NOT touch the surface of
the unlabeled side of the disc.
• Do NOT stick paper or tape on
the surface.
• Do NOT expose the disc to
direct sunlight or excessive
heat.
• Clean the disc before playback. Wipe the disc
from the center outward with a cleaning cloth.
• NEVER use solvents such as benzine or alcohol to
clean the disc.
• Do NOT use irregular shaped discs (example:
heart shaped, octagonal, etc.). They may cause
malfunctions.
Cleaning the Unit
• Be sure to turn the unit off and disconnect the
power source before maintaining the unit.
• Wipe the unit with a dry soft cloth. If the surfaces
are extremely dirty, wipe clean with a cloth
that has been dipped in a weak soap-and-water
solution and wrung out thoroughly. Then wipe
with a dry cloth.
• Never use alcohol, benzine, thinner, cleaning fluid
or other chemicals. Do NOT use compressed air to
remove dust.
Important Note
• Before transporting the unit, remove any disc
from the disc compartment.
Maintenance
View Mode
16:9 Fill, 16:9 Pillarbox, 4:3 Fill, 4:3 Pan Scan, and 4:3 Letterbox are available for your choice.
Note: Depending on the disc, you may not be able to view the mode as selected.
HDMI Resolution
To select the HDMI resolution to match the capabilities of your TV.
Note: HDMI resolution can be only selected if the HDMI cable is connected to a TV.
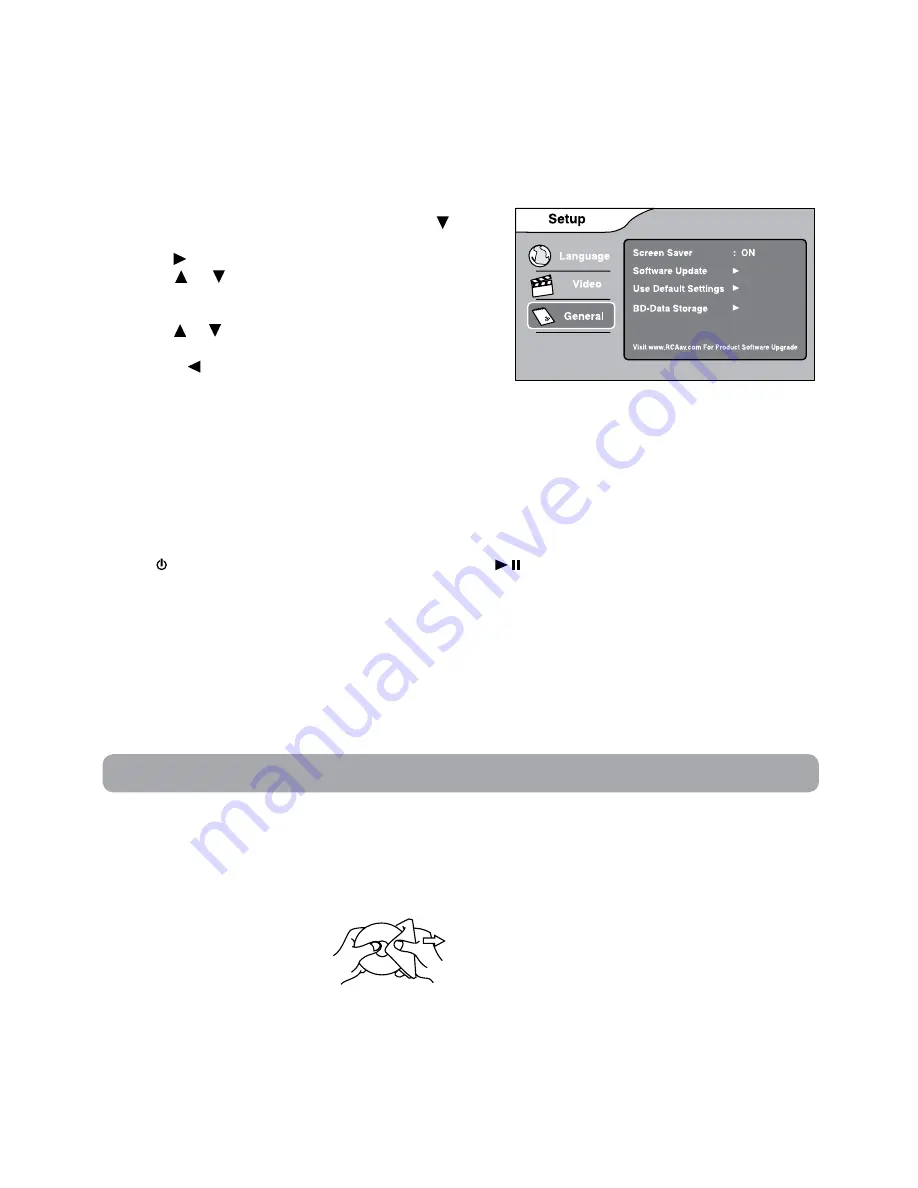
General Setup
1. In STOP mode, press the SETUP button. Press the button
to select General.
2. Use the button to move the highlight bar to the right,
use the or button to select Screen Saver, Software
Update, Use Default Settings and BD-Data Storage, press
the OK button to select.
3. Use the or button to select your settings, then press
the OK button to confirm.
4. Press the button to go back to the previous menu.
Repeat steps 2 and 3 to adjust other options.
5. To exit the SETUP MENU and return to the normal screen, press the EXIT or SETUP button.
Screen Saver
To turn on or off the screen saver (screen protection to prevent image burn).
Note:
• When you leave the unit in stop mode for approximately 5 minutes, the screen saver of the unit
automatically appears if you set the Screen Saver to On mode. To turn off the screen saver, press the PLAY
button.
• When screen saver appears approximately 15 minutes, the unit will automatically turn to STANDBY mode.
Press STANDBY/ON button (on the remote control) or Play/Pause button to turn the product from
STANDBY mode to ON.
Software Update
For future Product Software Upgrades - please visit
www.RCAav.com
for information on updates.
Use Default Settings
Restores your player to the original factory settings. The unit will exit the default setting menu automatically
and re-load the disc in the disc tray.
Note: It will take 3-5 seconds to reset the player to the factory default.
BD-Data Storage
The available storage space is displayed next to BD-Data Storage.


