


14
TV/VCR Features
Using the TV/VCR Features
Viewing Specific Content Themes
After you block specific content themes, you have the option of going
back and changing some of the content themes back to View (
V
).
1.
Determine the rating you want to change to View (
V
).
2.
Continuously press
1
until the rating status corresponding with
the content theme(s) you want to change appears on screen.
3.
To change the content theme to View (
V
), press the number on
the remote that corresponds with the content theme you want to
view.
4
. After you press the number, the
B
should change to
V
in the
content status field.
Note that only the content theme status corresponding to the rating
you selected changes to View (
V
). Higher rated content themes, such
as that for TV-MA language do not change to View (
V
).
Setting Movie Rating Limits
You set movie rating limits by blocking movies rated above a
specified level. To access the
V-CHIP MOVIE RATING LIMIT
menu:
1
. Press
MENU
to access the
TV/VCR MAIN MENU
.
2
. Press 4 to display the
PARENTAL CONTROLS
menu.
3.
Press 2 for the
V-Chip Movie Rating Limit
screen.
Blocking Movie Ratings
If you only want your child to watch movies that have a PG rating
and lower (in other words, movies rated PG and G), then you could
automatically block out all other movies with higher ratings.
To block movies:
1
. Determine the lowest level rating you do not want the child to
watch.
2
. Continuously press 1 until the lowest rating you do not want the
child to watch appears as the rating. (In the example above, you
would keep pressing 1 until the rating status scrolled to PG-13,
since the highest rating you want the child to watch is PG.)
3.
Press 2 to change the status from
View
to
Block
. All higher
ratings’ status will automatically change to
Block
.
4
. Press
MENU
to exit.
• Press
RESET
to return all rating limits to VIEW.
Remember: You must Lock Parental Controls for rating limits to
take effect.
V-CHIP TV RATING LIMIT
1
2 3 4 5 6 7
Rating Status D L S V FV
TV-PG View B V B B
TV-MA B LSV TV-G V
TV-14 B DLSV TV-Y7 VFV
TV-PG V DLSV TV-Y V
Press MENU to exit
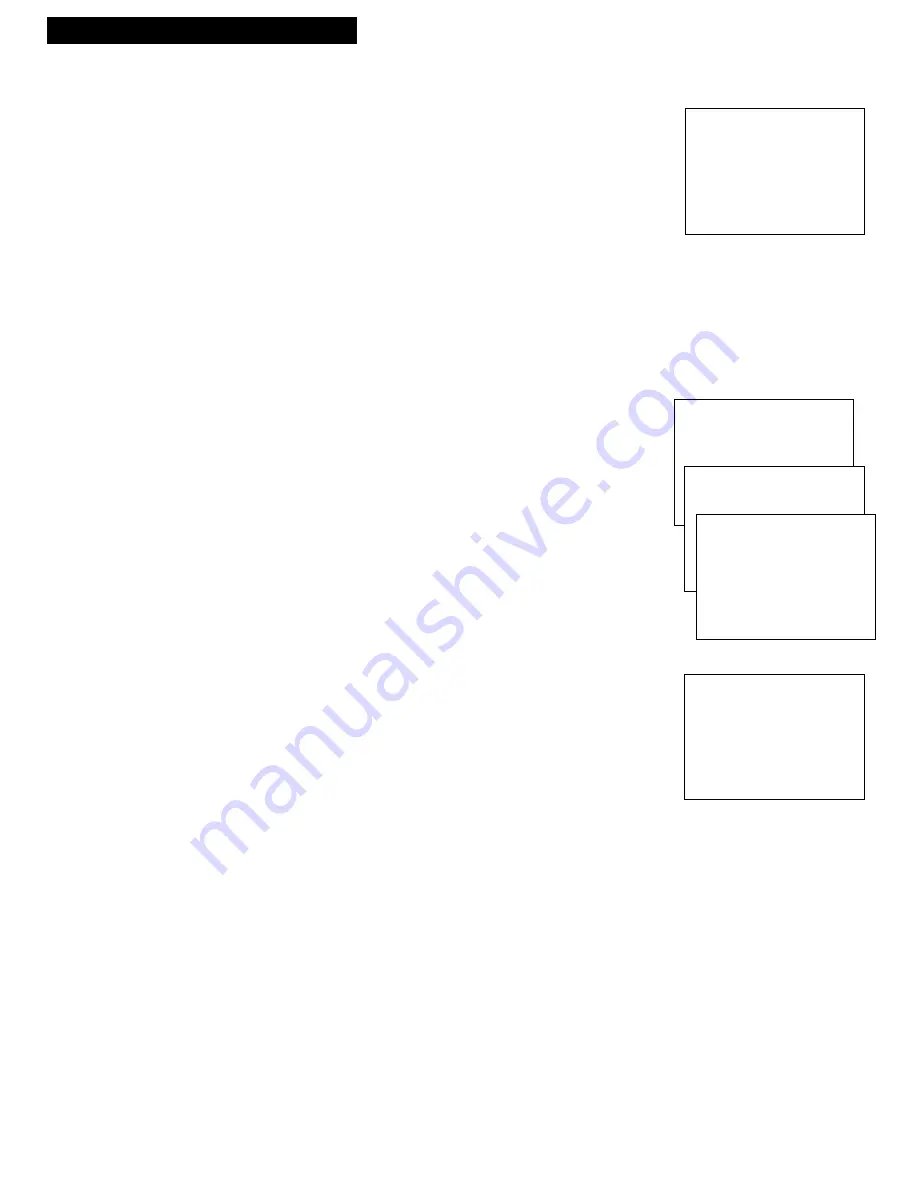
TV/VCR MAIN MENU
1 Screen
2 Time
3 Timer Recordings
4 Parental Controls
PARENTAL CONTROLS
1 V-Chip TV Rating Limit
2 V-Chip Movie Rating Limit
V-CHIP MOVIE RATING LIMIT
Rating Status
1 NR 2 View
NR View PG-13 View
X View PG View
NC-17 View G View
R View
Press MENU to exit
V-CHIP MOVIE RATING LIMIT
Rating Status
1 NR 2 Block
NR Block PG-13 Block
X Block PG View
NC-17 Block G View
R Block
Press MENU to exit
Change the status from View to
Block and all higher rated movies
will also be blocked.


