RCA 1512786B User Manual Download Page 23

21

Interactive Setup

Set the SAT•CABLE Channel

The next step lets you set the SAT•CABLE channel. When you set
the SAT•CABLE channel, you’re telling the TV what channel to
tune to when you press the SAT•CABLE button on the remote.

For example, if you have a cable box connected to the Antenna
jack on the back of the TV, and you usually tune your TV to
channel 3 to see cable stations, you want the TV to tune to
channel 3 when you press SAT•CABLE. If you don’t have a
satellite receiver or cable box connected to the TV, skip this step
or select Not Connected from the SAT•CABLE Channel choice list.
(For more, see Auto Tuning in the Quick Reference section.)
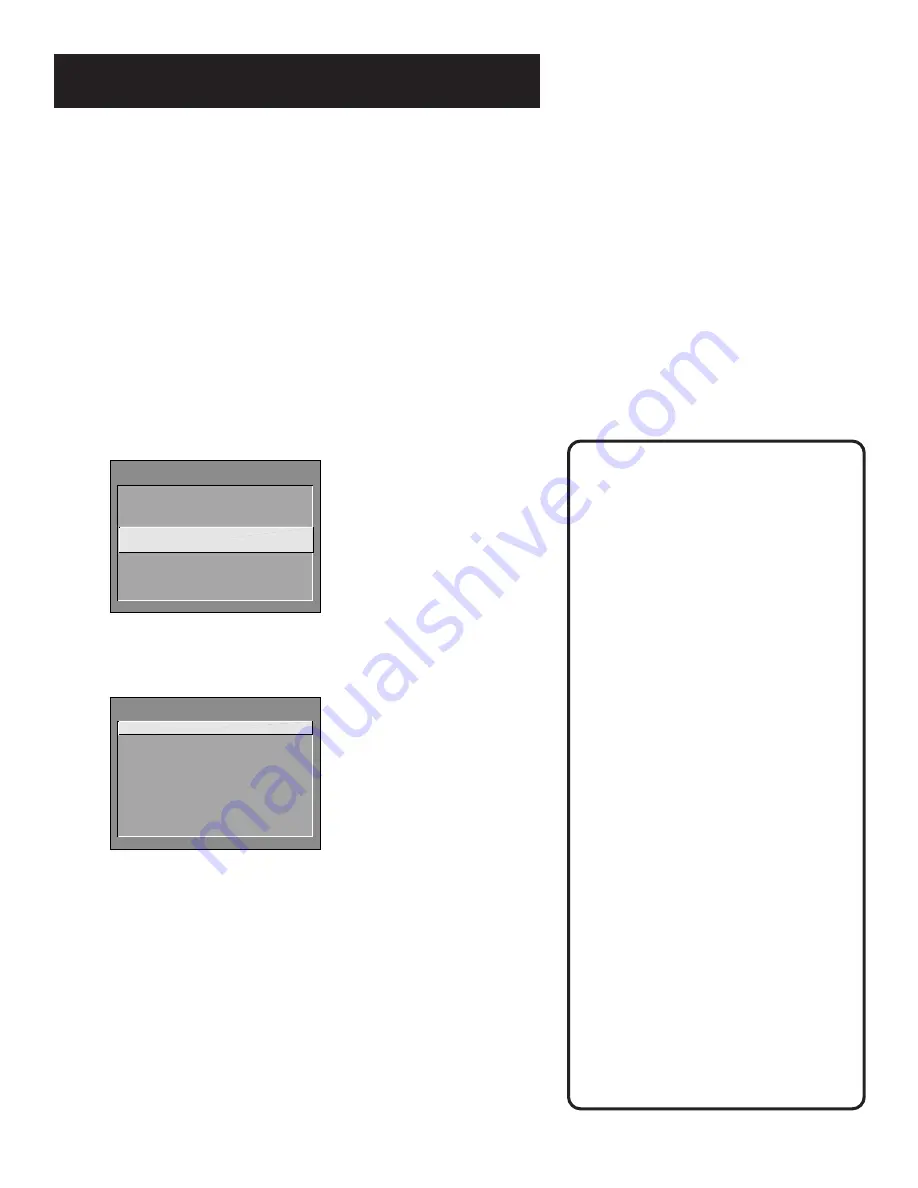
SETUP

Would you like to use a 
cable box or satellite 
unit with your TV?
1 Use with cable 
  or satellite

2


Skip this step

1.

Press MENU to bring up the SAT•CABLE choice list.

SET SAT/CABLE CHANNEL

1 Not connected

2 Channel 2
3 Channel 3
4 Channel 4
5 Video 1 Input
6 Video 2 Input

2.

Point to the choice that matches the way you have your
satellite receiver or cable box connected to the TV.

If you used the Connections Foldout to hook up your TV, use
the table at the right to select the SAT•CABLE channel.

3.

Press MENU to complete the Setup routine and return to TV
viewing.

Important:

If you have both a satellite receiver
and a cable box connected to the TV...

...The remote cannot control both a
cable box and the satellite receiver.
The chart details how to set the
SAT•CABLE button to control the
satellite receiver. You must then use
your cable box remote to control the
cable box. You may, however, prefer
to use the satellite receiver remote
for satellite programming, and set
your SAT•CABLE button to control
your cable box. It’s your choice.

If you used

With Cable Box
Select

Connection A

Ch3 Antenna *

Connection B

Ch3 Antenna *

Connection C

Ch3 Antenna *

Connection D

Ch3 Antenna *

Connection E

Ch3 Antenna *

If you used

With Satellite
Receiver Select

Connection F

Video 1 Input

Connection G

Video 1 Input

Connection H

Video 1 Input

Connection I

Video 1 Input

* Or Ch4 Antenna, depending on how
your VCR’s 3/4 switch is set.

Summary of Contents for 1512786B

Page 1: ...USER S GUIDE C O L O R T V ...

Page 2: ...r jusqú au fond Refer to the identification rating label located on the back panel of your product for its proper operating voltage FCC Regulations state that unauthorized changes or modifications to this equipment may void the user s authority to operate it If fixed non moving images are left on the screen for long periods they may be permanently imprinted on the screen Such images include networ...

Page 3: ...ing Setup 16 Select a Language 16 Auto Channel Search 17 Set the Time 18 Set the VCR1 Channel 19 Set the DVD VCR2 Channel 20 Set the SAT CABLE Channel 21 Label the Channels 22 Programming the Remote 25 Programming the Remote 26 To Control a VCR 26 To Control a DVD Player or Laserdisc Player 28 To Control an RCA Audio Device 28 To Control a Satellite Receiver or Cable Box 29 Using the Remote to Con...

Page 4: ...P Picture in Picture Operation 50 Fetch Menu 52 Choosing an Audio Processor 53 Closed Captioning 54 To display Closed Captioning 54 Closed Captioning Modes 55 On screen Program Details 56 APPENDIX A USING THE TV CONNECTIONS 57 APPENDIX B Connecting other Components 68 APPENDIX C Troubleshooting 70 APPENDIX D Limited Warranty 72 APPENDIX E Care and Cleaning 73 Accessories 74 Index 77 ...

Page 5: ... manual will get your TV up and running You ll learn how to use the menu system run the interactive setup routine and program the remote The rest of the manual gives you the specifics a tour of the TV a quick reference guide the advanced features and appendices Well if your TV s out of the box let s get started First things first Programming the Remote 4 Interactive Setup 3 Using the Menu System 2...

Page 6: ...pulled off This could cause damage to the TV and or personal injury Stands are not available by mail order To locate your nearest RCA dealer call 1 800 336 1900 Step 2 Connecting your TV If you re only going to connect the TV to your home antenna or cable system use the TV Only connection shown below If you re going to connect the TV to a VCR satellite receiver DVD player or other component look a...

Page 7: ...SATELLITE IN CH3 CH4 VIDEO 1 INPUT VIDEO R L MONO ANT S VIDEO AUDIO OUTPUT R L MONO VIDEO 2 INPUT VIDEO R L MONO SATELLITE SIGNAL CABLE CABLE BOX OR ANTENNA G TV VCR AND SATELLITE RECEIVER SATELLITE RECEIVER VCR 1 TV S VIDEO L R VIDEO OUT IN FROM ANT OUT TO TV SATELLITE IN CH3 CH4 IN FROM ANT OUT TO TV OUT VIDEO L R CH3 CH4 VIDEO 1 INPUT VIDEO R L MONO ANT S VIDEO AUDIO OUTPUT R L MONO VIDEO 2 INP...

Page 8: ... the TV The first steps ask you to select your preferred language for the menu system and to begin the auto channel search which puts available cable TV or antenna signals into the TV s memory You must complete the auto channel search After the first two steps you can skip any of the remaining steps and return to them later 2 FAV INPUT ANTENNA SKIP INFO MUTE GO BACK RECORD PAUSE STOP PLAY DVD VCR2...

Page 9: ...You control and customize the TV by making changes to various control panels in the menu system The great thing is you only need to know one rule point and select If you want a lot of cool features you have to use some kind of menuing system Look at it this way you only need to know one rule Using the Menu System ...

Page 10: ...ect The point and select method has two steps 1 Point to a menu item using the MOVE arrows on the remote To point up or down press the up or down arrows To point left or right press the left or right arrows 2 Select a menu item by pressing MENU SELECT Selecting an item tells the TV s menu system to go ahead and make the change or go to a place you have indicated For example to select the Channel m...

Page 11: ... Auto Tuning 0 Exit 4 Point to Exit and press MENU to return to the Main menu 5 Point to Exit and press MENU to leave the menu system and return to TV viewing If you ever want to leave the menu system press CLEAR Once you know how to point and select your way through the menus you can apply this rule in the control panels which do the real work in the menu system ...

Page 12: ... you to another menu or a control panel There are two ways to make a choice in a menu Point and select with the MOVE arrows and MENU Press a number button on the remote For example in the Main menu press 3 to go straight to the Screen menu Exiting a menu There are three ways to exit a menu Point to Exit and press MENU Press 0 on the remote Press CLEAR The on screen displays are cleared from the sc...

Page 13: ...s MENU The Picture Quality menu comes up 3 Press MENU to select Basic Picture Controls PICTURE QUALITY 1 Basic Picture Controls 2 Auto Color 3 Color Warmth 4 Picture Control Presets 5 Video Noise Reduction 0 Exit 5 Press the right or left arrow to adjust the indicator line Notice that the picture changes as you adjust the contrast PICTURE CONTROLS Contrast Color Tint Black Level Sharpness Press ME...

Page 14: ...l menu comes up CHANNEL 1 Signal Type 2 Auto Channel Search 3 List and Labels 4 Channel Directory 5 Auto Tuning 0 Exit 3 Point to Signal Type and press MENU The Signal Type choice list comes up with the current setting highlighted For example SIGNAL TYPE 1 UHF VHF Antenna 2 Cable TV 4 Point to the correct setting for your connection and press MENU As soon as you select a choice the TV saves your c...

Page 15: ... column 5 Press the right arrow to move to the next column then press the up or down arrow to enter a number 6 Repeat Step 5 until you have entered the hour and minute for the current time Notice that when you reach the last column pressing the up or down arrow changes whether the time reads AM or PM 7 When you have entered the correct time press MENU You are returned to the Time menu 8 Point to E...

Page 16: ......

Page 17: ...vailable channels Set the time Set the VCR1 channel Set the DVD VCR2 channel Set the SAT CABLE channel Make the channel list and labels Programming the Remote 4 Interactive Setup 3 Using the Menu System 2 First Things First 1 Complete the first two steps Select Language and Auto Channel Search to receive antenna or cable TV signals After that you can skip other steps and return to them at your con...

Page 18: ...ds to be set up Would you like to begin now 1 Begin setup now 2 Cancel setup 3 Press MENU to begin the Setup routine Select a Language The first part of the setup routine asks you to select your preferred language for the menuing system SETUP Select the language to be used in these menus 1 English 2 Español 3 Français 1 Press MENU to select English as your preferred language for the menuing system...

Page 19: ...gramming SETUP Would you like the TV to search for all available channels 1 Search for channels 2 Skip this step 1 Press MENU to tell the TV to begin searching for channels The display gives you a progress report and tells you when it has finished 2 Press MENU to continue You must complete the Auto Channel Search to receive TV signals and put channels in memory Auto Channel Search can also be acce...

Page 20: ... the TV 1 Set time 2 Skip this step 1 Press MENU to bring up the Set Time control panel SET TIME AM Enter 01 to 12 for the hour Press MENU to exit 2 Use the left and right arrows to point to the hour and minutes spaces Use the up and down arrows to scroll through the numbers and change from AM to PM 3 Press MENU to continue ...

Page 21: ... SETUP Would you like to use a VCR with your TV 1 Use TV with a VCR 2 Skip this step 1 Press MENU to bring up the VCR1 choice list SET VCR1 CHANNEL 1 Not connected 2 Channel 3 3 Channel 4 4 Video 1 Input 5 Video 2 Input 2 Point to the choice that matches the way you have your VCR connected to the TV If you used the Connections Foldout to hook up your TV use the table shown at the right to select t...

Page 22: ...u like to use a DVD player or a second VCR with your TV 1 Use TV with a DVD or VCR 2 Skip this step 1 Press MENU to bring up the DVD VCR2 choice list SET DVD VCR2 CHANNEL 1 Not connected 2 Channel 3 3 Channel 4 4 Video 1 Input 5 Video 2 Input 2 Point to the choice that matches the way you have your DVD player or second VCR connected to the TV If you used the Connections Foldout to hook up your TV ...

Page 23: ...2 Point to the choice that matches the way you have your satellite receiver or cable box connected to the TV If you used the Connections Foldout to hook up your TV use the table at the right to select the SAT CABLE channel 3 Press MENU to complete the Setup routine and return to TV viewing Important If you have both a satellite receiver and a cable box connected to the TV The remote cannot control...

Page 24: ... numbers and letters and select Yes or No in the Normal List field You may wish to refer to the call letters listed in your newspaper s TV section for ideas on labelling the channels 4 Repeat this process for each of your channels Then press MENU to continue Use the CH channel up or CH v channel down buttons to change channels in the Chan field This works even if you re not in the Chan field Or en...

Page 25: ...setup you can sit back relax and enjoy the TV Or Program the Remote Since you ve gone this far you can take a few minutes to program the remote to control your VCR DVD player laserdisc player and other component To find out how to program the remote go to the next section ...

Page 26: ......

Page 27: ...oxes If you have an RCA GE or ProScan component you probably don t need to program it at all other manufacturer s brands need to be programmed Now watch some TV Once you ve programmed the remote you will have completed all four setup sections Now you can sit back and enjoy the TV If you want to know more about the different parts of the TV see the next section Tour of the TV Refer to the other sec...

Page 28: ... to control your VCR 1 Turn on the VCR to be programmed 2 Look up your VCR brand and code number s on the code list on the next page 3 Press and hold the VCR1 button on the remote 4 Enter the two digit code from the code list 5 Release VCR1 then press POWER to see if the VCR responds to the remote commands If it doesn t try pressing VCR1 and POWER to see if the VCR responds 6 Repeat these steps us...

Page 29: ... 44 46 61 Marta 09 MEI 08 Memorex 08 09 12 15 MGA 04 27 Midland 32 Minolta 05 35 Mitsubishi 04 05 27 35 40 Montgomery Ward 06 MTC 07 15 Multitech 07 15 31 32 NEC 02 14 16 30 44 46 59 61 64 Panasonic 08 53 75 77 Pentax 05 35 44 Pentex Research 46 Philco 08 29 53 56 Philips 08 29 Pioneer 05 16 50 Portland 44 45 52 ProScan 00 Quartz 02 Quasar 08 53 RCA 00 05 07 08 28 35 37 54 69 Radio Shack Realistic...

Page 30: ... for your brand until the device responds to the remote commands Programming the Remote to Control an RCA Audio Device Your remote controls only RCA audio equipment such as an audio receiver or amplifier it does not control other brands of audio equipment Also the remote may need to be programmed for your equipment This remote may not operate all models of the brands that are shown at right Use th...

Page 31: ...d with the correct codes you are ready to use it to control your devices To operate the device 1 Press the device button TV VCR1 SAT CABLE DVD VCR2 or AUDIO to set the remote to control the device 2 Press POWER to turn the device off or on 3 Use the remote buttons that apply to that device ABC 22 46 53 54 Anvision 07 08 Cablestar 07 08 Chaparral 80 81 Cheyenne 81 Diamond 56 Drake 82 83 Eagle 07 08...

Page 32: ......

Page 33: ...31 A picture book tour This section talks about the TV s main parts at least the parts you ll actually use The Remote Control The Channel Marker The Back Panel The Front Panel Tour of the TV ...

Page 34: ... and hold to continue changing channels INFO Brings up channel information Press repeatedly to see detailed program information if available SKIP Press once before changing channels and the TV will wait 30 seconds before returning you to the original channel Press repeatedly to add more time MUTE Reduces the TV s volume to it s minimum level Press again to restore the volume GO BACK Returns you to...

Page 35: ...Used to point to different items in the menu system Also used to adjust the menu controls Also move the PIP window when no menus are on the screen PIP Brings up the small picture in picture window Press again to remove the PIP window FETCH Brings up the FETCH menu Point to different menu items with the arrow buttons Press MENU to select a highlighted FETCH menu item SWAP Swaps the main picture wit...

Page 36: ...ke sure to connect the three audio video cables as well as the S Video connector INPUT 2 Provides a connection for a second video component such as a VCR satellite receiver DVD player or laserdisc player L MONO Provides left audio connection Or if you are connecting a mono component use the L MONO input The left audio connector is usually white RIGHT Provides right audio connection The right audio...

Page 37: ...ifier that does not have its own volume control or remote control Fixed output is ideal when connecting to an A V receiver or amplifier that has its own remote control You can choose the type of audio output by selecting the Audio Output Speakers control panel in the Audio menu To connect an amplified subwoofer to the TV use the left L AUDIO OUTPUT jack ...

Page 38: ...ses the volume When in the menu system VOL is used to point left to items and adjust menu controls VOL Increases the volume When in the menu system VOL is used to point right to items and adjust menu controls POWER Turns the TV on and off The front panel above shows a typical button layout The exact look of the buttons may be different from those on the front of your TV If you turn Parental Contro...

Page 39: ...he current channel SAP Displayed when the current channel is broadcasting SAP Second Audio Program information PIP Chan Displays the current PIP channel VCR Displays the label assigned to the current channel VID1 Displays the current channel or input channel Remote batteries are low Displayed when the batteries in the remote need to be replaced Sleep Displayed when the Sleep Timer has been set 00 ...

Page 40: ......

Page 41: ...ode and display Channel Contains all the commands used to control your channels including custom building your channel list and setting up your TV to control the components connected to the TV Time Contains the controls that let you set the time and schedule the TV to turn off and on at specific times Parental Controls Contains the controls that let you block out specific channels and locks the TV...

Page 42: ...maximum volume range adjusts too Second Audio Program SAP Plays the program s audio in a second language if one is available The TV displays the word SAP when you tune to a program that is broadcast with SAP information SAP audio is broadcast in mono Audio Output Volume Speakers Displays a choice list that lets you turn the TV s internal speakers on or off and set the audio outputs to fixed level ...

Page 43: ...s Color Warmth Displays a choice list that lets you set one of three automatic color adjustments Cool for a more blue palette of picture colors Normal and Warm for a more red palette of picture colors Picture Control Presets Displays a choice list that lets you select one of three preset picture settings Bright Lighting Normal Lighting or Soft Lighting Choose the setting that is best for your view...

Page 44: ...Displays a choice list that lets you choose which captioning mode is used for displaying captioning information Menu Language Displays a choice list that lets you select your preferred language English French or Spanish Picture Tilt 31 screen size or above only Your TV has an extra large color picture tube 31 or above which makes it vulnerable to the effects of the Earth s magnetic field You may n...

Page 45: ...e whether the channel number indicated is included Yes or is not included No in the Normal channel list Chan Labels Use the up and down arrows to enter a six character label for each channel Hold the button down to scroll quickly through the characters Press RESET to clear a label The TV can store up to 27 labels in memory Channel Directory Displays all of the labeled channels In the Channel Direc...

Page 46: ...ess the specified component button Reminder Make sure the component s Ch 2 3 4 switch is set to channel 2 Channel 3 Choose this if your component is connected to the antenna jack on the back of the TV and you want the TV to tune to channel 3 when you press the specified component button Reminder Make sure the component s Ch 3 4 switch is set to channel 3 Channel 4 Choose this if your component is ...

Page 47: ...e amount of time you want to give the TV before it shuts itself off Schedule Displays a control panel that lets you set up a schedule for turning the TV on and off automatically Make sure to turn the schedule On The on screen directions guide you through the steps needed to set the schedule Set Time Displays a control panel that lets you enter the current time The on screen directions guide you th...

Page 48: ...plays a control panel that lets you decide when a channel can be viewed Off All channels are available On Always The front panel CH channel buttons will tune only to channels that you have marked as Parent Approved The remote will still tune to any channel Scheduled Selected channels will be blocked out between start and stop times you enter in the control panel The front panel CH channel buttons ...

Page 49: ...5 Time 6 Parental Control 7 Setup 0 Exit SETUP When first used or after a power outage your television needs to be set up Would you like to begin now 1 Begin setup now 2 Cancel setup Setup Menu The setup routine is detailed earlier in the manual in the Interactive Setup section ...

Page 50: ......

Page 51: ...ures PIP Picture in Picture Operation Fetch Menu Display Choosing an audio processor Using Closed Captioning Displaying on screen Program Details For more about the different menus and control panels in the menu system see the Quick Reference section Advanced Features ...

Page 52: ...ow and the main picture For instance press PIP to bring up the PIP window You can change channels by entering channel numbers or pressing the CH channel up or CH v channel down buttons When you press the CH CTRL button the channel control switches to the main picture You can now change channels in the main picture by entering channel numbers or pressing the CH channel up or CH v channel down butto...

Page 53: ...ture and the PIP window 2 Press the CH channel up or CH v channel down buttons The main picture surfs through the channel list When the SKIP feature times out the original channel will return automatically to the main picture Channel Surfing in the PIP Window You can use the PIP window to surf through channels as well 1 Press PIP to bring up the PIP window 2 Press the CH channel up or CH v channel...

Page 54: ...ble the buttons on the front of the TV Parental Controls Select this item to display the Parental Controls menu Select a menu item to go to the desired control panel Schedule Displays a control panel that lets you program the TV to turn on and off automatically Make sure to turn the schedule On Begin Setup Starts the Interactive Setup routine that lets you choose a menu language search for availab...

Page 55: ... separation to stereo audio signals Enhanced SRS Stereo Enhances the SRS signal to give the impression of even greater depth and stereo separation Sound Logic Stereo Sound Logic monitors a program s audio track and limits the volume to a minimum and maximum volume range Whenever you adjust the volume on the TV the minimum and maximum volume range adjusts too Second Audio Program SAP Plays the prog...

Page 56: ...ress MENU to select Closed Caption Display CLOSED CAPTION DISPLAY 1 Off 2 On Always 3 On when sound is muted Off No closed captioning information will be displayed On Always Closed captioning will be displayed whenever it is available On when sound is muted Closed captioning will be displayed only when you have muted the sound by pressing the MUTE button 4 Point to your choice and press MENU to se...

Page 57: ...ext2 7 Text3 8 Text4 3 Point to your choice and press MENU to select it and return to the Screen menu Turning off Closed Captioning 1 Select Screen from the Main menu 2 Press MENU to select Closed Caption Display 3 Point to Off and press MENU The closed captioning is turned off and you are returned to the Screen menu If you are unsure of the differences among the modes you may prefer to leave the ...

Page 58: ...creen program details 1 Press INFO once to bring up the channel marker 2 Press INFO again to bring up the program title the program s length and elapsed time 3 Press INFO again to bring up and other program details such as the story line and whether Closed Captioning is available 4 Press INFO again to clear the screen Whether all or any of the program details are displayed depends on whether the p...

Page 59: ...u connect your components Try not to coil any twin lead cables and keep them away from the audio video cables as much as possible Make sure all antennas and cables are properly grounded Refer to the Safety Tips sheet packed with your TV Protect your components from overheating Do not block ventilation holes in any of the components Arrange the components so that air can circulate freely Do not sta...

Page 60: ... Things First then follow the steps in the Interactive Setup Using Connection A To watch TV programs 1 Turn VCR off 2 Press TV and tune to a channel To record one program and watch another 1 Press VCR1 and tune to a channel 2 Begin recording 3 Make sure the TV VCR switch on the VCR is set to TV 4 Press TV and tune to a channel To play a tape on the VCR 1 Press VCR1 2 Press PLAY See Connections Fol...

Page 61: ...urn to First Things First then follow the steps in the Interactive Setup Using Connection B To watch TV programs 1 Turn VCR off 2 Press TV and tune to a channel To record one program and watch another 1 Press VCR1 and tune to a channel 2 Begin recording 3 Make sure the TV VCR switch on the VCR is set to TV 4 Press TV and tune to a channel To play a tape on the VCR 1 Press VCR1 2 Press PLAY APPENDI...

Page 62: ...low the steps in the Interactive Setup Using Connection C To watch TV programs 1 Turn VCR off 2 Press TV and tune to a channel To record one program and watch another 1 Press VCR1 and tune to a channel 2 Begin recording 3 Make sure the TV VCR switch on the VCR is set to TV 4 Press TV and tune to a channel To play a tape on the VCR 1 Press VCR1 2 Press PLAY To play a disc 1 Press DVD VCR2 2 Press P...

Page 63: ... recording 4 Make sure the TV VCR switch on the VCR1 is set to TV 5 Press TV and tune to a channel To play a tape on the VCR 1 Press VCR1 2 Press PLAY You can record from one tape to another tape dubbing 1 Insert original tape into VCR2 2 Insert blank tape into VCR1 3 Press VCR1 4 Set VCR to line input for more see your VCR User Manual 5 Press RECORD to begin recording 6 Press DVD VCR2 then press ...

Page 64: ... cable optional To connect 1 Connect cables as shown in Connection E 2 Return to First Things First then follow the steps in the Interactive Setup Using Connection E To watch TV programs 1 Press TV and tune to a channel To play a disc 1 Press DVD VCR2 2 Press PLAY See Connections Foldout Connection E DVD PLAYER TV S VIDEO L R VIDEO OUT INPUT 1 VIDEO R L MONO ANT S VIDEO AUDIO OUTPUT R L INPUT 2 VI...

Page 65: ... connect 1 Connect cables as shown in Connection F 2 Return to First Things First then follow the steps in the Interactive Setup Using Connection F To watch TV programs 1 Turn satellite receiver off 2 Press TV and tune to a channel To watch satellite programming 1 Press SAT CABLE and tune to a channel See Connections Foldout Connection F SATELLITE RECEIVER TV S VIDEO L R VIDEO OUT IN FROM ANT OUT ...

Page 66: ...tellite receiver off 2 Press TV and tune to a channel To watch Satellite programming 1 Press SAT CABLE and tune to a channel To record off air broadcasts and watch a different channel 1 Turn satellite receiver off 2 Press VCR1 and tune to a channel 3 Begin recording 4 To watch another channel make sure the TV VCR switch on the VCR is set to TV then press TV and tune to a channel To play a tape on ...

Page 67: ...l To watch satellite programming 1 Press SAT CABLE and tune to a channel To record off air cable or antenna broadcasts and watch a different channel 1 Turn satellite receiver off 2 Press VCR1 and tune to a channel 3 Press RECORD to begin recording 4 To watch another channel make sure the TV VCR switch on the VCR is set to TV then press TV and tune to a channel To play a tape on the VCR 1 Press VCR...

Page 68: ...serdisc player off 2 Press TV and tune to a channel To watch Satellite programming 1 Press SAT CABLE and tune to a channel To record from one VCR to the other tape dubbing 1 Turn satellite receiver off 2 Insert original tape into VCR2 3 Insert blank tape into VCR1 4 Press VCR1 5 Set VCR to line input for more see your VCR User Manual 6 Press RECORD to begin recording 7 Press DVD VCR2 then press PL...

Page 69: ...CR2 2 Insert blank tape into VCR1 3 Press VCR1 4 Make sure to set VCR1 to line input 5 Press RECORD to begin recording 6 To watch another channel make sure the TV VCR switch on the VCR is set to TV then press TV and tune to a channel To play a tape on VCR1 1 Press VCR1 and then press PLAY APPENDIX A USING CONNECTION I Note The unauthorized recording of copyrighted material may infringe the rights ...

Page 70: ...e control you may prefer to select the fixed output settings Important Do not use the amplifier s PHONO inputs If the amplifier is not stereo use the L AUDIO OUT jack Consult the amplifier s owner s manual for the manufacturer s recommended hookup Connecting a Subwoofer To connect a subwoofer to the TV 1 Connect the subwoofer s audio input to the left L AUDIO OUT jack Connecting a tape deck To use...

Page 71: ...the channel marker displays VID1 3 Start playback on the camcorder Playback from an S VHS camcorder To connect a camcorder with S Video capability 1 Connect an S Video cable from the camcorder to the S VIDEO jack on the TV 2 Connect the camcorder s audio video outputs to the INPUT 1 audio and video jacks on the TV 3 Press INPUT on the remote until the channel marker displays VID1 4 Start playback ...

Page 72: ...g is between the remote and the remote sensor Maybe the remote is not aimed directly at the component TV or VCR you are trying to control Maybe remote is not in TV Mode Press the TV button so remote will control TV Maybe batteries in remote are weak dead or installed incorrectly Try replacing batteries Note if you remove the batteries you may have reprogram the remote to control other components T...

Page 73: ...the TV VCR switch on the VCR is in the correct position Noisy stereo reception May be a weak station Use SOUND button to change to mono mode instead of stereo No picture no sound but power light is on Maybe the cable air function is set to the wrong position Maybe a vacant channel is tuned If watching VCR connected only through antenna input make sure TV is tuned to channel 3 or 4 same as CH3 4 sw...

Page 74: ...r evidence of purchase date or first rental What your warranty does not cover Customer instruction Your Owner s Manual clearly describes how to install adjust and operate your television Any additional information should be obtained from your dealer Installation and related adjustments Signal reception problems not caused by your television Damage from misuse or neglect Batteries Customer replacea...

Page 75: ... furniture polish on the TV cabinet or screen While cleaning do not spray liquid directly on the screen or allow liquid to run down the screen and inside the TV Also avoid placing drinks or vases with water on top of the TV This could increase the risk of fire or shock hazard or damage to the TV Caution If fixed non moving images are left on the screen for long periods they may be permanently impr...

Page 76: ... available from most dealers and electronics supply stores in case you want to position your components farther apart or need additional cables Antenna Cables Screw on Cable attaches to the round antenna connectors called 75 ohm F type on the back of your VCR or TV The ends screw onto the connectors for a secure connection Push on Cable attaches to the round antenna connectors called 75 ohm F type...

Page 77: ... are subject to availability Where applicable we will ship a superseding model 2 FAV INPUT ANTENNA SKIP INFO MUTE GO BACK RECORD PAUSE STOP PLAY DVD VCR2 AUDIO REVERSE FORWARD CLEAR RESET PIP SWAP FETCH CH CTRL MOVE M E N U S E L E C T 3 1 5 6 4 8 0 9 7 CH CH POWE R VCR1 SAT CABL E TV V O L V O L SOUND Signal Splitter AH047 3 95 Gold Tip Push on Antenna Cable 6 ft AH065G 5 95 Gold Tip Push on Ante...

Page 78: ...tems listed on this order form 1 800 338 0376 r r s TM Charge your order on your VISA or MasterCard by filling in below USE YOUR CREDIT CARD IMPORTANT Copy complete account number from your VISA card IMPORTANT Copy complete account number from your MasterCard My card expires My card expires Copy Number above your name on MasterCard AUTHORIZED SIGNATURE Prices are subject to change without notice P...

Page 79: ...2 43 Language 16 42 M Memory 43 Menu Language 16 42 Menus 10 Mono 40 53 MOVE buttons 50 Mute 37 40 N Normal List 43 O On screen Program Details 56 Outputs 35 P Parent Approved 46 Parental Controls Channel Block 46 Fetch menu 52 Front Panel Lockout 46 Parental Controls menu 46 Picture Control Presets 41 Picture Quality menu 41 Picture Tilt 42 PIP Picture in Picture 50 PIP Chan 37 PIP button 50 Poin...

Page 80: ...soy based For a free brochure regarding Thomson s Environmental Health and Safety Programs write to Thomson Consumer Electronics address below attention Environmental Programs INH340 CREATING A GREENER FUTURE At Thomson Consumer Electronics we are dedicated to the preservation of our natural heritage and to a healthy and safe way of life for current and future generations This is a global effort w...

Reviews: