2
Attaching Speaker Wires
The CTx Series uses spring-loaded speaker wire terminals to
firmly hold either a pin connector or bare speaker wire. To
obtain a better connection, it is important to slightly tug
on the wires after they have been secured in the terminals.
This will cause the small teeth inside the connectors to
'bite' into the wire. It is recommended that you use wire
which is color-coded or marked on one side. If the distance
is less than 50 feet long from the amplifier or receiver to
the speaker, use 16-gauge or larger wire; if the distance is
more than 50 feet long, use 14-gauge wire.
WARNING:
Avoid routing the speaker wire near other electrical
wires, and avoid nailing or stapling the speaker wire.
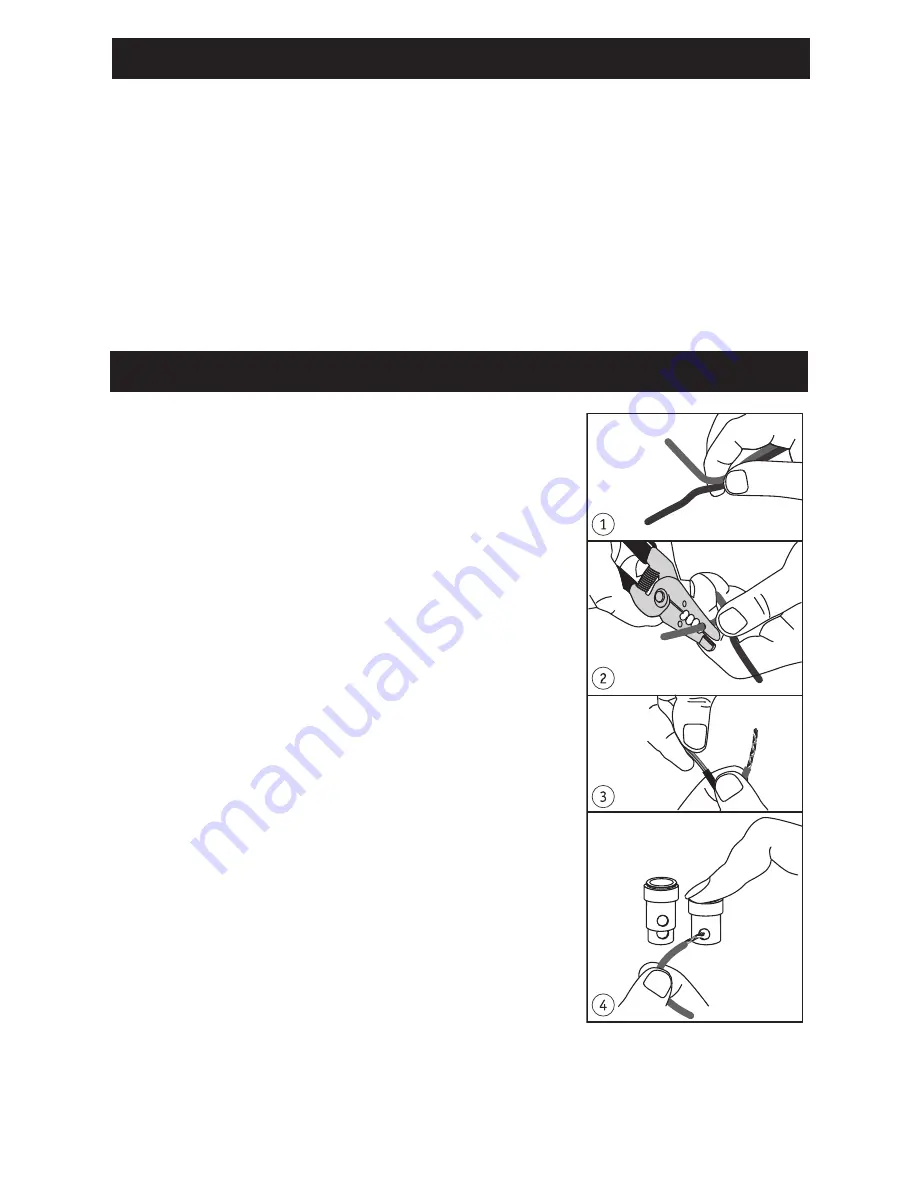
1. Separate the last 4 inches of the speaker wire conductors
at each end of the wire.
2. Use a wire stripper to remove about ¼-inch of insulation
from the end of each conductor.
3. Twist the ends of each conductor to secure loose strands.
4. Connect the positive wire to the red terminal on the
back of the speaker by pressing down on the red positive
(+) terminal's tab, inserting the end of the positive
conductor, and releasing the tab.
5. Repeat this procedure to connect the negative conductor
to the black negative (-) terminal.
Features
an extensive crossover network. Steep acoustic slope crossovers are used to integrate
drivers. The use of steep crossover slopes allows for higher power handling, minimizes
driver interaction anomalies, and maximizes the ability of each driver in their respective
band of frequencies.
Cabinets are constructed of fiber-reinforced polymer matrix composite. The rounded inte-
riors prevent the “standing wave” effect resulting in clean, uncolored sound. The speakers
virtually disappear leaving only a deep, wide sound stage with pinpoint imaging. The MM-4x
and C-4x has metal keyhole mounts for direct wall mounting as well as female 1/4-inch 20
TPI threads in back and bottom (MM-4x only) for optional bracket mounting.


