background image


Static green         


Fully charged 


CONNECTING YOUR HEADSET 

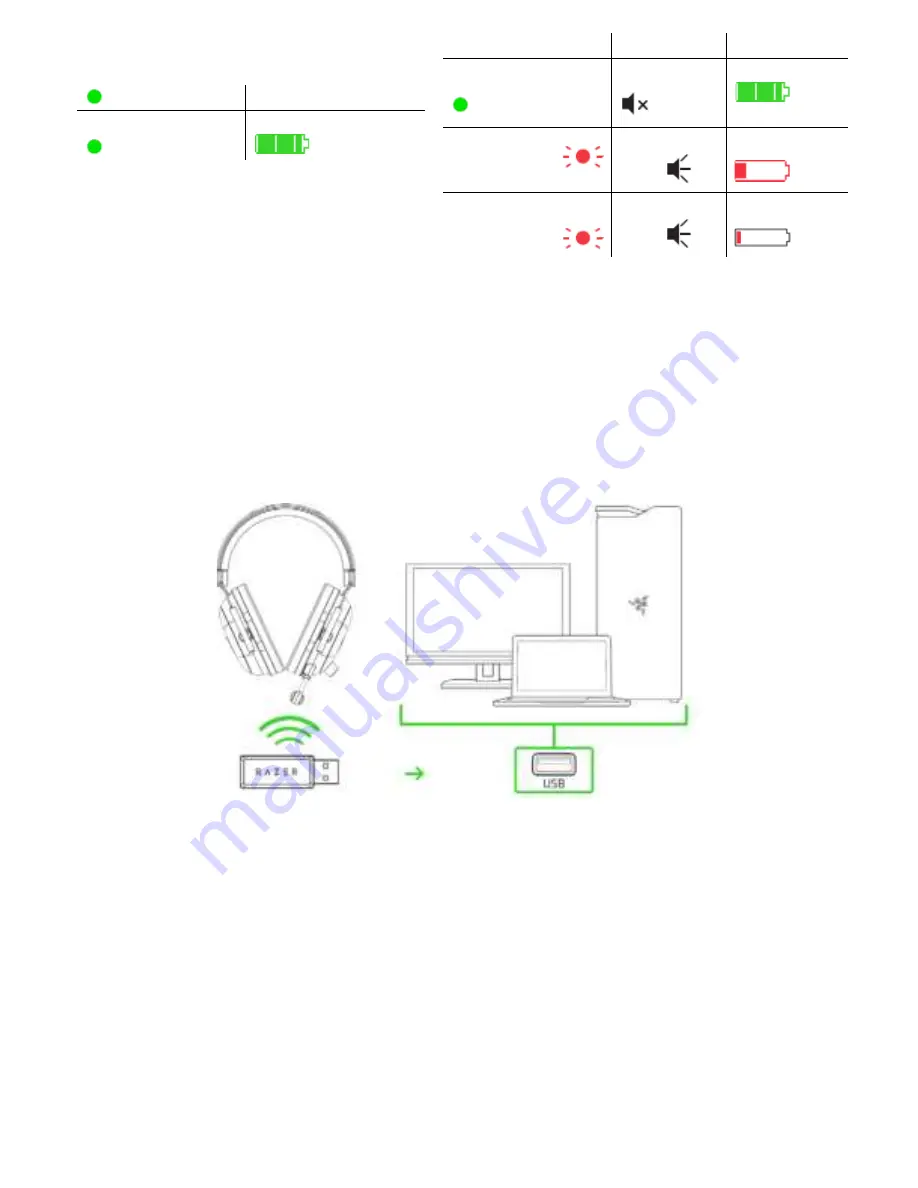
A. TO YOUR PC VIA USB PORT 

1.  Plug the USB wireless transceiver to your PC.  


2.  Press and hold the power button until the status indicator is lit, or until you hear a tone.


Indicator 

Sound 

Battery Status  

Static green         


None              


Fully 
charged 


Slow blinking         
red                

Warning 

tone  


Low (30%) 


Rapid blinking        
red          

Warning 

tone  


Critical(10%)    


F O R   G A M E R S .   B Y   G A M E R S .


3


Summary of Contents for RZ04-0322

Page 1: ...Dat 06 May 2020 Product Manual for Gaming Headset Model RZ04 0322...

Page 2: ...dset Model RZ04 0322 djustable padded headband ltra soft breathable memory foam ear cushions olume knob 5 mm audio mic jack harging port tatus indicator ic mute button H Power button Removable RazerTM...

Page 3: ...DED PRODUCT REQUIREMENTS PC with a free USB port Devices with 3 5 mm combo jack RAZER SYNAPSE REQUIREMENTS Windows 7 64 bit or higher Internet connection for software installation Compatible with PC M...

Page 4: ...e with a 2 year limited warranty coverage Now maximize its potential and score exclusive Razer benefits by registering at razerid razer com Got a question Ask the Razer Support Team at support razer c...

Page 5: ...rt using the charging cable For best results please fully charge your headset before using it for the first time A depleted unit will fully charge in about 3 hours STATUS INDICATOR BEHAVIORS When plug...

Page 6: ...wireless transceiver to your PC 2 Press and hold the power button until the status indicator is lit or until you hear a tone Indicator Sound Battery Status Static green None Fully charged Slow blinkin...

Page 7: ...connected to the USB wireless transceiver Indicator Status Blinking blue Pairing Static blue Connected 4 On your PC right click on the sound icon on the system tray and then select Sounds 5 On the Pla...

Page 8: ...ver to your device and make sure your Razer BlackShark V2 Pro is the default input and output audio device C TO DEVICES VIA 3 5MM COMBO PORT If your device has a 3 5mm audio mic combined jack simply p...

Page 9: ...ack While powered on press the power button to play or pause the current track Next track Previous track While powered on double press the power button to go to the next track While powered off triple...

Page 10: ...percardioid Mic to the headphone and bend until it is parallel to your mouth Make sure the mic diaphragm is in front and the air vent is facing away from your mouth MUTING UNMUTING THE MICROPHONE Pres...

Page 11: ...head to minimize headband stress However please avoid overstretching the headset beyond its technical limits ACTIVATE THX SPATIAL AUDIO Unleash the full potential of your Razer BlackShark V2 Pro by e...

Page 12: ...new headset at support razer com SAFETY AND MAINTENANCE SAFETY GUIDELINES In order to achieve maximum safety while using your Razer BlackShark V2 Pro we suggest that you adopt the following guideline...

Page 13: ...sulting in lowered awareness of your external surroundings Please remove the device when engaging in any activities that requires active awareness of your surroundings Listening to excessively loud vo...

Page 14: ...o the Product may differ from pictures whether on packaging or otherwise Razer assumes no responsibility for such differences or for any errors that may appear Information contained herein is subject...

Page 15: ...FOR GAMERS BY GAMERS 6...

Page 16: ...FOR GAMERS BY GAMERS 7...

Page 17: ...e complies with Part 15 of the FCC Rules Operation is subject to the following two conditions 1 this device may not cause harmful interference and 2 this device must accept any interference received i...

Reviews: