background image

10

Trouble Shooting

ensure all tests are undertaken by a qualified, trained engineer.

ensure safe working practices are followed at all times


Step 1: Basics


• Check polarity of WHITe-LIGHT Lamp connection

  red=+ve, black=-ve

• Check telemetry link is in

• Check photocell is working

• Check power setting pot fully clockwise

• Check mains input

• Check fuse intact


If OK…


Step 2: Lamp Test

Check voltage of lamp o/p approx 14V


Check current of lamp – see instructions for correct current setting


To check lamp current (this must be done while both Led panels 

are connected to the PSU) ve Led from both lamp supply 

cables and connect multimeter set to 10A current in line with the 

lamp. [One lead of multimeter in common (COM), other lead into 

10A socket of multimeter; set multimeter to 10A readings]. Refer to 

PSU Specifications for correct current settings, see pages 7.

Summary of Contents for RAYLUX URBAN UBA48

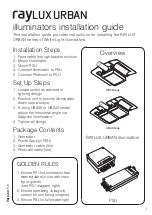
Page 1: ...fixings Package Contents 1 Illuminator 2 Power Supply PSU 3 Illuminator cable 5m 4 Photocell cable 5m illuminators installation guide LUXURBAN 1 RAYLUX URBAN illuminators PSU Overview This installati...

Page 2: ...hange without notice Installation to be carried out by suitable trained and qualified personnel 2 Photocell input LED output 2 Mains input LED output 1 1 5m LED output 2 LED output 1 Photocell input M...

Page 3: ...nt and secure illuminator Typically Column Mounted Mount PSU Suitable for inside most general lighting columns excluding UBA48 can also be mounted ex ternally If external ensure glands are facing down...

Page 4: ...r adjust available if required see PSU diagrams pages 8 9 4 Locate unit s as advised in lighting design 1 Position unit to provide illumination down onto a scene 2 If using UBA48 or UBA32 model adjust...

Page 5: ...diameter 28 UBF Range UBA Version Wall Bracket Finished in Silver o d outside diameter 42 4 i d inside diameter 34 4 Top Stub Bracket Arm o d 42 4 i d 39 4 Bracket Cup o d 88 9 i d 84 9 Fits 76 Spigo...

Page 6: ...arious Various Various Various Bracket Side entry Side entry Side entry Side entry Side entry IP IP66 IP66 IP66 IP66 IP66 Weight inc PSU 5kg 4kg 3kg 2 5kg 1 5kg URBAN Series OPERATING VOLTAGE All RayL...

Page 7: ...5 lbs 0 7kg 1 5 lbs Dimensions L x W x D 160x160x81mm 6 3x6 3x3 2 248x78x55mm 9 7x3x2 1 248x78x55mm 9 7x3x2 1 248x78x55mm 9 7x3x2 1 248x78x55mm 9 7x3x2 1 URBAN Series PSU Power Supply Features Standar...

Page 8: ...UBA48 Model Power Supply Diagrams Not to scale Telemetry Input requires zero volt latched input Photocell Sensitivity Photocell Input Mains Input 100V to 230V AC Auto Sensing LED Output x2 Polarity Se...

Page 9: ...9 SLIMLINE PSU URBAN UBA32 UBF24 UBF16 UBF8 Models LED output 1 LED output 2 Photocell input Mains Input Photocell Sensitivity Power Adjust...

Page 10: ...input Check fuse intact If OK Step 2 Lamp Test Check voltage of lamp o p approx 14V Check current of lamp see instructions for correct current setting To check lamp current this must be done while bot...

Page 11: ...11 Step 3 Contact RayLed for further assistance Note down Model Angle version any options Serial Number of illuminator and PSU...

Reviews: