6.3 Power up and standby
When the breaker connecting power to the camera is switched on,
the camera will run a boot up sequence lasting for about 1 minute,
after which the camera will be in
Standby
mode.
In order for the camera to operate, you must bring the camera out
of standby mode using the camera controls.
Thermal camera standby
Standby mode can be used to temporarily suspend the thermal
camera's functions when the camera is not needed for a prolonged
period.
When in standby mode the camera:
• Does NOT provide a live video image.
• Moves the camera into its “stowed” (parked) position (lens facing
down into the camera base) to protect the camera optics.
• Engages its pan / tilt motors to hold the camera in place in rough
seas.
Note:
The “stowed” (parked) position can be configured using the
camera's setup menu.
Power menu
Menu item / Description
Settings / Operation
Assign JCU
Assigns the JCU to the camera.
JCU Stndby?
This option places the JCU in standby. The camera
and other controllers on the system are unaffected.
Camera Stndby?
With this option the camera moves to its stow
position and enters standby mode. The JCU
remains on and available to “wake” the camera.
System Off
This option places both the JCU and camera into
Standby mode.
Calibrate JCU
Use the “Calibrate JCU” function to calibrate the
JCU puck.
Follow the on screen instructions to calibrate the
puck:
•
Rotate CCW / CW
– requires you to rotate the
puck fully clockwise, then counter-clockwise.
then press the puck to continue.
Cancel
Exit the Power Menu.
Accessing the power menu
The power menu can be accessed by following the steps below.
Using the JCU
1. Press and hold the
Power
button on the JCU.
The JCU LCD will countdown from 3 to 0, after which the power
menu is displayed.
2. Use the JCU
Puck
to select the relevant power option.
3. Select
Cancel
to cancel the power menu.
Note:
The power menu is only displayed on the JCU's LCD
display.
6.4 Camera control
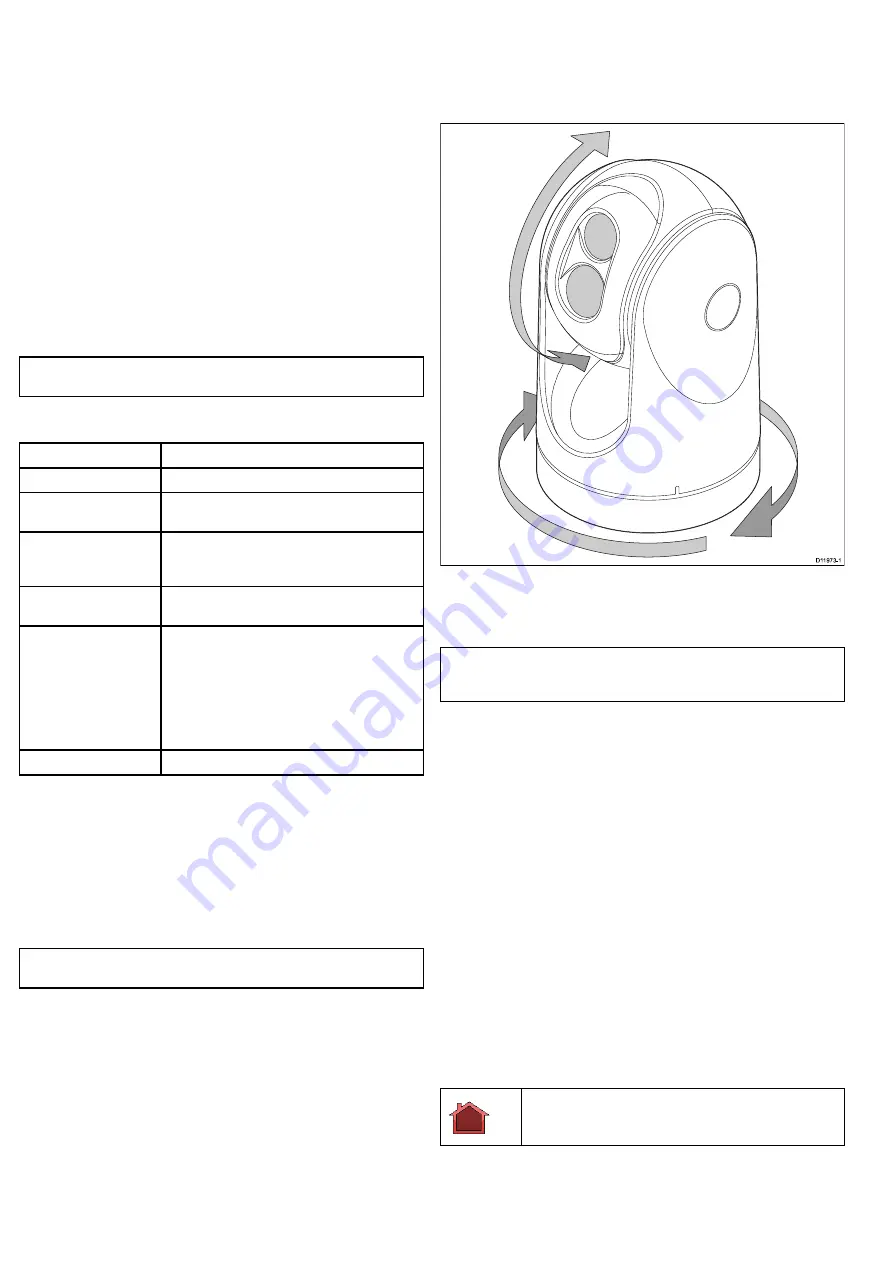
Pan, tilt and zoom
The camera controls allow for pan and tilt (elevation) of the camera,
as well as zoom (magnification) of the thermal image.
D11973-1
• Pan continuously through 360º.
• Tilt (elevate) to ±90º relative to the horizon.
• Zoom (magnify) the thermal camera image.
Note:
Stabilized variants of the T-Series thermal cameras include
a continuous zoom function, non-stabilized variants can switch
between x2 and x4 magnification.
Zooming the camera using the JCU
The JCU puck is used to control the zoom function of the thermal
camera, an icon will be displayed on-screen to indicate the current
zoom level.
With no zoom level selected:
1. Push the
Puck
in and hold for 1 second to turn on 2X zoom.
2. Push the
Puck
in and hold for 2 seconds to turn on 4X zoom.
3. Pull the
Puck
out to return to the previous zoom level.
Continuous zoom
The T470SC and T473SC have a continuous zoom color visible
light camera. The visible light camera will zoom to the same
magnification as the thermal camera. However, when the visible
light color camera is viewed the zoom can continue to a preset limit.
Thermal camera home position
The home position is a preset position for the camera.
The home position usually defines a useful reference point — for
example, straight ahead and level with the horizon. You can set the
home position as required and to return the camera to the home
position at any time.
The home icon appears on-screen momentarily when the
camera returns to the home position. The icon flashes when a
new home position is set.
32
T-Series
Summary of Contents for T303
Page 2: ......
Page 4: ......
Page 6: ...6 T Series...
Page 18: ...18 T Series...
Page 24: ...24 T Series...
Page 28: ...Thin panel mounting D11989 1 Thick panel mounting D11990 1 28 T Series...
Page 40: ...40 T Series...
Page 43: ......
Page 44: ...www raymarine com...


