USER INSTRUCTIONS
9
6.9 LOW TEMPERATURE CONTROL
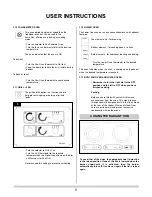
The low temperature control allows three different temperatures
to be selected. Denoted by (one bar), (two bars),
(three bars). One bar is the lowest set temperature and three
bars is the highest.
To use this function select a cooking zone and then repeatedly
touch the low temperature button until the desired level is
achieved. i.e , or in the cooking zone display.
6.10 PAUSE
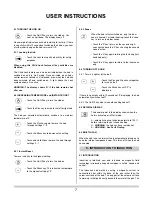
When a cooking zone is in operation the hob can be paused.
when the hob is paused the symbol “II” will be displayed in both
cooking zone displays.
To pause the hob press both cooking zone displays
simultaneously. To restart a paused hob press both cooking
zone displays simultaneously then release “II” symbols will flash,
press anywhere on the slider.
6.3 WARNING
The display shows ‘H’ if the hob remains hot after use. The heat
is producted by pans resting on the hob and is not induced heat.
6.4 LOCKING THE HOB
When using this child lock feature all key activities are disabled.
The child lock feature can only be activated when the hob is
switched on and the dots beside both cooking zone displays are
flashing.
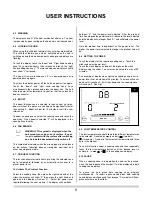
To lock the display touch the “boost” and “Right hand cooking
zone” keys simultaneously, then release and touch the “right
hand cooking zone key”. The two cooking zone displays should
now show “L” for locked.
The hob will remain locked even if it is powered down and
powered back up again.
To unlock the display, power off the hob and power it on again.
Touch the “boost” and “right hand cooking zone” keys
simultaneously then release and press the boost key. The hob
should power off automatically to confirm that the unlock has
been successful.
6.5 BOOST
The boost function can be selected to reduce heat up times,
boost will heat the pot over a cooking zone significantly faster
than setting 9. Boost will last for 10 minutes or until the user
intervenes.
To boost a cooking zone, select the cooking zone and touch the
boost key. When boost is selected “P” will be displayed in the
cooking zone display.
6.6 PAN SENSOR
WARNING:
This symbol is displayed when the
hob cannot sense a pan on its surface. If a pan
is not in contact with the surface after switching
on a hob, both hobs automatically switch off.
This symbol also indicates when the wrong type of pan is placed
on the surface. Induction does not recognise aluminium and
other non magnetic metals.
6.7 PRE-HEAT FUNCTION
This function allows for rapid heat up to bring the selected zone
up to temperature, followed by an automatic switch over to a
preset power level.
To Activate The Pre-Heat Function
Select the cooking zone, then press the right hand end of the
slider, the display will show “9” then press the right hand end
again and the display will show “A”. Select the power level
required following the heat up time. The display will now flash
between “A” and the power level selected. After the pre-heat
time has elapsed the power level will reduce to the level selected
and the display will no longer flash “A” and will display the power
level.
Note the preheat time is dependent on the power level. The
higher the power level selected the longer the preheat time will
be.
6.8 SETTING THE TIMER
Touch the display for the required cooking zone. Touch the
slider and select power level.
Touch the clock display, and adjust the digits on the clock
display using the slider. The timer can be setup to a max of 99
minutes.
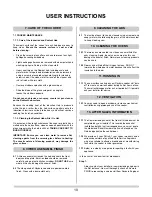
See example of display when right hand cooking zone is set to
power level 2 for a duration of 08 minutes. The clock will count
down until it reaches 0, it will then beep and the cooking zone
will switch off. See Fig 7.
7


