Power Meter Quick Setup Guide
14
QSG-PMM-1A-v3.3.10-E
255-64-0004-00
Login and Configuration
Connect your PC directly to the PMM to complete the initial configuration.
To access the web interface at the rack:
1.
Disable the wireless interface of the PC.
2.
Connect a cat 5 cable between the PC and PMM network ports.
3.
Open a browser. Enter the URL "https://pdu.local". The login page appears.
If the URL does not resolve, use the IP address of the PMC. Retrieve the direct IP address using the LCD display: Menu > Device
Information, scroll to the IPV4 settings. Enter the IP address in the web browser:"https://IP address/"
4.
Login with the default username and password. Allow 30 seconds for first connection.
Username: admin
Password: raritan
Configuring Power Meters and Branch Circuit Monitors
You can configure your product with a spreadsheet, or in the product's web interface.
To configure with a spreadsheet:
Go to Raritan.com and download the configuration spreadsheet from the BCM2 Support page. Follow the instructions in the
spreadsheet.
To configure with the product web interface:
Make a network connection to the product. See
Login and Configuration
(on page 13). Follow the instructions in this guide, starting
with: Scan Power Meters.
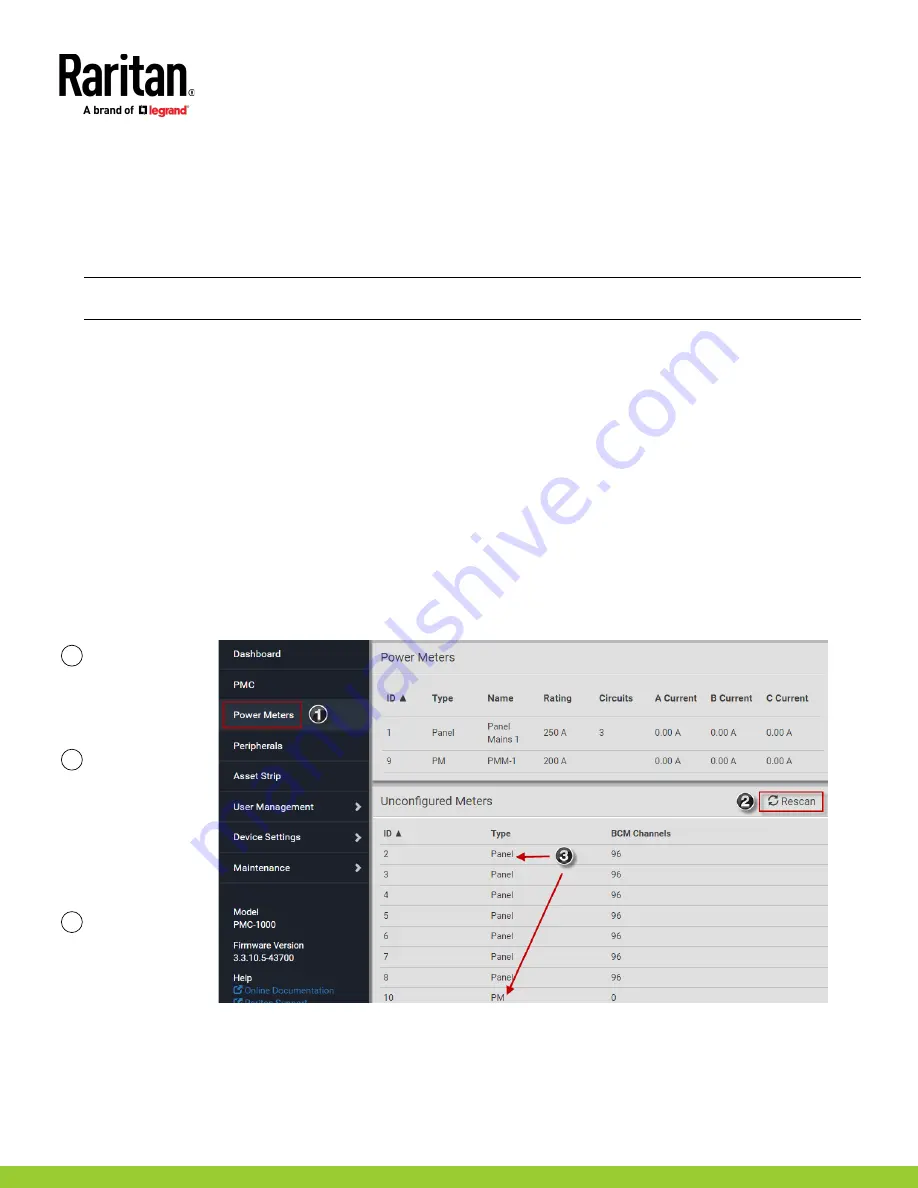
Configure Using the Web Interface
Scan Power Meters
1
Click Power
Meters.
2
If nothing is
configured, scan
begins
immediately in
the
Unconfigured
Meters section.
Click Rescan to
refresh the list.
3
Click the power
meter or panel
in the
discovered list
to configure it.
Types:
PM: 3-phase
Panel: BCM


