KSX II Quick Setup Guide
4
QSG-DKSXII-v2.3.0-0D-E
255-62-5001-00-RoHS
To connect the Local User port:
Attach a multi-sync VGA monitor, keyboard, and mouse to
the respective Local User ports (using either a PS/2 or
USB keyboard and mouse).
Connection Description
Monitor
Attach a standard multi-sync VGA monitor
to the HD15 (female) video port.
Keyboard
Attach either a standard PS/2 keyboard to
the Mini-DIN6 (female) keyboard port, or a
standard USB keyboard to one of the USB
Type A (female) ports.
Mouse
Attach either a standard PS/2 mouse to
the Mini-DIN6 (female) mouse port or a
standard USB mouse to one of the USB
Type A (female) ports.
You can use the Local Admin port to connect the KSX II
directly to a workstation to manage your serial targets and
configure the system with a terminal emulation program such
as HyperTerminal. The Local Admin port requires the use of a
standard null modem cable.
Note: When local Authorization and Authentication is set to
None, logging in to serial admin console requires username
input.
D. KVM Target Server Ports
The KSX II uses standard UTP cabling (Cat5/5e/6) to connect
to each target server.
To connect a KVM target server to the KSX II:
1. Use the appropriate Computer Interface Module (CIM).
2. Attach the HD15 video connector of your CIM to the video
port of your KVM target server. Ensure that your target
server's video has already been configured to a supported
resolution and refresh rate. For Sun servers, also ensure
that your target server's video card has been set to output
standard VGA (H-and-V sync) and not composite sync.
3. Attach the keyboard/mouse connector of your CIM to the
corresponding ports on your target server. Using a
standard straight-through UTP (Cat5/5e/6) cable, connect
the CIM to an available server port on the back of your
KSX II device.
Note: The DCIM-USB G2 provides a small slide switch on the
back of the CIM. Move the switch to P for PC-based USB
target servers. Move the switch to S for Sun USB target
servers.
A new switch position takes effect only after the CIM is
power-cycled. To power-cycle the CIM, remove the USB
connector from the target server and plug it back in a few
seconds later.
E. Power Strip
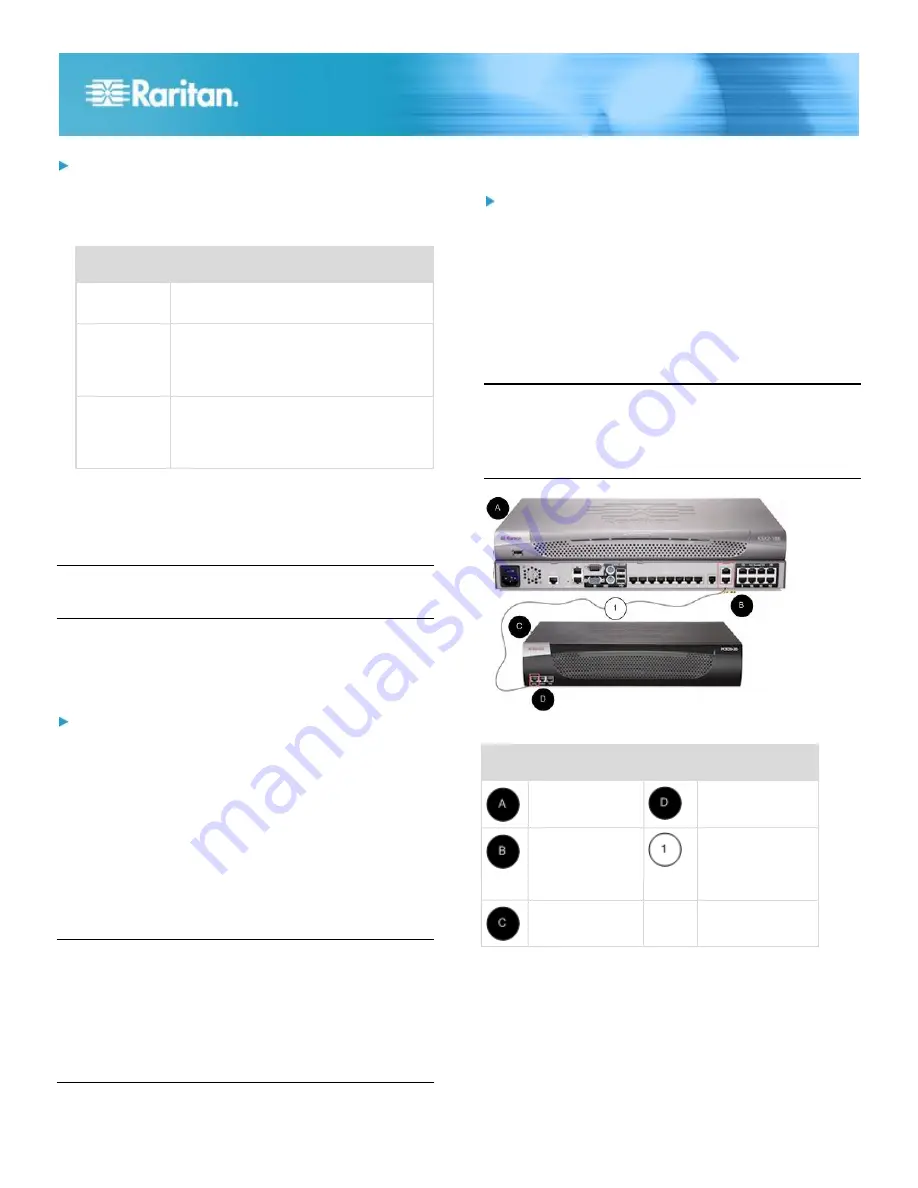
To connect the Dominion PX to the KSX II:
1. Plug one end of a Cat5 cable into the Serial port on the
front of the Dominion PX.
2. Connect the other end of the Cat5 cable to either the
Power Ctrl. 1 or Power Ctrl. 2 ports on the back of the
KSX II.
3. Attach an AC power cord to the target server and an
available rack PDU outlet.
4. Connect the rack PDU to an AC power source.
5. Power on the KSX II device.
Important: When using CC-SG, the power ports should be
inactive before attaching rack PDUs that were swapped
between the power ports. If this is not done, there is a
possibility that the number of power outlets will not be
correctly detected, especially after swapping 8 and 20
outlet rack PDU models.
Diagram key
KSX II
PX serial port
KSX II Power
Ctrl. 1 Port or
Power Ctrl. 2
Port
Cat5 cable
PX
F. Serial Target Ports
To connect a serial target to the KSX II, use a Cat5 cable with
an appropriate serial adapter.


