background image


1.2.


Connecting to Player 

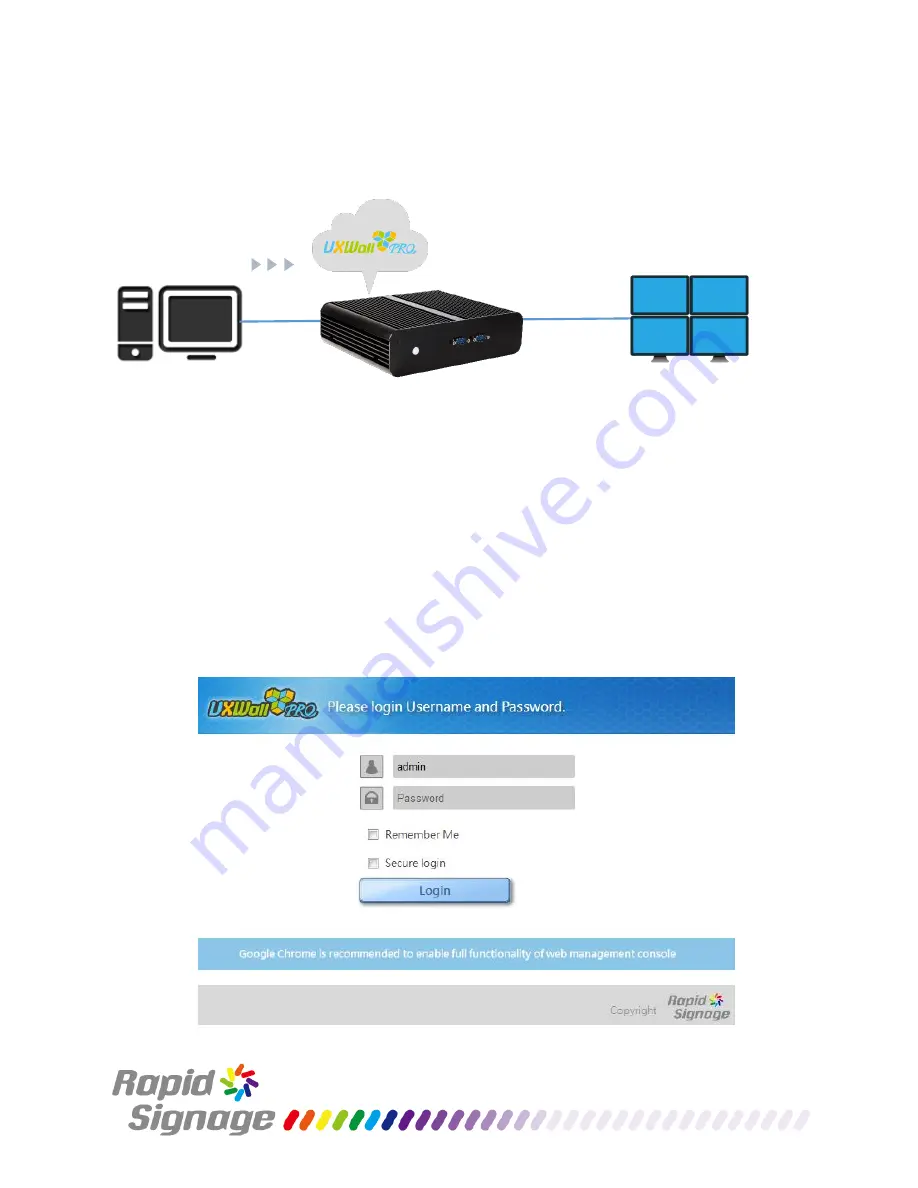
Direct Connect:   


By default, RS-400 will set a static IP address 192.168.100.1  with subnet mask 255.255.255.0  for LAN-2

Change the PC/Laptop network  TCP/IP Address to 192.168.100.2  and the same network  mask, then 

connect to RS-400’s LAN-2 with a LAN cable. 

User Chrome and connect to  http://192.168.100.1   

Default login name and password are both “admin”. 


Summary of Contents for RS-400

Page 1: ...RS 400 Digital Signage Player User Manual V1 2...

Page 2: ...demarks of Rapidsignage Inc Other products and company names mentioned herein may be the trademarks of their respective companies Disclaimer In no event shall Rapidsignage Inc liability exceed the pri...

Page 3: ...1 4 Player User Interface overview 8 2 Screen configure 10 3 Design 14 3 1 New Design 14 3 1 1 Media list 17 3 1 2 Widgets 19 3 1 3 Application 31 3 2 Load Design 37 4 Plan 38 4 1 Create a New Plan 38...

Page 4: ...1 Getting Started 1 1 I O Layout 1 Power Button 2 COMports x2 3 DC in 4 HDMI Output x4 5 1 LAN 1 5 2 LAN 2 6 USB 3 0 x2 7 USB 2 0 x2 8 Audio Out 9 Mic in 1 2 6 7 3 4 9 8 5 1 5 2...

Page 5: ...s 192 168 100 1 with subnet mask 255 255 255 0 for LAN 2 Change the PC Laptop network TCP IP Address to 192 168 100 2 and the same network mask then connect to RS 400 s LAN 2 with a LAN cable User Chr...

Page 6: ...1 to use a DHCP connection 2 Click SystemConfig on the main page of Player then click Network config Tab 3 Double click textbox of DHCP and make sure DHCP is turned on then Click Apply 4 Click Power...

Page 7: ...tion refer to 2 Screen configure Step 2 Start Design Click New Design Design the uploads and page Design of videos pictures advertising and other media materials to be displayed FOR more information r...

Page 8: ...ges including English Traditional Chinese Simplified Chinese Japanese Korean Spanish German Click Language and the selection list appears This user interface will switch to selected language Screen Co...

Page 9: ...gn Loading and modify existing Design New Plan Arrange the schedule of the Designs Load Plan Load an existing Plan Export Plan Export a Plan for manual update Overview Shows the information of Player...

Page 10: ...olution Click Resolution then set resolution of the Canvas Too high resolution will decrease the performance of system Please set proper resolution according to the performance of your hardware system...

Page 11: ...leted any changes click Apply to finish all the screen setting The buttonsat thetop of page Buttons DESCRIPTION A Menu Click Menu to return to the main page of Player B Overview Click Overview to go t...

Page 12: ...RS 400 supportsthesevideo wall configurations...

Page 13: ......

Page 14: ...Media list B Media Widget bar C Canvas To compose theDesign Step 1 Upload Files to Media list Step 2 Click and hold Widgets from the Widget bar or Media from the Media list then drag and drop it to a...

Page 15: ...aylist A playlist is a sequence of Widget that you choose for display in a zone Each zone has its own playlist and runs independently of other playlists To create a playlist with multiple Widget objec...

Page 16: ...m this page C Load Click Load Then Designer dialog appears select existing Design file formlist then click Load Design to modify Design D Save Click Save to save the new Design or design changes E Del...

Page 17: ...ON Media type Display the media type Alias Display the file name Media duration sec To edit the time intervals edit the Value by double clicking the cell and add the amount of seconds you want it to d...

Page 18: ...Width or Height To edit the width and height find Width or Height and edit it to best fit your layout Layer order To change the order of Layer in the Canvas...

Page 19: ...y X Pixel or Y Pixel To edit the location of the media to pixel perfection find X Pixel or Y Pixel and edit the Value by double clicking the cell and adjusting the values Width or Height To edit the w...

Page 20: ...Pixel and edit the Value by double clicking the cell and adjusting the values Width or Height To edit the width and height find Width or Height and edit it to best fit your layout Layer order To chan...

Page 21: ...h or Height To edit the width and height find Width or Height and edit it to best fit your layout Layer order To change the order of Layer in the Canvas Direction Select text move direction the select...

Page 22: ...icking the cell and add the amount of seconds you want it to display X Pixel or Y Pixel To edit the location of the media to pixel perfection find X Pixel or Y Pixel and edit the Value by double click...

Page 23: ...erfection find X Pixel or Y Pixel and edit the Value by double clicking the cell and adjusting the values Width or Height To edit the width and height find Width or Height and edit it to best fit your...

Page 24: ...e values Width or Height To edit the width and height find Width or Height and edit it to best fit your layout Layer order To change the order of Layer in the Canvas Offset GMT To edit the time zone F...

Page 25: ...and edit it to best fit your layout Layer order To change the order of Layer in the Canvas Foreground color To edit the text color Background color To edit background color of the text Opacity To set...

Page 26: ...you want it to display Volume To edit sound volume edit the Value by double clicking the cell and choosing a number between 1 and 10 X Pixel or Y Pixel To edit the location of the media to pixel perf...

Page 27: ...t sound volume edit the Value by double clicking the cell and choosing a number between 1 and 10 X Pixel or Y Pixel To edit the location of the media to pixel perfection find X Pixel or Y Pixel and ed...

Page 28: ...the media to pixel perfection find X Pixel or Y Pixel and edit the Value by double clicking the cell and adjusting the values Width or Height To edit the width and height find Width or Height and edi...

Page 29: ...he width and height find Width or Height and edit it to best fit your layout Layer order To change the order of Layer in the Canvas Server IP address Enter the source link Ex 192 168 100 2 Remote path...

Page 30: ...edit it to best fit your layout Layer order To change the order of Layer in the Canvas Foreground color To edit the text color Background color To edit background color of the text Opacity To set Wid...

Page 31: ...o Player and create New Design Step 3 Drag and drop to adding Live Data Widget on Canvas then change properties for example Source Type CSV Source Link http 52 xxx xxx 1 menuboard csv Data Mapping col...

Page 32: ...col 2 row 2 col 1 row 2 col 1 row 6 col 2 row 6...

Page 33: ...ring ex share Step 2 Import images and video to this folder Content of share folder Step 3 Link to Player and create New Design Step 4 Drag and drop to adding Remote Folder Widget on Canvas then chang...

Page 34: ...cess without username and password please enter guest and don t need to enter the password Step 5 Close the property window and click Save to finish Design Step 6 Creating a Plan and Publish Plan Remo...

Page 35: ...erver ex C and Unzip RsTcpCommand rar Content of RsTcpCommand folder Step 2 Link to RS CMS and create New Design Step 3 Drag and drop to adding Queueing Widget on Canvas then change properties Text co...

Page 36: ...Publish Plan Step 7 Opening Command Prompt then change to C RsTcpCommand directory Step 8 Enter command RsTcpCommand 192 168 99 119 7898 GROUP GROUP1 KEY VALUE1 VALUE 125 ACTION QUEUEING_SET The playe...

Page 37: ...Design please follow these steps Step 1 Click Load Design from Main page of Player or button at the top of Design page Step 2 Then Designer dialog appears Step 3 Select existing Design file fromlist t...

Page 38: ...ew Plan A Design list B Timetable To create a new Plan please follow these steps Step 1 Click Plan from Main page of Player Step 2 Drag Design file from Design list and drop it onto Timetable Step 3 D...

Page 39: ...lan of Timetable then Plan dialog appears Step 5 To define the star and end date and time Step 6 Click Apply then Click Save the button at the top of Plan page To delete the content of Plan please fol...

Page 40: ...Plan if user is not finishing current Plan please Save it before exiting from this page C Load Click Load then Planner dialog appears select existing Plan file from list then click Load Plan to modif...

Page 41: ...4 2 Load Plan To modifying existing plan please follow these steps Step 1 Click Load Plan from Main page of Player or button at the top of Plan page Step 2 Then existing Plan will appears...

Page 42: ...Main page of Player Step 2 Then Export Plan dialog appears To import plan to Player please follow these steps Step 1 Copy the export plan file to USB device and Unzip rs_export zip Step 2 Connect USB...

Page 43: ...ing Player name firmware version Current Plan and Current Design CPU RAM Status View the current CPU loading and the current memory size status Network View current Network setting including IP addres...

Page 44: ...tep 1 Click Reboot or Shutdown then the dialog appears Step 2 Click OK the Player will Reboot or Shutdown immediately To setting Power Schedule please follow these steps Step 1 Choose Time from the dr...

Page 45: ...o Edit Power Schedule please follow these steps Step 1 Select currently schedule from the task list Step 2 Click Edie to the setting Step 3 Click the Save button To Delete Power Schedule please follow...

Page 46: ...Tab DESCRIPTION Download Register Information User can click Apply to download register information License Key To Register the License key and unlock all features of the player For technical question...

Page 47: ...layer at the same time To Register a player to The RS CMS server please follow these steps Step 1 Check IP address of the RS CMS server Step 2 Check Pairing Key from the RS CMS server please refer to...

Page 48: ...ChangePassword User can change administer password with this option...

Page 49: ...ure Use the Network options to configure and check the Player network connection To change IP address please follow these step Step 1 Double click textbox of IP address to change IP address Step 1 The...

Page 50: ...tion to configure the time source and time zone for Player Best for accuracy that requires the Player to have network connection to an extremal NTP server If you chose on of the NTP methods you must e...

Page 51: ...to enable this function and set up log size About content please refer to 5 3 Logs SystemUpgrade From the menu choose the Firmware Upgrade item to select the file then click Apply to start to upgrade...

Page 52: ...rtant events such as recent login information for all the users and systembooting The event log appears in reverse order which means the latest event log shows first With this option also provides use...

Reviews: