Ranger design C4-BA13-3 Installation Manual Download Page 16

For technical support, contact us at 1-800-565-5321

C4-BA13-3 Installation Guide


|  REV. A1  |  Page

 16

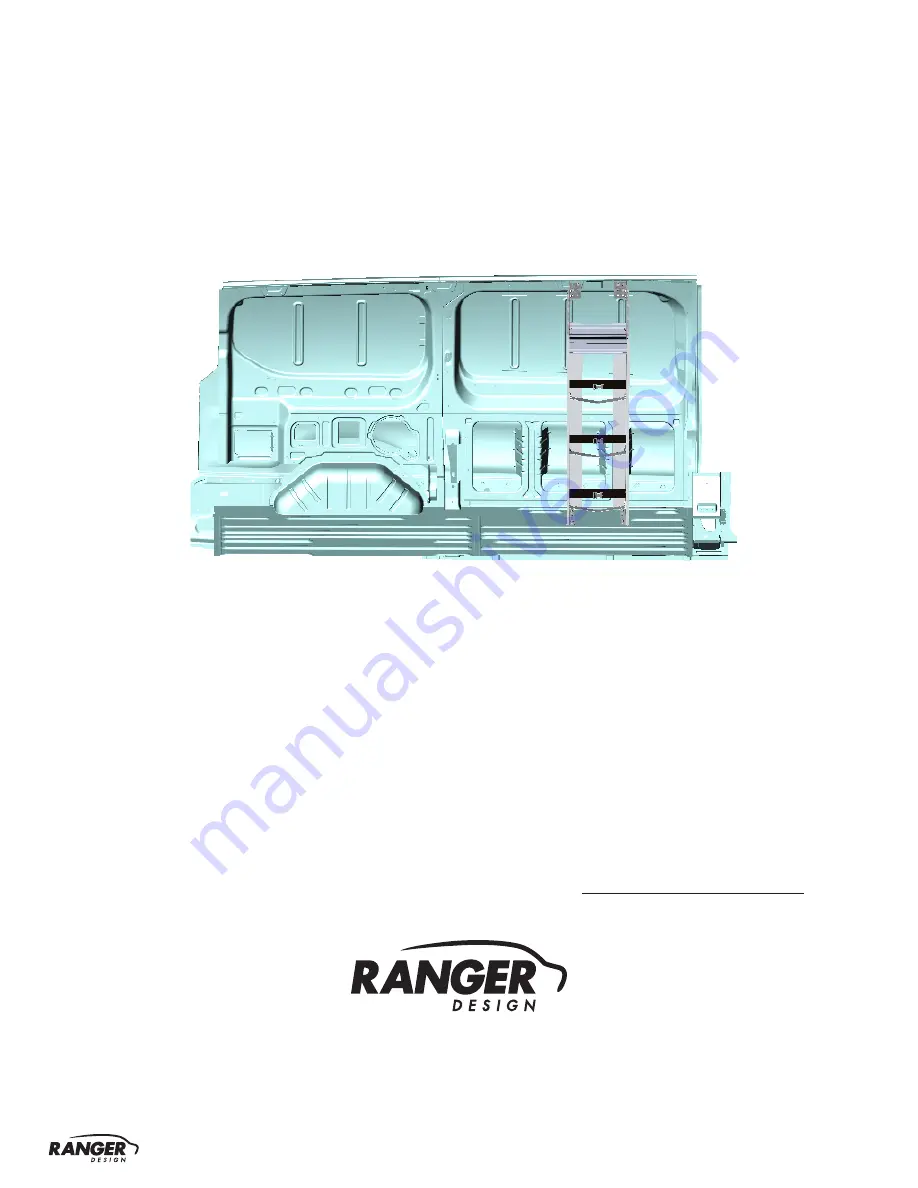
“You have successfully installed your

C4-BA13-3

Thank you for doing business with us.”

For any feedback or suggestions you may have, please contact:   

[email protected]

Summary of Contents for C4-BA13-3

Page 1: ...INSTALLATION GUIDE C4 BA13 3 BOTTLE HOLDER...

Page 2: ...13 14 q 2 1 Attach Wall Brackets To The End Panels q 2 2 Mark Holes For Plus Nuts q 2 3 Attach Plus Nuts q 2 4 Attach Bottle holder To The Floor q 2 5 Attach Wall Brackets q Cordless Impact q Cordless...

Page 3: ...of materials 1 1 2 Verify all parts are present Item No Description Qty 6098 Strap 3 40 715 Bracket Head 2 40 716 Bracket Arm 2 40 742 End Panel Left 1 40 743 End Panel Right 1 53 611 V Shelf 3 60 11...

Page 4: ...Hex Bolt 5 16 18 3 4 GR 5 ZINC 90 204 8 8 Hex Bolt 5 16 18 1 2 GR 5 ZINC 90 200 12 12 94 116 Serrated Nut 5 16 18 ZINC 20 20 8 8 92 102 Screw HWH 14 1 ZINC 20 20 98 116 Flat Washer 5 16 ZINC 90 200 H...

Page 5: ...asher 94 132 5 16 Plusnut 94 132 5 16 Plusnut 4 4 90 011 Hex Bolt 5 16 1 3 4 98 122 Lock Washer 98 116 Flat Washer 98 157 Spacers QTY Gap between floor and end panel 4 4 Spacer 0 375 ID 1 0 OD 0 25 LO...

Page 6: ...s Impact q 1 2 Socket 1 2 1 Attach both panels to the shelf trays PHASE 1 ASSEMBLY 1 2 BOTTLE HOLDER ASSEMBLY 11 7 8 13 13 11 875 13 53 611 IMPORTANT Assemble the cabinet on a protected clean surface...

Page 7: ...7 1 2 2 Attach the straps to the end panels NOTE Hand tighten the bolts for adjustment 1 2 3 Attach the bracket head to the bracket arm TOOLS q Cordless Impact q 1 2 Socket HARDWARE USED 4 hand tighte...

Page 8: ...LS 2 1 1 Place the assembled bottle holder into the vehicle at the desired location Attach the bracket arm to the panels aligning the bracket head along the horizontal rim of the vehicle HORIZONTAL RI...

Page 9: ...on the vehicle rim PHASE 2 INSTALLATION 2 2 MARK HOLES FOR PLUS NUTS TOOLS q Marker TOOLS q Marker MARK Mark the 2 holes locating each end panel to the vehicle floor MARK Mark the 2 holes locating br...

Page 10: ...ollar then insert the plus nuts WARNING Before drilling ensure that you will not hit any critical parts of the vehicle such as the Gas tank Wiring Harness and Hose NOTE Use 1 2 drill bit with drill co...

Page 11: ...HARDWARE USED Flat washer 5 16 Flat washer 5 16 BS 7 8 OD TOOLS q Cordless Impact q 1 2 Socket q 9 16 Wrench STEP 1 Assemble the 6491 plusnut tool with the hardware needed plus nut and the 9 16 wrench...

Page 12: ...and fasten to the plus nut PHASE 2 INSTALLATION 2 4 ATTACH END PANEL TO THE FLOOR without ranger floor TOOLS q Cordless Impact q 1 2 Socket 90 011 Hex Bolt 5 16 1 3 4 98 122 Lock Washer 98 116 Flat Wa...

Page 13: ...unit to the floor mounting track by sliding bolts in the mounting tracks and putting screw in the last rear slot of the end panels of the shelving unit 94 104 Hex Nut 98 116 Lock Washer 98 122 Flat W...

Page 14: ...plus nuts then align and fasten the wall brackets to the end panels IMPORTANT After installation is completed ensure all bolts are tightened PHASE 2 INSTALLATION 2 5 ATTACH WALL BRACKETS without range...

Page 15: ...el nuts IMPORTANT After installation is completed ensure all bolts are properly tightened NOTE Tighten the bolts that used to attached the wall bracket to the wall or wall kits 1st before the bolts th...

Page 16: ...us at 1 800 565 5321 C4 BA13 3 Installation Guide REV A1 Page 16 You have successfully installed your C4 BA13 3 Thank you for doing business with us For any feedback or suggestions you may have pleas...

Reviews: