For technical support, contact us at 1-800-565-5321
1506-GS Installation Guide
| REV. A3 | Page
5
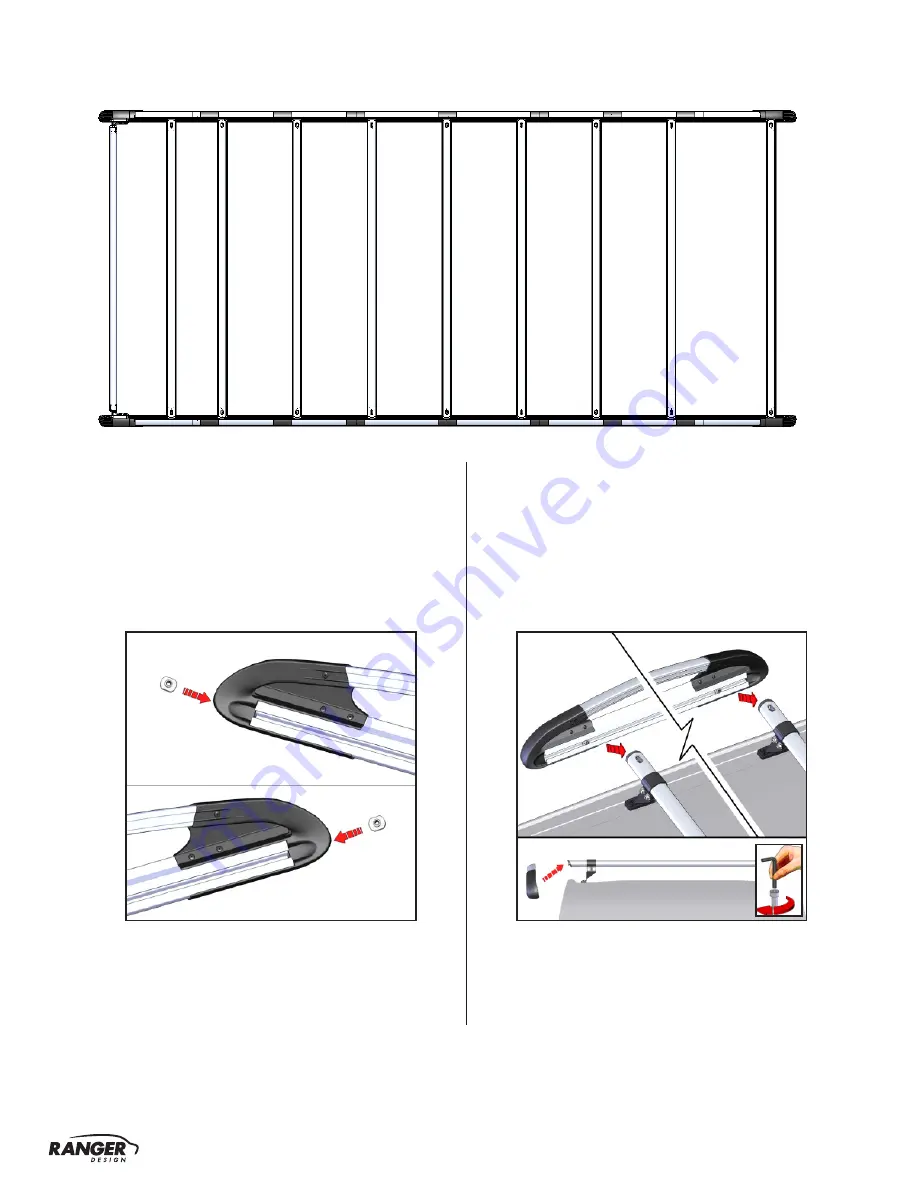
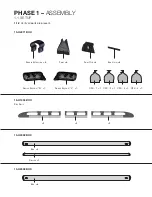
1
St
S
ide
R
ailS
×11
2
nd
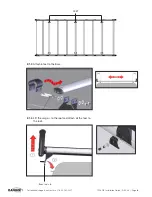
2.1.1
Slide 11pcs. of channel nuts in each
side rails.
2.1.2
Attach all bars to the side rear.
Page 1: ...INSTALLATION GUIDE 1506 GS Cargo Plus SAVANA RWB ...
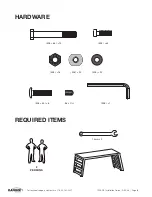
Page 2: ...rify all parts are present 15 U4011 BOX 15 U1003 BOX 15 U3002 BOX 15 U2002 BOX Side Rails 2 2 2 Bar 3 Bar 6 Roller 1 Roller Support R 1 Roller Support L 1 CFK 1 1 CFK 2 1 CFK 3 1 CFK 4 1 Saddle Extrusion 6 Foot 6 Foot Clip 6 Edge trim 6 ...
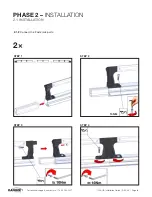
Page 3: ...For technical support contact us at 1 800 565 5321 1506 GS Installation Guide REV A3 Page 3 REQUIRED ITEMS HARDWARE 2 PERSONS M8 1 M8 65 12 13mm 2 M8 16 M8 22 M8 24 M8 34 M8 35 6 Bolt Cup ...
Page 4: ...For technical support contact us at 1 800 565 5321 1506 GS Installation Guide REV A3 Page 4 2 STEP 1 STEP 2 STEP 3 STEP 4 2 1 2 Connect the 3 side rails parts 10 NM PHASE 2 INSTALLATION 2 1 INSTALLATION ...
Page 5: ...ical support contact us at 1 800 565 5321 1506 GS Installation Guide REV A3 Page 5 1ST Side Rails 11 11 2ND Side Rails 2 1 1 Slide 11pcs of channel nuts in each side rails 2 1 2 Attach all bars to the side rear ...
Page 6: ...technical support contact us at 1 800 565 5321 1506 GS Installation Guide REV A3 Page 6 2 1 3 Attach 6 feet to the bars 2 1 4 Lift the cargo to the roof and attach all the feet to the roof FEET Edge trim 6 ...
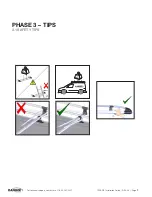
Page 7: ...For technical support contact us at 1 800 565 5321 1506 GS Installation Guide REV A3 Page 7 PHASE 3 TIPS 3 1 SAFETY TIPS MAX 110 lbs MAX 220 lbs ...
Page 8: ...s at 1 800 565 5321 1506 GS Installation Guide REV A3 Page 8 You have successfully installed your 1506 GS Cargo Plus Thank you for doing business with us For any feedback or suggestions you may have please contact cs rangerdesign com ...