4
Setup
Before getting started:
Read the Safety & Warranty Manual before using Twelve.
Make sure all items listed in
Introduction
Box Contents
are included. Items not listed
are sold separately.
1. Assemble the Platter System
1. Remove the Twelve base from the packaging. Remove the platter assembly from the
package (underneath Twelve). Place Twelve on a flat, stable surface for assembly and
operation.
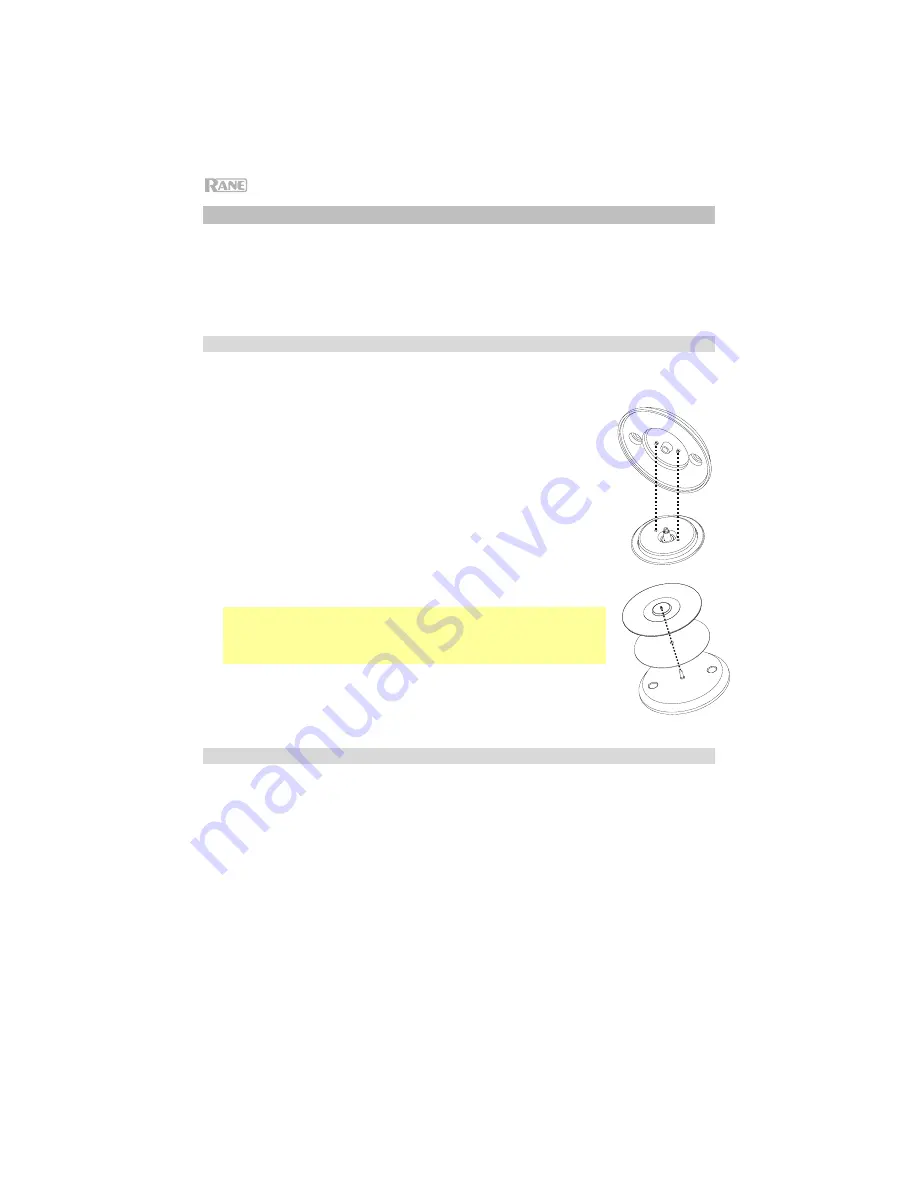
2. Place the platter onto the Twelve base by aligning the pins in the
bottom of the platter with the holes in Twelve’s motor. Press it down
firmly. Check to make sure that it rotates uniformly and does not
wobble excessively.
3. Place the slipmat onto the platter. Then place the
Control Disc
over
the spindle (with the attached
Quick Release Adapter
on top). To
lock the
Control Disc
to the spindle, pinch the top of the spindle while
slowly rotating the disc until you hear it click. It locks when the groove
in the spindle lines up directly opposite to the button on the side of
the
Quick Release Adapter
.
Note:
If you would like to adjust the slip friction of the disc, consider
placing 1-4 of the included spacers over the spindle, underneath the
slipmat. The more you elevate the
Control Disc
with the spacers, the
more spinback you will get.
2. Connect and Start DJing!
1. Make sure you have downloaded and installed the latest version of your DJ software.
2. Place Twelve on a flat, stable surface.
3. While the power is switched off, plug the included power cable into Twelve first, then plug
the cable into a power outlet.
4. Power on Twelve using the
power switch
.
5. Use a standard USB cable (included) to connect the
USB Port
to one of the following:
If you are using Twelve with the Rane Seventy-Two mixer (sold separately), connect
the USB cable to the
Deck 1
or
Deck 2
USB ports labeled
Twelve/Controller
.
If you are using another mixing interface, connect the USB cable to an available
USB port on your computer or a powered hub connected to the computer.
6. Open Serato DJ Pro and go! For more information on how to use Serato DJ Pro with
Twelve, visit
support.serato.com
.
Summary of Contents for TWELVE
Page 2: ...2 ...
Page 5: ......
Page 6: ......
Page 7: ......
Page 8: ......
Page 9: ......
Page 10: ......
Page 11: ......
Page 12: ......
Page 13: ......
Page 14: ......
Page 15: ......
Page 16: ......
Page 17: ......
Page 18: ......
Page 19: ......
Page 20: ......
Page 21: ......
Page 22: ......
Page 23: ......
Page 24: ......
Page 25: ......
Page 26: ......
Page 27: ......
Page 28: ......
Page 29: ......
Page 30: ......
Page 31: ......
Page 32: ......
Page 33: ......
Page 34: ......
Page 35: ......
Page 36: ......


