ROPE TENSIONER OVERHAUL
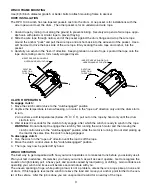
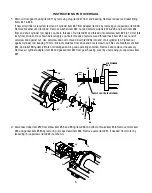
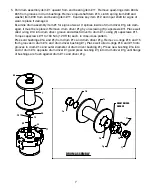
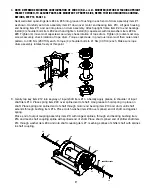
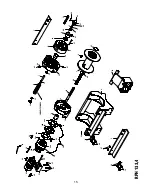
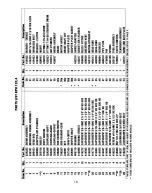
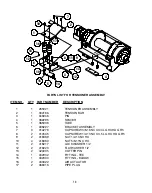
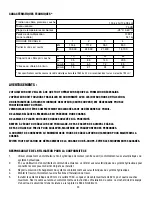
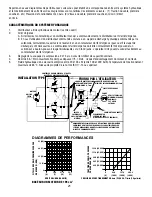
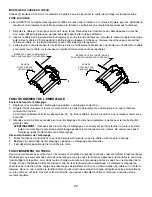
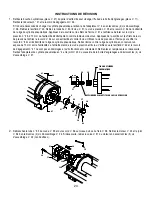
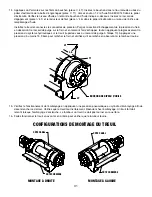
Refer to the Rope Tensioner Parts Diagram on the following page for the assembly of the Rope Tensioner.
The rope tensioner requires an independent, adjustable air supply of between 3,4 bar (50 PSI) and 6,2 bar (90 PSI).
Do not operate the winch with the tensioner energized against a bare drum.
The winch should only be operat-
ed with at least one wrap of rope around the drum with the tensioner energized.
1. To remove the air tensioner from the winch, disconnect the air supply from the tensioner. Remove the capscrews
item #8), lockwashers item #11 and nuts item #9 that mount the tensioner to the winch frame. Disassemble
the tensioner as shown on the following page and remove any parts that are worn.
2. Re-assemble the tensioner assembly. Mount the tensioner to the winch frame, placing the spacers item #4
between the tensioner bracket and the winch frame. Center the tensioner bar item #2 between the drum flanges
using a tape measure or scale. Tighten the mounting bolts to 102 Nm (75 ft lb) of torque.
3. Install the rope on the drum. After a few wraps of the rope are wound onto the drum, connect the air supply to
the tee fitting item #14 to energize the tensioner against the drum. As the rope winds onto the drum, watch the
tensioner to ensure that it moves freely and does not touch either drum flange.
4. Adjust the air supply until the rope does not “bird nest” when it is freespooling.
17
Summary of Contents for RPH 133,4
Page 19: ...16...

