


WWW.RAISE3D.COM
AMERICA · ASIA · EUROPE
Pro2 Hotend Installation Instruction
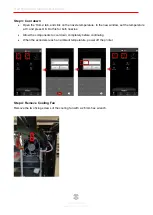
Step 8: Install hot end
•
Insert the hotend and push it all the way up.
•
Secure it by tightening the fixing screw.
If replacing multiple hotends, repeat steps 4-8 with the second hotend before continuing to
the alignment procedures.
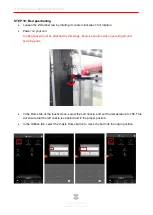
Step 9: Adjust the other Hotend
•
Loose the fixing screw marked in red with 2.5mm hex wrench.
•
Insert the hotend and push it all the way up.
•
Secure it by tightening the fixing screw.


