


WPX Battery-Operated Controller
2
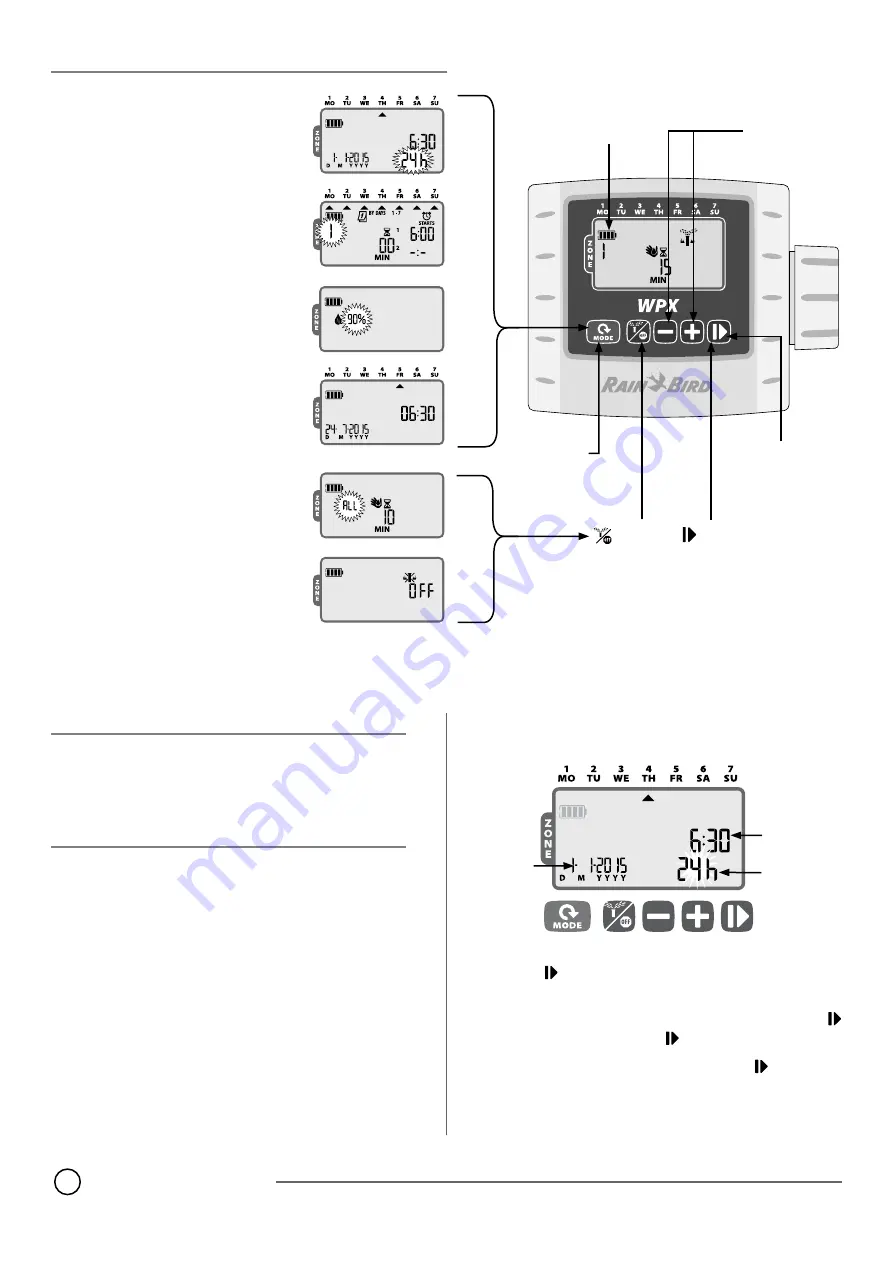
Controls and Indicators
Operating Modes
l
l
Set Date & Time -
Set the current Date and
Time of day (select 12 hour or 24 hour format).
l
l
Set Irrigation Schedule -
Edit customized
irrigation schedules that run automatically.
l
l
Seasonal Adjust -
Increase or decrease wa-
tering duration (Run Times) by a percentage
for all Zones.
l
l
Auto Run -
Watering occurs automatically ac-
cording to programmed irrigation schedules.
Manual Watering / Off
l
l
Manual Watering -
Start watering immedi-
ately for ALL Zones or for any ONE Zone.
l
l
Off
-
Stops any active watering and disables
automatic irrigation.
+
or
–
Buttons
Adjust settings
Button
Cycles through
Manual Water-
ing, Off and
Auto mode
Mode Button
Cycles through
Operating Modes
One-touch
Manual Start
Water all zones
i m m e d i a t e l y
according to
their scheduled
run times
Button
Advance
to the next
setting
Battery Indicator
Shows the remaining
battery life
Introduction
Thank you for choosing Rain Bird’s WPX Battery-Operated Controller.
The WPX is designed to provide worry-free automatic irrigation in the
absence of AC power or in areas where installing new field wires is not
practical.
Operation and Setup
Contractor Rapid Programming
TM
At initial programming, the controller automatically copies the start
times and watering days from Zone 1 to all other zones.
l
b
NOTE:
If multiple zones have the same or overlapping watering
times, the controller will water the zones in sequence (multiple
zones will not run at the same time).
l
b
NOTE:
Changes to a zone’s schedule made after initial program-
ming will only affect the zone being modified.
l
b
NOTE:
You may re-activate the Contractor Rapid Programming
TM
feature by resetting factory defaults (see page 5).
Set Date & Time
Press the MODE button until the Set Date & Time screen is displayed.
SET
DATE
SET
TIME
SELECT
TIME
FORMAT
Press
+
or
–
to set the time format (12 hour or 24 hour); then
press
Press
+
or
–
to set the hour (ensure that AM/PM set-
ting is correct when using 12 hour format); then press
to set the minutes; then press
Press
+
or
–
to set the year (YYYY); then press
to set the day
(D), then month (M). If 12 hour format is selected, the date format
will be shown as M/D/YYYY.