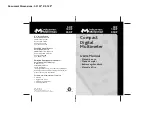
background image

- 2 -

Table of Contents

Troubleshooting Guide

 . . . . . . . . . . . . . . . . .3

1. Troubleshooting at the Controller

Voltage check of 120V input  . . . . . . . . . . . . . . .5
Voltage check of transformer:  . . . . . . . . . . . . . .6
Resistance check of fuse:  . . . . . . . . . . . . . . . . .7
Voltage check of battery: . . . . . . . . . . . . . . . . . .8
Voltage check of station output:  . . . . . . . . . . . . .9

2. Troubleshooting the System

Resistance check of each station:  . . . . . . . . . .10
Voltage check of each valve:  . . . . . . . . . . . . . .11
Voltage check of pump relay: . . . . . . . . . . . . . .12

WARNING

This booklet is only intended to be a guide for using this
product with other Rain Bird products. Carefully read and 
follow the manufacturer’s instructions regarding safety 
precautions and warranty information.

FOR TECHNICAL SUPPORT

800-247-3782 (USA and Canada only)

The World’s Leader in Irrigation

RB.DM200.TGuide.mech  2/3/03  10:18 AM  Page 2

Summary of Contents for TI-DM200

Page 1: ...TI DM200 Digital Multimeter TROUBLESHOOTING GUIDE...

Page 2: ...Troubleshooting the System Resistance check of each station 10 Voltage check of each valve 11 Voltage check of pump relay 12 WARNING This booklet is only intended to be a guide for using this product...

Page 3: ...d to Step 4 If all of the stations are work ing then you don t have any troubleshooting to do at the controller Step 4 Make a list of all of the stations that are not functioning properly Measure the...

Page 4: ...ons provided Page 7 of this guide If the fuse is good proceed to Step 7 If the fuse is bad replace it and start again at Step 3 Step 7 Check the 120 V power being supplied to the controller according...

Page 5: ...e wire nuts inside of the controller where the power lines connect to the transformer 3 Make sure the wire nuts are not touching each other or anything else 4 Turn power back on 5 Touch a probe to eac...

Page 6: ...e to each of the power lines that run into the terminal strip from the transformer Be careful not to touch the probes together 2 Check the reading on your multimeter Acceptable range 24 28V AC SET MET...

Page 7: ...e each fuse to test it 3 Touch one probe to each side of the fuse 4 Check the reading on your multimeter Acceptable range Very low or zero Ohms OK A high value or Over Range Indication OL indicates a...

Page 8: ...ing on your multimeter A good 1 5Vdc battery will read above 80 0mA A good 9Vdc battery will read above 22 0mA 6 Replace the battery CAUTION Avoid electrical shock or instrument damage by not exceedin...

Page 9: ...emove cover of controller to expose terminal strip 3 Turn controller to manual mode and activate the station or master valve MV to be checked 4 Touch insert one probe to the terminal labeled COM for c...

Page 10: ...he station or MV to be checked 3 Check the reading on your multimeter Acceptable range 20 60 Ohms Less than 20 indicates a short or crossed wires more than 60 indicates a broken wire bad splice or bad...

Page 11: ...part of each of the two splice wires leading into the solenoid If it is easier disconnect the solenoid and just check the voltage drop across the two wires coming from the controller 3 Check the read...

Page 12: ...t the pump relay expose a part of each of the two wires coming out of the relay 3 Touch a probe to each of the exposed wires 4 Check the reading on your multimeter Acceptable range 24 28 V AC Rain Bir...

Reviews: