9
EN
Original instruction manual
Dear Customer,
Congratulations on the purchase of machinery from the fastest growing brand of electric
and pneumatic tools - RAIDER. When properly installed and operating, RAIDER are safe and
reliable machines and work with them will deliver a real pleasure. For your convenience has
been built and excellent service network of 45 service stations across the country.
Before using this machine, please carefully acquainted with these “instructions for use”.
In the interest of your safety and to ensure proper use and read these instructions carefully,
including the recommendations and warnings in them. To avoid unnecessary errors and
accidents, it is important that these instructions will remain available for future reference to all
who will use the machine. If you sell it to a new owner “Instructions for Use” must be submitted
along with it to enable new users to become familiar with relevant safety and operating
instructions.
Euromaster Import Export Ltd. is an authorized representative of the manufacturer and
owner of the trademark RAIDER.
Adress: Sofia City 1231, Bulgaria “Lomsko shausse” Blvd. 246, tel 02 934 33 33, 934 10 10,
www.raider.bg; www.euromasterbg.com; e-mail: [email protected].
Since 2006 the company introduced the system of quality management ISO 9001:2008 with
scope of certification: Trade, import, export and servicing of hobby and professional electrical,
mechanical and pneumatic tools and general hardware. The certificate was issued by Moody
International Certification Ltd. England
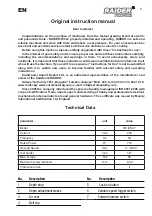
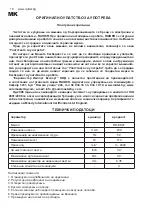
Technical Data
parameter
unit
value
Model
-
RD-ES47
Current
V AC
230
Frequency
Hz
50
Rated Power
W
710
No-load Speed
min-
1
0 – 4000
Tool holder
inch
1/4”
Max. Torque
Nm
90
Maximum screw diameter
mm
6.35
Protection Class
-
II
12
13
KEY P
AR
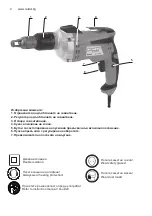
TS DIAGRAM
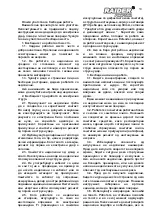
No.
Description
No.
Description
1
Depth stop
5
Lock-on button
2
Depth adjustment sleeve
6
Wrist strap
3
Air vent
7
Variable speed trigger switch
4
Belt clip
8
Forward/reverse switch
OPERA
TING INSTR
UCTIONS
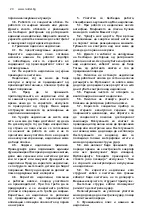
Forward/reverse switch
The forward/reverse switch (1) is conveniently
mounted in front of the trigger switch (2) (fig. 1).
To make the screwdriver rotate clockwise for
driving screws, push the forward/reverse switch to
the left. To make the screwdriver rotate counter-
clockwise to remove screws, push the forward/
reverse switch to the right.
NOTES:
a) Never change the position of the forward/re-
verse switch while the screwdriver bit is turning.
b) The trigger switch will NOT function with the
forward/reverse switch in the middle position.
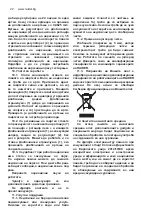
Variable speed trigger switch
This screwdriver is equipped with a variable-
speed ON/OFF trigger switch.
1.
To start the screwdriver, gently squeeze the
trigger switch (2) (fig. 2).
NOTE:
The screwdriver will turn at its
slowest speed when the trigger switch is
depressed slightly. The screwdriver will turn
at its fastest speed when the trigger switch
is fully depressed.
2.
To stop the screwdriver, release the trigger
switch.
Trigger switch lock-on
The trigger switch lock-on feature allows the
trigger switch to be locked in the ON position at
full speed when continuous operation for extended
periods of time is required.
fig. 1
fig. 2
DRYWALL SCREWDRIVER 054-3181-2
DRYWALL SCREWDRIVER 054-3181-2
Summary of Contents for RD-ES47
Page 41: ...41 RD ES47 Exploded view ...
Page 58: ...58 www raider bg ...
Page 60: ...60 www raider bg ...
Page 63: ...63 ...


