14
www.raider.bg
and attachments may increase the risk of injury or damage to the machine.
3. ASSEMBLING THE ELEMENTS OF THE BATTERY BRUSH CUTTER AND PUTTING IT
INTO SERVICE.
Some trimmer parts are disassembled to reduce the volume of the package during transport.
Mounting the protective cover
Attach the safety cover (6) to the brush cutter base using the solo screws and the cross-head
screwdriver as shown in Figure A
Attention !!! Never use the brush cutter without first applying the protective cap.
Starting the brush cutter
If this is the first time the brush cutter is being used, make sure that the cord touches or passes the
safety cover.
The cord should be cut automatically if it is loosened to the maximum (outside the protective cover).
To achieve the required length of cord or knife, hold the button as shown in Figure B and C
ATTENTION
• Before inserting batteries into the tool, always check that the switch is activated
triggers correctly and returns to the OFF position when released.
Using a tool with a switch that does not operate properly can result in loss of control and serious
personal injury.
A lock lever is provided to prevent the switch trigger from being accidentally pulled.
To start the tool, grasp the back handle (the locking lever is released from the grip) and then pull the
switch trigger.
To stop the tool, release the switch trigger.
The tall grass should be mowed in layers, as shown in FIG. D
Attention !!!
Protect the brush cutter from hard surfaces and injuries.
Angle and direction of cutting Fig. (E)
Replacing the spool:
. Switch off the brush cutter;
• Turn the machine upside down;
. Squeeze the lid of the cord head with its locking teeth. Remove the pulley and replace the cord with a
new one, not exceeding 2 meters in total length. The cord must be wound in a direction opposite to the
direction of wobble of the head. Put the reel in the base („bed“) of the head, pull out some of the cord
to make sure that the reel is properly fitted, and then insert the head cover, ensuring that it is securely
secured by the retainers.
4. PRACTICAL TIPS:
Observe municipal regulations for the time of day you can use outdoor machines. In some countries,
mowing is prohibited in the morning before 08.00, after noon between 14.00 and 16.00 in the evening
and after 22.00 in the evening, to protect citizens from unwanted noise.
Often the lawns are made up of grasses of different varieties. Frequent mowing will enhance the
growth of these varieties, which form dense tufts and strong roots. If you rarely mow your lawn, you
will enhance and improve the development of tall grasses and weeds. The normal height of the grass
is about 4-5 cm. It‘s a good idea to plan your mowing frequency so that you can cut at most 1/3 of the
total grass height with one cut. If you do not water your lawn, do not mow the lawn less than 4 cm, as
it will be damaged if it is dried.
When operating in particularly harsh conditions, be careful not to overload the motor. When the motor
is overloaded, the motor speed drops and its noise changes. In this case, stop, release the power lever
(1) and adjust a higher cutting height. Otherwise, productivity will decrease and the machine may be
damaged.
When mowing near the edges, be careful not to attach any foreign objects to the trimmer.
Cutting performance depends on the density, humidity, length of grass, as well as cutting height.
Cutting performance decreases when the trimmer is switched on and off frequently during cutting. To
optimize mowing performance, it is recommended that you mow more often, increase cutting height,
and operate at a moderate speed.
SERVICE, MAINTENANCE AND STORAGE.
ATTENTION! Once the machine is switched off, the cord continues to rotate for a while! Before you
start working on the trimmer, wait until the motor rotates and the cord stops completely!
Never try to stop the rotation of the cord!
Always wear protective gloves when carrying out activities near the cord!
Follow maintenance procedures on a regular basis to ensure long-lasting and reliable use of the
trimmer. Check periodically for noticeable defects, such as loose or damaged knife and loose screw
connections. Make sure that the covers and safety equipment are in good working order and are
properly installed.
Cleaning.
It is easiest to clean the trimmer immediately after mowing. After work, carefully clean the machine with
a soft brush and a cloth. Do not use water and / or solvents and detergents. Remove any debris from
the grass, especially the vents. Position the machine sideways and clean the cord area. Always wear
safety gloves! Remove any sticky particles with wood or plastic logs.
Always clean the trimmer thoroughly when leaving it for longer storage. Especially in winter.
FAULTS AND WAYS TO REMEDY THEM.
The table below shows symptoms of malfunctions and how you can help yourself if your trimmer stops
working properly. If you cannot find and correct the problem by following the instructions in the table,
contact a Raider Authorized Repairer.
Summary of Contents for PRO RDP-SBBC20
Page 8: ...8 www raider bg 1 a 20 2...
Page 9: ...9 3 6 B C D...
Page 10: ...10 www raider bg 2 Raider 4 08 00 14 00 16 00 22 00 4 5 cm 1 3 4 cm 1...
Page 11: ...11 5 R20 System 6 6 1 6 2 6 3 RAIDER 7 7 1 2012 19 EC...
Page 23: ...23 1 20...
Page 24: ...24 www raider bg 2 3 7 A B C OFF...
Page 25: ...25 2 4 08 00 14 00 16 00 22 00 4 5 1 3 4 1...
Page 26: ...26 www raider bg 5 R20 System 6 6 1 6 2 6 3 RAIDER 7 7 1 waste 2012 19...
Page 33: ...33 1 20...
Page 34: ...34 www raider bg 2 3 7 OFF...
Page 35: ...35 To 2 4 08 00 14 00 16 00 22 00 4 5 cm 1 3 4 1...
Page 36: ...36 www raider bg trimmer trimmer Ryder 5 R20 System 6 6 1 6 2 2012 19...
Page 43: ...43 1 20...
Page 44: ...44 www raider bg 2 3 7 A B C...
Page 45: ...45 D E 2 4 08 00 14 00 16 00 22 00 4 5 1 3 4 1...
Page 46: ...46 www raider bg Ryder 5 R20 6 6 1 6 2 6 3 RAIDER 7 2012 19 EC...
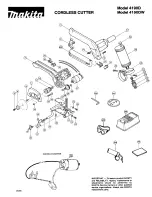
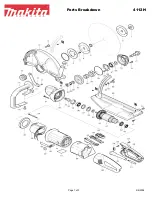
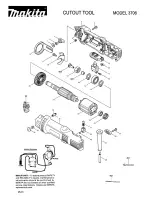
Page 73: ...73 EXPLODED VIEW...
Page 79: ...79 246 0700 44 155 e mail info euromasterbg com...
Page 81: ...81 1 5 2 bar Raider 18 Raider Industrial Raider Pro 12 Raider Power Tools Raider Garden Tools...
Page 88: ...88 www raider bg...
Page 89: ...89 45...
Page 92: ...92 www raider bg...


