15
Easy and fast adjustment of the desired cutting height.
3.4. Check if the bolt that holds the blade is tight. Head bolt for spanner 27 mm, and the bolt
itself has a diameter of 8 mm and a right hand thread with step 1,25 mm. The length of the thread
is 30 mm The bolt is screwed to the right and to the left has been unscrewed. To unscrew or
tighten the bolt catch with glove the cutting blade to block the rotating of the shaft. Do not insert
a screwdriver or other metal object into the vent hole to block the rotation of the shaft. This will
break the cooling turbine.
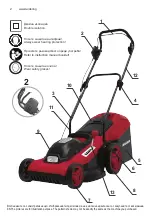
3.5. Firmly attached the extension cable for the device (13), then plug the extension cord plug to
plug. Make sure the extension cord is away from the blade of the mower and the area to mow. Then
plug the other end of the extension in the sockets 220 V. Machines with rated supply voltage 230 V
can work included in the electric supply 220 V.
3.6. Turn on the electric lawn mower by pressing the safety button (2) against inadvertent
switching on and push the lever (1) on the switch to the handle (12). Submit safety button (2). Never
operate the mower if it is in the high grass.
3.7. Switching off the electric lawn mower by release the lever (1) of the On/Off switch and
necessarily wait for the cutting blade to stop rotating!
Do not switch the mower immediately after you turn it off.
4. Practical tips:
4.1. Follow local regulations for the time of day during which you can use machines outdoors.
In some countries prohibit mowing morning before 08.00 hours, in the afternoon between 2:00 p.m.
to 16:00 hours and after 22:00 at night, to protect citizens from unwanted noise.
4.2. Often lawns are composed of grasses of different varieties. With frequent mowing you
will boost the growth of those species, which form dense sward and strong roots. If you mow
your lawn frequently will strengthen and improve the development of high - growing grasses and
weeds. The normal height of the grass is about 4-5 cm. Better to plan the frequency of mowing a
lawn that can reduce up to 1/3 of the total height of the grass. If you do not irrigate your lawn, mow
grass lower than 4 cm, since a potential drought it will degenerate.
4.3. Mow the lowest height (20 mm) only if your lawn area is very flat, expect heavy rains or will
leave on vacation.
4.4. The average height of mowing (35-45 mm) is best when the interval between the previous
and the next mowing are not lengthy.
4.5. Cutting height (70 mm) is suitable for the first mowing of the season and when there is a
drought.
4.6. Empty the container (6) for collecting grass clippings after filling 2/3 of its volume, this will
provide a more efficient mowing and prevent the mower from overloading.
4.7. When working in very difficult conditions not to overload the motor. When reloading the
rotational speed of the motor drops and noise is changed. In this case, stop, release the lever to
include (1) and set higher mowing height. Otherwise, performance will be reduced and the machine
may be damaged.
4.8. When cutting close to edges careful not to pinch the mower foreign objects.
4.9. Cutting performance depend on the density, moisture content, length of the grass and the
cutting height. Cutting performance decreases with frequent switching on and off the mower while
mowing. To optimize the performance of the cutting recommended frequent cutting, increasing the
height of the cutting operation and at a moderate speed.
5. Servicing, maintenance and storage.
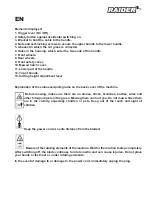
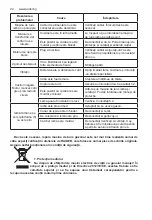
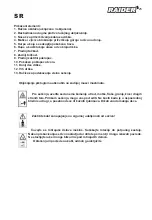
ATTENTION! Always disconnect the plug from the wall outlet before making activities related
to maintenance or cleaning! Once the machine is off, the blade continues to rotate for some time
by inertia! Before you start working on the mower, wait for the rotation of the motor and the blade
to stop completely!
Never try to stop the rotation of the knife!
When you need to perform operations in the vicinity of the knife, always operate with gloves!
Perform maintenance procedures regularly to ensure your long-term and reliable use of the
mower. Check it periodically for visible defects such as loose or damaged knife and loosened
screw connections. Make sure the covers and guards are undamaged and are installed properly.
Summary of Contents for GARDEN TOOLS RD-LM33
Page 46: ...46 www raider bg EXPLODED VIEW OF GRASS TRIMMER RD LM33 ...
Page 63: ...63 ...
Page 67: ...67 ...


