

Bump Testing and Calibration Setup
Important!
Test the alarms prior to performing a
bump or span calibration test.
Manually calibrate the MicroRAE using a fixed-flow
regulator (refer to User’s Guide for more details) and the
supplied special calibration adapter that covers the gas
inlet:
1.
Connect the gas cylinder, flow regulator, tubing, and
calibration adapter to the MicroRAE.
2.
With the MicroRAE in Normal Mode, enter
Programming Mode by pressing and holding both
[MODE] and [Y/+] until the password screen
appears.
3.
Input the 4-digit password. (The default password is
“0000”.) Then follow the menus to select single- or
multi-sensor bump test, zero, or span calibration.
Important!
After a bump test or calibration, remove the
calibration adapter to ensure correct readings.
Bump (Functional) Testing
Bump test to confirm that the sensors and alarms are
functional.
Important!
Make sure all sensors have warmed up
before performing the bump test.
With the MicroRAE in Programming Mode:
1.
Enter the Bump Test or Multi Bump menu. The
calibration gas value for each sensor is shown.
2.
In Single Bump, select the sensor to bump test. In
Multi Bump, you do not need to select a sensor.
3.
Connect calibration gas to the instrument and start
the flow.
4.
Press [Y/+] to start the bump test.
5.
After the countdown, the result is shown.
6.
Exit bump testing.
Zero & Fresh Air Calibration
Before other calibrations are performed, the MicroRAE
should be fresh-air calibrated in clean air with 20.9%
oxygen or with a cylinder of clean zero air. The oxygen
sensor should be calibrated with nitrogen (N
2
). In
Programming Mode, select “Fresh Air.” Then:
Press [Y/+] to start a Fresh Air calibration for the listed
sensors. All are fresh-air calibrated at once.
To individually zero calibrate sensors:
1.
Select “SINGLE ZERO” and select a sensor.
2.
Press [Y/+] to select a sensor to zero calibrate.
3.
Start the flow of the zero gas, if used, and press
[Y/+].
4.
The screen says, “CAL” and counts down.
5.
When done, it says, “PASS” (the reading should be
0 or very close to it for combustible and toxic gas
sensors, and 0% Vol. for an oxygen sensor).
6.
Shut off the flow of zero air (if used) and remove
the calibration adapter.
Span Calibration
Span Calibration determines the second point of the
sensor calibration curve for the sensor.
Important!
Make sure all sensors have warmed up
before performing a span calibration.
With the MicroRAE in Programming Mode:
1.
Enter the Single Span or Multi Span menu. The
calibration gas value for each sensor is shown.
2.
In Single Span, select the sensor to calibrate. In
Multi Span, you do not need to select a sensor.
3.
Connect calibration gas to the instrument and start
the flow.
4.
Press [Y/+] to start calibration.
5.
After the countdown, the result is shown.
6.
Exit span calibration.
Rev. A P/N: M03-4002-000
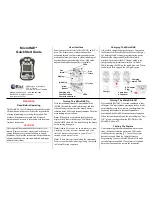
Menu Navigation
Pressing [MODE] repeat-
edly allows you to step
through the screens as
shown here.
Note:
The gray boxes
Indicate optional func-
tions. These depend on
the instrument’s config-
uration and settings.
Consult the MicroRAE
User’s Guide for more
detailed descriptions.


