RC2200DB
2004 Radiocrafts AS
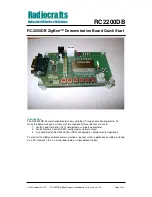
RC2200DB ZigBee Demonstration Board Quick Start (rev. 0.2)
Page 2 of 2
Quick Start Guide
1. Set up the SLC as network coordinator
Simply turn on the power to the “SLC” board by plugging in the AC/DC battery adapter or
connecting the 9V battery pack. The green LED close to the DC jack will light up when the
power source is OK.
After a moment the orange LED will light up indicating that the coordinator is up and running.*
The packet sniffer will show this event as one “Beacon request” transmission from the SLC.
As no other nodes are present, there will not be any more activity in the network.
2. Set up the SRC as network router and associate it to the coordinator
Turn on the power to the “SRC” board by plugging in the AC/DC battery adapter or
connecting the 9V battery pack, and the green LED close to the DC jack will light up.
After a moment the orange LED will light up indicating that the router is up and running.*
The packet-sniffer will show this event as several “Beacon request” transmissions from the
SRC, and finally an “Association request”. The SRC is now associated (“logged on”) to the
coordinator.
3. Make an end device binding between the SRC and the SLC
The devices need now to be bound. That is, one particular remote control (“switch”) shall be
bound to control one particular load controller (“lamp”).
Push button number 5 (“BIND”) on the SRC in order to initiate the binding process. Within 10
seconds push button number 5 (“BIND”) on the SLC. The SRC will light up its green LED to
indicate a successful binding.
(Repeat 2 and 3 above for the second SRC)
4. Make an automatic end device binding by using service discovery
As an alternative to “manual” binding, an SRC can do an automatic binding to a device that
accepts the message from the SRC. In this small demonstration network the SLC is the only
such device. Push button 4 (“AUTOBIND”) on the SRC in order to do this.
5. Take the control: Turn the light on/off!
Pushing button number 6 (“ON/OFF”) on the SRC will now turn on/off the light (the green LED
at the SLC).
It is simple! It is ZigBee powered by Radiocrafts!
*) If the yellow LED starts blinking after power on, this indicates that the MAC address has not been configured. This
can then simply be done by setting the potentiometer (grey knob in the down right corner) in a random position and
press push button number 1 (“MAC-ADDR). This random MAC address is then stored in the internal EEPROM and
will be used the next time the board is reset or powered up.
Contact Information
Radiocrafts AS
Gunnar Schjelderups vei 11
NO-0485 OSLO
NORWAY
www.radiocrafts.com
Tel: +47 970 86 676
Fax: +47 22 71 29 15
ZigBee is a trademark of the ZigBee Alliance. © 2004, Radiocrafts AS. All rights reserved.


