
2
3
4
5
6
7
8
9
10
Learn to
Solder Kit
6400254 User’s Guide
4.
Flow a small
amount of solder
onto the joint. The
solder joint should
have enough
solder to hold
the component,
but should not extend beyond the pad and should
extend only slightly above the pad.
5.
Trim the excess lead as
closely as possible to the
PCB.
Caution:
Be careful when
soldering and trimming
leads. Protective eyeware is
recommended.
We hope you enjoy your Learn to Solder Kit from
RadioShack. Please read this user’s guide before
using your new soldering kit.
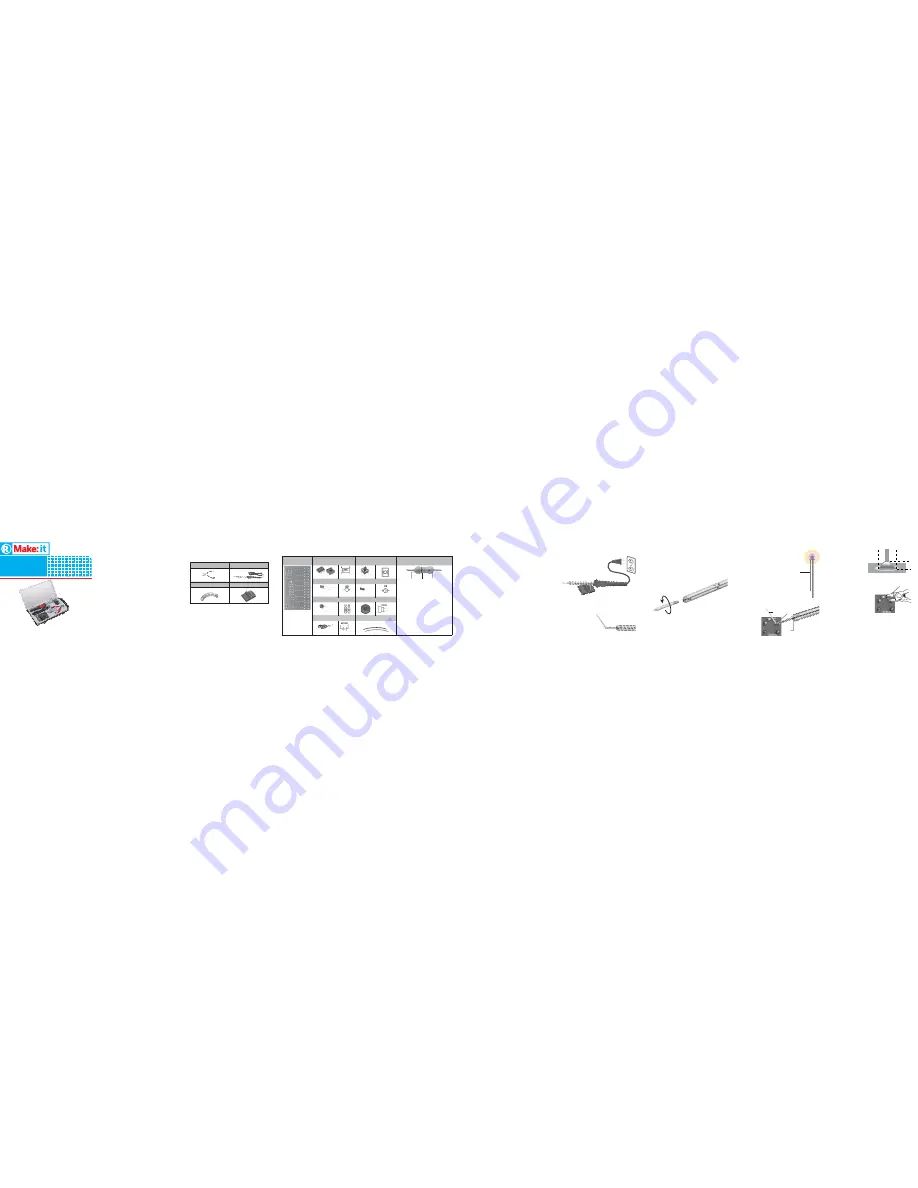
Package Contents
Tools
Diagonal Pliers
Soldering Iron
Solder
Safety Stand
Caution:
The solder contained in this kit contains lead.
Thoroughly wash your hands after soldering and before
consuming food.
Kit Components
Printed Circuit
Board (1)
NE555P Integrated Circuit
(1) IC Socket (1)
Tact Switch (8)
Resistors (10)
Green, Green, Orange = 55K
The sequence of the colored stripes
indicates the resistance value.
R1 = 55K (Green, Green, Orange)
R2 = 49K (Yellow, White, Orange)
R3 = 44K (Yellow, Yellow, Orange)
R4 = 41K (Yellow, Brown, Orange)
R5 = 36K (Orange, Blue, Orange)
R6 = 32K (Orange, Red, Orange)
R7 = 28K (Red, Gray, Orange)
R8 = 27K (Red, Violet, Orange)
R9 = 1K (Brown, Black, Red)
R10 = 750 (Violet, Green, Brown)
LED (1)
Electrolytic Capacitor (1)
Ceramic Capacitor (2)
Speaker (1)
Battery Holder (1)
Speaker Input Wires (2)
Before You Begin
Instill good working habits. A soldering iron is not a toy.
• Prepare a clean, uncluttered workspace with no
distractions.
• Verify all tools and parts.
• Review schematics and instructions. Attention to detail
is critical.
Cleaning Your PCB
Copper on the printed circuit board (PCB) may oxidize
when exposed to oxygen and moisture in the air. This
oxidation can result in poorly connected welds. Before
soldering, use a scouring pad to gently clean the copper
surface so it is uniformly shiny. This will enable the solder
to properly adhere to the PCB.
Preparing Your Soldering Iron
1.
Place your soldering iron on
the stand.
2.
Plug the soldering iron into
a wall outlet.
Soldering
1.
Insert the component leads
through the correct pads on
the PCB.
2.
Press the iron to the pad
where the lead emerges. Heat
the pad for a few seconds,
so that the solder will flow
smoothly and evenly.
3.
Do not move the iron. Instead,
touch the solder to the point
where the iron, pad, and lead
all meet.
Leads
Tin the Soldering Iron Tip
“Tinning” means coating the soldering iron tip with a small
amount of solder.
1.
Plug in the iron and
wait three minutes.
2.
Tin the soldering tip
by adding a small
amount of solder.
Important Safety Instructions
• Read instructions before operating the product.
• Keep out of the reach of children.
• Work only in a dry area that is free from flammable materials.
• Operate the soldering iron in properly ventilated rooms or rooms
with a fume extraction system. Inhalation of soldering fumes and
particles from flux in the solder is detrimental to health.
• Be careful! Hot soldering irons can cause severe burns and ignite
fires. Do not touch the tip or let it come in contact with any other
material.
• Do not touch the tip of a hot soldering iron or remove solder from
its surface with your hands.
• If the supplied cable is damaged, it should be repaired by the
manufacturer or its agent or a suitable qualified person in order to
avoid a hazard.
• Never hold the soldering tip to the soldering point too long. This
can destroy the soldering point.
• Never operate the soldering iron without the soldering tip. This
can damage the heating device.
• When you are not using your soldering iron, unplug from wall
outlet.
• Store the soldering iron in a dry, secure place where children
cannot reach it.
• Keep the soldering iron away from dust and dirt, and clean it with
a damp cloth occasionally to keep it looking new.
• This product, when used for soldering and similar applications,
produces chemicals known to the State of California to cause
cancer and birth defects (or other reproductive harm).
Replacing the Soldering Tip
Your soldering iron comes with a nickel-plated tip. When
it wears out, you can replace it with another iron tip (not
supplied).
Unplug the soldering iron’s power cord from the power
source and let it cool down before replacing the tip.
Iron
Solder


