background image

11

Follow these steps to turn auto talk on or
off.

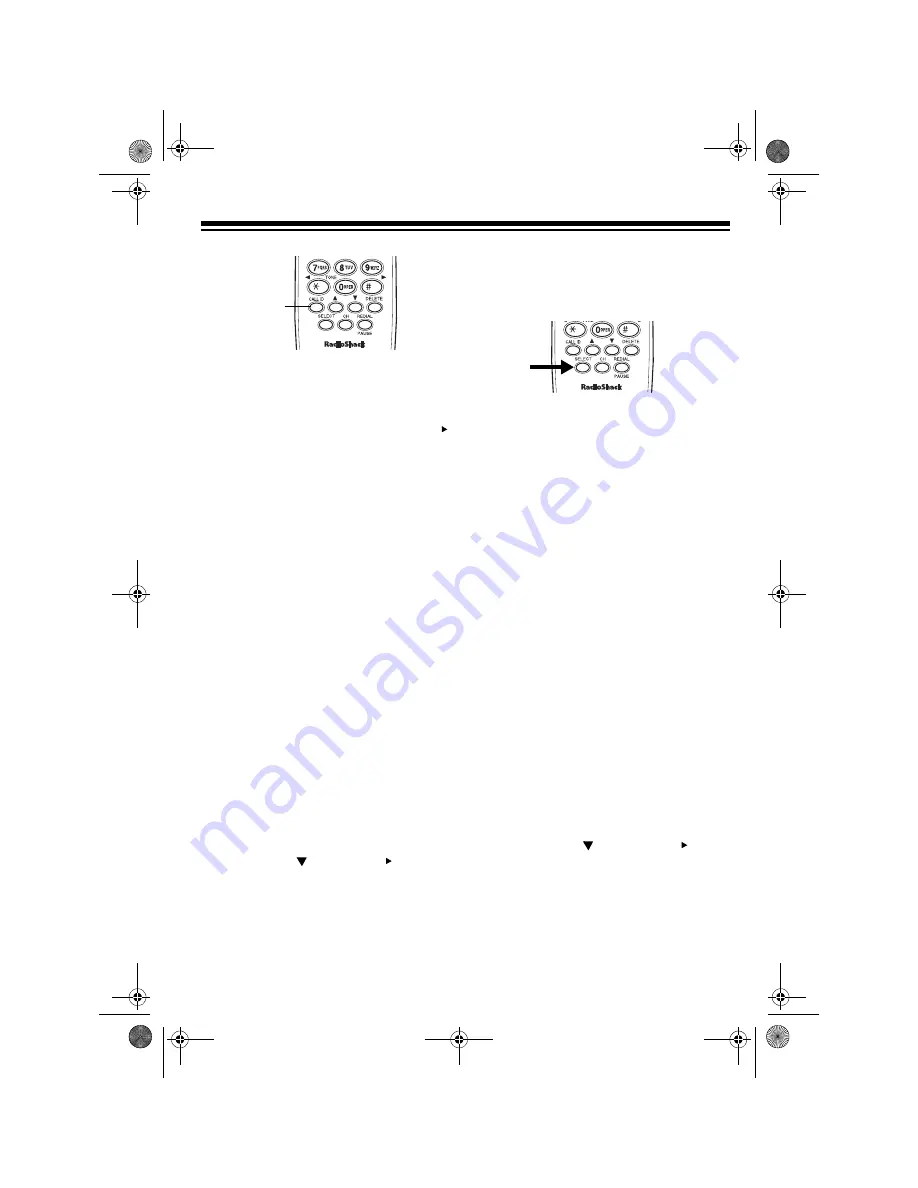
1. Lift the handset and hold down

CALL ID

. A menu appears with 

1

Auto Talk

 selected.

2. Press 

SELECT

 to change the auto

talk setting. 

On

 or 

Off

 appears indi-

cating the selected setting.

3. Return the handset to the base or

press 

CALL ID

 to store the new set-

ting.

TURNING CALLER ID/
CALL WAITING ON/OFF

If you subscribe to Call Waiting with
Caller ID service, you can set the ET-
1109 to show Caller ID information for
an incoming call even while you are us-
ing the phone. 

Follow these steps to turn the Caller ID/
Call Waiting feature on or off.

1. Lift the handset and hold down

CALL ID

.

2. Press 

2

 or 

 to select 

2

CIDCW:

(Caller ID/Call Waiting).

3. Press 

SELECT

 to change the Caller

ID/Call Waiting setting. 

On

 or 

Off

appears indicating the selected set-
ting.

4. Return the handset to the base or

press 

CALL ID

 to store the new set-

ting.

STORING YOUR 
AREA CODE

To quickly dial a number from a Caller
ID record (see “Dialing Numbers from a
Caller ID Record” on Page 20) or to cor-
rectly store a number from a record into
a memory dialing location (see “Storing
a Caller ID Record to Memory” on
Page 20), you must store your local area
code in the ET-1109’s memory. Then,
when you dial from a Caller ID record,
the ET-1109 skips the area code if it
matches the one you stored.

Follow these steps to store your area
code.

1. Lift the handset and hold down

CALL ID

.

2. Press 

3

 or 

 to select 

3

Area

Code:

.

CALL ID

43-1109.fm  Page 11  Friday, June 18, 1999  10:26 AM

Summary of Contents for ET-1109

Page 1: ...Cat No 43 1109 OWNER S MANUAL Please read before using this equipment ET 1109 900 MHz Digital Cordless Telephone with Caller ID Call Waiting ID 43 1109 fm Page 1 Friday June 18 1999 10 26 AM...

Page 2: ...0 Number Memory Dialing lets you store up to 20 numbers in memory for easy dialing Page lets you send a signal from the base to the handset to page someone or to help you locate the handset Volume Con...

Page 3: ...you must be in an area where those services are available and you must subscribe to those services through your local phone company Where Caller ID is offered one or more options are generally availab...

Page 4: ...ne add up all the RENs If the total is more than five three in rural areas your phones might not ring If ringer operation is impaired re move a device from the line FCC STATEMENT Your ET 1109 complies...

Page 5: ...a Pulse Line 14 Paging 15 Memory Dialing 15 Storing a Number and Name in Memory 15 Editing or Deleting a Number in Memory 16 Entering a Pause 17 Reviewing Memory Numbers 17 Dialing a Memory Number 17...

Page 6: ...sitive and its plug must fit the ET 1109 s DC IN 9V jack The supplied adapter meets these specifications Us ing an adapter that does not meet these specifications could damage the ET 1109 or the adapt...

Page 7: ...ter and modular cords through the grooves on the bracket 4 Plug the modular cord s other end into the wall plate jack then align the bracket s keyhole slots with the wall plate studs and slide the bas...

Page 8: ...eyhole slots with the mounting screws and slide the base downward to secure it CONNECTING AND CHARGING THE BATTERY PACK The ET 1109 comes with a recharge able nickel cadmium battery pack in the handse...

Page 9: ...might be lost To reset the code return the handset to the base for about 5 seconds The handset does not lose its secu rity access protection code even if the battery pack is completely dis charged Usi...

Page 10: ...ues you have pulse service Set DIAL MODE to P pulse 4 Press TALK or place the handset on the base to hang up SETTING THE RINGER TONE VOLUME You can select one of four different ring er tone volume set...

Page 11: ...2 or to select 2 CIDCW Caller ID Call Waiting 3 Press SELECT to change the Caller ID Call Waiting setting On or Off appears indicating the selected set ting 4 Return the handset to the base or press C...

Page 12: ...the correct number Note If an area code is already stored it appears on the display af ter you press and hold CALL ID To delete the area code press DELETE three times Then enter your area code 4 Pres...

Page 13: ...andset is away from the base press any key To end a call place the handset on the base or press TALK SELECTING THE CHANNEL The ET 1109 has 30 channels frequen cy pairs used between the base and handse...

Page 14: ...l services such as Call Waiting For example if you have Call Waiting press FLASH to answer an incoming call without disconnecting the current call Press FLASH again to return to the first call Note If...

Page 15: ...3 characters Storing a Number and Name in Memory Notes An error tone sounds and the phone exits the storing process if you wait more than 20 seconds between each key press If you receive a call during...

Page 16: ...ry n Stored appears After 2 seconds Memory Store appears Repeat Steps 3 8 to store more numbers 9 When you finish press MEM to exit the Memory Store display For each stored number write the per son s...

Page 17: ...emory n if you did not store a name To see the stored phone numbers press An arrow to the right of the number means it is longer than 13 digits Press again to see the rest of the number Repeatedly pre...

Page 18: ...ull open the rubber cover marked on the side of the handset then insert the headset s plug into the jack Notes Connecting a headset disconnects the handset s earpiece and micro phone or on the handset...

Page 19: ...LASH again If the ET 1109 s Caller ID memory be comes full any new call replaces the oldest call s record REVIEWING CALLER ID RECORDS To review the Caller ID records lift the handset and press CALL ID...

Page 20: ...Press MEM Select Location appears 3 Choose a memory location 01 20 by pressing a number or by repeat edly pressing or then press SELECT Display Description New XX Total XX Shows the number of new Call...

Page 21: ...you want to delete 2 Press DELETE Delete Mes sage appears prompting you to confirm the deletion 3 Press or to move the cursor to Yes or No then press SELECT or DELETE The phone beeps once in dicating...

Page 22: ...properly connected The handset stops working or works poorly during a call Move the handset closer to the base Lift the base s antenna to a fully vertical position Be sure the handset s battery pack i...

Page 23: ...set and base If they are dirty clean them with a pencil eraser Be sure the battery pack is connected correctly Be sure the handset is properly seated on the base Replace the battery pack see Replacing...

Page 24: ...refully Dropping it can damage circuit boards and cases and can cause the ET 1109 to work im properly Use only fresh batteries of the required size and recommended type Batteries can leak chemicals th...

Page 25: ...y pack promptly and properly Do not burn or bury it Cautions You must use a replacement battery pack of the same size and type Do not dispose of the battery pack in a fire because it might explode Do...

Page 26: ...r phone is causing it Try to eliminate the interference by moving your phone away from the receiver connecting your phone to an AC outlet that is on a different electrical circuit from the receiver co...

Page 27: ...27 NOTES 43 1109 fm Page 27 Friday June 18 1999 10 26 AM...

Page 28: ...ect during the warranty period take the product and the RadioShack sales receipt as proof of purchase date to any RadioShack store RadioShack will at its option un less otherwise provided by law a cor...

Reviews: