


5
Prepa
rat
ion
PREPARATION
I
NSTALLING
B
ATTERIES
Your meter requires 3 AAA batteries (not
supplied) for power. Batteries are available
at your local RadioShack store or online at
www.radioshack.com.
o
Ô
1. Set the function dial to
OFF
. Then
unplug the test leads.
2. Use a Phillips screwdriver to loosen the
battery cover’s screw on the back of the
meter. Then remove the battery cover.
3. Install the batteries according to the
polarity markings (+ and –) in the
battery compartment.
4. Replace the battery compartment
cover and secure it with the screw.
When
;
appears on the left side of the
display or the meter stops operating
properly, replace the batteries.
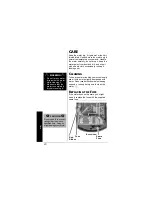
C
ONNECTING
THE
T
EST
L
EADS
The test leads (black
and red) supplied with
your meter are rated
for 1000 volts. Use
only test leads of the
same rating as the
meter. You can order
replacement leads
from your local RadioShack store.
o
o
WARNING
o
•
To avoid electrical
shock, disconnect
both of the test leads
from any equipment
before you install or
replace the meter’s
batteries.
•
Do not operate the
meter until the
batteries are properly
installed and the back
cover is in place and
secured.
Ô
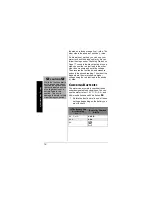
BATTERY NOTES
Ô
•
Dispose of old
batteries promptly
and properly.
•
Do not burn or bury
batteries.
•
Use only fresh
batteries of the
required size and
recommended type.
•
Do not mix old and
new batteries or
different types of
batteries (standard or
alkaline).
•
If you do not plan to
use the meter for a
month or more,
remove the batteries.
Batteries can leak
chemicals that can
destroy electronic
parts.
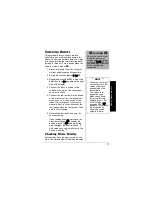
Black Test Lead
Red
Lead
Test
o
WARNING
o
•
Although the test
leads are rated for
1000 volts, do not try
to measure any
voltage greater than
600 volts DC/600
volts RMS AC.
•
If you connect one
test lead to a hot wire
first and touch the
other test lead tip,
you could receive an
electric shock.


