background image

7

R

ECHARGING

 N

I

-C

D


OR


N

I

-M

H

 B

ATTERIES

The radio’s

DC 6V

jack is for charging

Ni-Cd or Ni-MH batteries and powering
the radio. You can recharge Ni-Cd or
Ni-MH batteries inside the radio at
home or in your vehicle, using a 6V,
1000mA AC or DC adapter and a size
H Adaptaplug

TM

connector.


Ô

1. Rotate

Off

Ð

clockwise until it

clicks to turn off the radio.

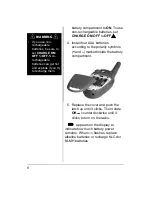
2. Pull down the latch on the battery

compartment cover, and remove
the cover.

3. Set

CHARGE ON/OFF

to

ON.

4. Place four Ni-Cd or Ni-MH

batteries in the compartment
according to the polarity symbols
(

+

and

) marked inside. Then

replace the cover and push the
latch up until it clicks.

5. Attach the Adaptaplug to the

adapter so TIP reads positive (

+

).

6. Connect the Adaptaplug’s other

end to the radio’s

DC 6V

jack and

plug the adapter into a standard

 CAUTION 

You must use a Class 2
power source that
supplies regulated 6V
DC (Not more than 6V)
and delivers at least
600mA. Its center tip
must be set to positive
and its plug must fit the
radio’s DC 6V jack.
Using an adapter that
does not meet these
specifications could
damage the radio or the
adapter.

Ô

 NOTES 

Ô


Complete charging
takes about 14-16
hours with a standard
AC or DC adapter. If
you want to charge
batteries faster, use an
optional “smart
charger” (Catalog
number 21-1930).

Ni-MH batteries take
longer to charge than
Ni-Cd batteries.

The power duration for
a fully charged
Ni-MH battery is
approximately 13
hours.

You can charge the
radio while it is on, but
only if you connect it to
a DC-DC regulated
and filtered adapter.

Summary of Contents for 21-1904

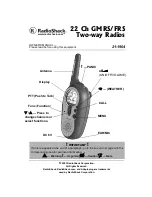
Page 1: ...by RadioShack Corporation d e Press to changechannels or select functions IMPORTANT If an icon appears at the end of a paragraph go to the box on that page with the corresponding icon for pertinent i...

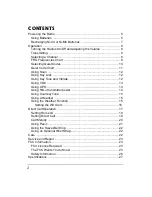
Page 2: ...2 Using Key Tone and Vibrate 12 Using VOX 13 Using APO 14 Using Hi Lo transmitter power 14 Using Courtesy Tone 15 Using a Headset 15 Using the Weather Function 15 Setting the WX Alert 16 Direct Call O...

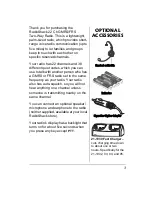
Page 3: ...et to the same frequency as your radio Your radio also has auto squelch so you will not hear anything on a channel unless someone is transmitting nearby on the same channel You can connect an optional...

Page 4: ...nables standalone usage and works with a hands free accessory Automatic Power Off the radio automatically turns off when the radio is idle for 30 60 or 90 minutes Hi Lo power selection select the tran...

Page 5: ...off the radio rotate Off clockwise until it clicks 2 Pull down on the battery compartment cover and remove it from the compartment 3 To use Ni MH or Ni Cd rechargeable batteries set CHARGE ON OFF ins...

Page 6: ...and push the latch up until it clicks Then rotate Off counterclockwise until it clicks to turn on the radio appears on the display to indicate how much battery power remains When flashes replace alkal...

Page 7: ...dapter so TIP reads positive 6 Connect the Adaptaplug s other end to the radio s DC 6V jack and plug the adapter into a standard CAUTION You must use a Class 2 power source that supplies regulated 6V...

Page 8: ...down PTT to send a page to other FRS radios set to the same channel and the same quiet code if you selected one TX appears Release PTT to stop transmission SELECTING A CHANNEL Press e or d to select t...

Page 9: ...rstitial 5 6 462 6875 FRS 6 GMRS Interstitial 6 7 462 7125 FRS 7 GMRS Interstitial 7 8 467 5625 FRS 8 9 467 5875 FRS 9 10 467 6125 FRS 10 11 467 6375 FRS 11 12 467 6625 FRS 12 13 467 6875 FRS 13 14 46...

Page 10: ...you set a quiet code there are 38 codes to choose from and turn on this feature you can communicate with anyone who has a radio set to the same channel and quiet code To select the desired quiet code...

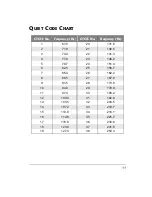
Page 11: ...5 3 74 4 22 141 3 4 77 0 23 146 2 5 79 7 24 151 4 6 82 5 25 156 7 7 85 4 26 162 2 8 88 5 27 167 9 9 91 5 28 173 8 10 94 8 29 179 9 11 97 4 30 186 2 12 100 0 31 192 8 13 103 5 32 203 5 14 107 2 33 210...

Page 12: ...AND VIBRATE You can set the radio so it sounds a tone when you press any key except PTT or FUNC You can also set the radio to vibrate When the radio is idle for 30 seconds the radio vibrates when it...

Page 13: ...and press e or d key until and ON appear Press PTT to store the setting USING VOX Vox operation allows you to transmit a voice message without pressing any key To activate Vox continuously press MENU...

Page 14: ...and vibrates To activate the radio press any key Make sure the radio is set to ON by setting the rotary switch to on The radio beeps and vibrates when you turn it on USING HI LO TRANSMITTER POWER You...

Page 15: ...ot supplied available at your local RadioShack store To connect a headset insert the headset s plug into the EAR MIC jack on the bottom of the radio USING THE WEATHER FUNCTION Your radio can receive w...

Page 16: ...r area To turn off this feature press again Setting the WX Alert You can set your radio to monitor the weather broadcast while the radio is in the FRS GMRS mode In an emergency weather situation the r...

Page 17: ...d CTCSS code for both radios are not the same Direct Call data is sent when user presses CALL The radio transmits Direct Call data to the desired radio At the same time the other radio checks the rece...

Page 18: ...conversation is made within this period the 15 second time out is extended for another 15 seconds To exit the 15 second period press CALL or wait for the 15 second time out After a 15 second time out...

Page 19: ...e the setting SETTING DIRECT CALL Direct Call data allows you to enter the receiver s radio ID number that you want to call The radio s receiver only receives the Call when the Direct Call data is mat...

Page 20: ...ber If you select you can send a page to all users 2 Press PTT to store the setting CALL MELODY When you press CALL to send out the direct call data a melody specific to the ID number sounds Likewise...

Page 21: ...two seconds the radio generates an alarm sound 3 To stop the alarm sound press and hold PANIC until the alarm stops and STOP appears on the LCD Call Melody No ID 1 2 3 4 5 For Receiver Group Call Sen...

Page 22: ...might need to use a small screwdriver or straightened paper clip to do this Then pull the strap s large loop through the small loop CARE Keep the radio dry if it gets wet wipe it dry immediately Use a...

Page 23: ...ust be at lease 18 years of age and cannot be a representative of a foreign government You must complete FCC Forms 605 and 159 Fee Remittance Advice and return them with the applicable fees IMPORTANT...

Page 24: ...al Radio Steering Group PRSG is the national user advocacy organization for the GMRS The PRSG provides assistance with licensing and other information about the GMRS including how to contact and commu...

Page 25: ...ential installation This equipment generates uses and can radiate radio frequency energy and if not installed and used in accordance with the instructions may cause harmful interference to radio commu...

Page 26: ...ed fifty percent In August 1996 the Federal Communications Commission adopted RF exposure guidelines with safety levels for handheld wireless devices CAUTION To maintain compliance with the FCC s RF e...

Page 27: ...Audio output power 200mW 8 Ohms Audio Distortion 5 Emissions more than 50dB RF Output Power FRS 500mW 6V DC RF Output Power GMRS 1 5W 6V DC Harmonic Power Supply 4 x AAA Alkaline not supplied Operati...

Page 28: ...ct defect during the warranty period take the product and the Ra dioShack sales receipt as proof of purchase date to any RadioShack store RadioShack will at its option unless otherwise provided by law...

Reviews: