Radio Shack 16-634 Owner'S Manual Download Page 21

21

OPERATION

WATCHING TV

Using the TV’s Tuner 

To watch a broadcast using the TV’s tuner, turn
off the VCR or repeatedly press 

TV/VCR

 until

VCR disappears from the VCR’s display.

Note: If you are using a TV/monitor connected
to the VCR’s 

R-AUDIO-L/VIDEO OUT

 jacks, be

sure to set the TV/monitor to its TV mode.

The antenna or cable signals pass through the
VCR unaffected, as if the antenna or cable
were connected directly to the TV. Use the TV
as you normally would.

Using the VCR’s Tuner 

Your VCR can receive up to 68 VHF and UHF
channels, and up to 125 cable channels. The
VCR displays the channels as 1–125.

Notes:

• Channels 2–13 are the same for VHF and

cable TV, and cable companies usually
number them as they appear on the dis-
play.

• Since cable companies sometimes desig-

nate cable channels with letters or letter-
number combinations, a channel number
you see on the VCR’s display might differ
from the channel number displayed on
your cable box. You might need to experi-
ment to determine the proper cable chan-
nel designations for your cable system. For
more information, contact your local cable
company.

• Two of the cable channels are designated

for audio only.

1. Turn on the TV and set it to the same chan-

nel as the VCR’s 

3-CH-4

 switch.

Note: If you are using a TV/monitor con-
nected to the VCR’s 

R-AUDIO-L/VIDEO OUT

jacks, set the TV/monitor to its video mode.

2. Repeatedly press 

TV/VCR

 until VCR

appears.

3. To manually select a channel, you can

press 

CH 

s or 

CH

 t to have the tuner auto-

matically advance to the next channel
stored in the tuner’s memory.

Note: If you press 

CH

 s when the tuner is

at the highest programmed channel or 

CH

 t

when the tuner is at the lowest pro-
grammed channel, the VCR enters the
audio/video mode and 

LINE


1

 or 

LINE


2

appears on the TV (see “Selecting the Sig-
nal to Record” on Page 34). Continue to
press 

CH

 s or t until the highest or lowest

programmed channel appears.

Or, to directly select a channel, press the
number buttons on the remote control for
the desired channel.

Notes:

• Precede a single-digit number with a 0

— for example, 01, 02, and so on.

• To enter a three-digit number, press 

100

,

then enter the second and third digits in
the channel number.

• If you receive MTS stereo or SAP broad-

casts, see “Receiving/Recording Stereo/
SAP Broadcasts” on Page 34.
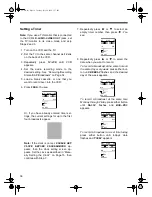
Channel Caption

You can assign call letters (such as ABC or
CBS) to a channel so the call letters appear
with the channel number on the TV when you
select the channel. You can select from the
VCR’s 24 preset call letter combinations and
create up to 10 call letter combinations of your
own.

16-634.fm  Page 21  Tuesday, July 20, 1999  5:37 PM

Summary of Contents for 16-634

Page 1: ...Cat No 16 634 16 636 OWNER S MANUAL Please read before using this equipment Model 64 Model 65 Hi Fi Stereo VCR With Four Head Double Azimuth 16 634 fm Page 1 Tuesday July 20 1999 5 37 PM...

Page 2: ...d only from the type of power source indicated on the marking label If you are not sure of the type of power supplied to your home consult your appliance dealer or local power company For VCRs intende...

Page 3: ...extensive work by a qualified technician to restore the VCR to its normal operation If the VCR has been dropped or the cabinet has been damaged When the VCR exhibits a distinct change in perfor mance...

Page 4: ...w to view on a purchased or rent ed tape Auto Tracking System automatically ad justs tracking when you start playback Time Stamp the VCR displays useful re cording information such as date start time...

Page 5: ...roduced by other manufacturers Memory Sentinel protects clock settings tuner programming information and timer memory settings in case of a power loss The VCR holds the current time for 1 minute and t...

Page 6: ...s 16 Reprogramming Tuner Memory 16 Changing the On Screen Language 17 Resetting the VCR s Memory 18 Turning the Error Beep On Off 18 Using the VCR Remote Control With Your TV and Cable Box or Satellit...

Page 7: ...2 Recording 33 Recording Speeds Tape Selection 33 Erase Protection 33 Selecting the Signal to Record 34 Receiving Recording Stereo SAP Broadcasts 34 Immediate Recording 34 Recording a Program as You W...

Page 8: ...ording describes the different recording methods Additional Information includes a trouble shooting section care and maintenance proce dures and the VCR s specifications We recommend you thoroughly re...

Page 9: ...onnections that do not go through a cable box Check the laws in your area before you make connections A cable converter box to the VCR s IN FROM ANT jack Note There are many cable TV sys tems in use I...

Page 10: ...Combiner OUT I N UHF TV Antenna In TV Antenna In Audio In Video In L R L Audio Video R VHF Antenna In 1 2 3 75 Ohm Coax Cable or or or or 300 Ohm Lead In Wire Outside Antenna 300 to 75 Ohm Transformer...

Page 11: ...I N Antenna In Audio In Video In L R 75 Ohm Coax Cable Video Cable or or or Outside Antenna 300 to 75 Ohm Transformer Select the signal source you have Cable CATV Company Center Right Left Front Spea...

Page 12: ...ur cam corder or other video source Be sure to connect VIDEO to VIDEO and AUDIO to AUDIO use the plug s color codes as a guide CONNECTING POWER To power the VCR plug its power cord into a standard AC...

Page 13: ...line bat teries such as RadioShack Cat No 23 557 Cautions Use only fresh batteries of the required size and recommended type Do not mix old and new batteries different types of batteries standard alka...

Page 14: ...ch when you see 4 At this screen set your cable box to the local PBS station then press CH s If you do not have a cable box simply press CH s Notes You can also set your direct to home satellite recei...

Page 15: ...he correct time If you do not press a button within 5 min utes in Steps 2 9 the clock is not set Start again from Step 1 1 Press MENU ACTION to display the main menu Note To exit the programming mode...

Page 16: ...one automatically sets its clock to the correct time If the VCR does not find an EDS signal follow the steps under Manually Setting the Clock on Page 15 Adding Erasing Channels We recommend you check...

Page 17: ...UP KEY AUTO CLOCK SET PROCEEDING CANCEL PUSH STOP KEY clock to the correct time and AUTO CLOCK SET COMPLETED appears Afterwards the VCR resets the clock by the received EDS signal the first time you...

Page 18: ...ACTION twice to exit To turn on the beep again repeat these steps and select ON in Step 3 ON ON ACK ON Y KEY VCR USING THE VCR REMOTE CONTROL WITH YOUR TV AND CABLE BOX OR SATELLITE RECEIVER In additi...

Page 19: ...eer 05 06 78 Pulsar 04 30 42 44 52 63 85 88 RadioShack 44 88 RCA 16 17 101 Realistic 44 51 88 Regal 14 41 Regency 28 Rembrandt 29 32 39 42 44 88 Salora 68 72 Samsung 32 40 42 78 94 Scientific Atlanta...

Page 20: ...ou want to control TV DSS CABLE or VCR Then press the desired function button Notes The codes you programmed might be erased if you remove the batteries from the remote control to replace them for exa...

Page 21: ...nel as the VCR s 3 CH 4 switch Note If you are using a TV monitor con nected to the VCR s R AUDIO L VIDEO OUT jacks set the TV monitor to its video mode 2 Repeatedly press TV VCR until VCR appears 3 T...

Page 22: ...to highlight the wrong entry Use or to change the number or ADD DLT to delete the number 9 Press MENU ACTION four times to exit Follow these steps to manually create up to 10 of your own call letter c...

Page 23: ...VCR plays the tape Notes NO CASSETTE PLEASE INSERT A CASSETTE appears when you press PLAY REW FAST F or REC TIME without inserting a cassette During playback the VCR automatically adjusts tracking bu...

Page 24: ...ighted Then press to select ON or OFF 4 Press MENU ACTION twice to exit On Screen Display To view your VCR s current operating mode and other information about your VCR press DISP ENT display enter Yo...

Page 25: ...ion on Page 33 Notes If you leave the VCR in the freeze frame mode for 3 minutes the VCR stops playing the tape to protect the video heads To reduce or eliminate jitter in the freeze frame picture hol...

Page 26: ...you view it During recording Commercial Advance stores in memory the locations of the beginnings and endings of commercials After recording is over the VCR replays the tape and marks the beginnings e...

Page 27: ...recording before power is turned off com mercials might not be correctly marked Selecting a Commercial Advance Tape Playback Option Follow these steps to select how the VCR op erates when you play any...

Page 28: ...s to the start of the movie SEARCHING FOR START OF MOVIE appears When the VCR finds the beginning of the movie THE MOVIE IS READY PUSH PLAY TO START appears GO TO PREVIEW The VCR searches for and play...

Page 29: ...AM INDEX SEARCH appears only when there is a timer recording on the program index list See Automatic Timer Recording on Page 35 MOVIE ADVANCE appears only when the tape has its erase protection tab re...

Page 30: ...recorded pro grams to the program index list However when you eject the tape or press any function button such as REW or PLAY then record a new program using normal recording any previous program is...

Page 31: ...on the TV screen for about 7 seconds then disappears Follow these steps to turn time stamp on or off 1 Press MENU ACTION to display the main menu 2 Repeatedly press or to highlight SET UP FEATURE the...

Page 32: ...TV VCR COUNTER RESET ADD DLT POWER and STOP EJECT This can help you keep children from changing the VCR s timer settings Note Even with the lock set previously set timer recordings still record You c...

Page 33: ...a recording made at the SP speed The quality of tape you use greatly affects record playback quality and the life of the VCR Use only video cassettes that display the offi cial logo High grade tape ha...

Page 34: ...right of the audio mode display indicates the current audio mode To select the audio mode when the broadcast has a stereo or SAP signal press SAP Hi Fi so the arrow mark points to the desired mode IM...

Page 35: ...ding from that source at a time you set then stop record ing at a time you set You can set up to eight timers to record any combination of daily weekly or one time events You can set the VCR to record...

Page 36: ...screen ap pears Set the clock as described in Manu ally Setting the Clock on Page 15 then continue with Step 7 7 Repeatedly press or to select an empty timer number then press You see 8 Repeatedly pre...

Page 37: ...timer number and repeat Steps 8 13 15 Press PROG again TURN VCR OFF FOR TIMER RECORDING briefly appears 16 Press POWER to turn off the VCR TIMER appears Notes Be sure that TIMER appears when you turn...

Page 38: ...recording from one audio video device to another is called dubbing An audio video device where a signal origi nates is called the dubbing source You can use another VCR camcorder satellite receiv er o...

Page 39: ...ecordings by connecting a pre amplifier or mixer to the VCR s R AUDIO L IN 1 jacks Simply select the line input and record as usual Caution Do not directly connect a microphone to the VCR Note For the...

Page 40: ...TV Audio video connections are incorrect Check all connections The playback picture is dis torted The video heads are dirty See Cleaning the Video Heads on Page 43 The VCR might not have adjusted trac...

Page 41: ...y Select LINE 1 or LINE 2 No stereo sound for a stereo recording You have not connected the VCR s R AUDIO L OUT jacks to a ste reo system or stereo TV Connect the jacks to a stereo output The audio ou...

Page 42: ...an cause premature wear of parts Handle the VCR gently and carefully Dropping it can damage circuit boards and cas es and can cause the VCR to work improperly Use only fresh batteries of the required...

Page 43: ...nforma tion contact your local RadioShack store Storing Your Video Cassettes Unless you are making an automatic timer re cording eject and store the cassette before you turn off the VCR This helps pro...

Page 44: ...t VHF UHF F Type Antenna Output VHF UHF F Type Video Input Output Phono Connector Audio Input Output Phono Connector Video Output Level 1 0 Vp p Video Output Impedance 75 Audio Output Level 10 dBV Aud...

Page 45: ...Power Requirement 120 V 60 Hz Power Consumption 23 Watts Dimensions HWD 35 8 1415 16 1113 16 Inches 9 3 38 30 cm Weight 7 lbs 9 oz 3 5 kg Specifications are typical individual units might vary Specifi...

Page 46: ...46 NOTES 16 634 fm Page 46 Tuesday July 20 1999 5 37 PM...

Page 47: ...47 16 634 fm Page 47 Tuesday July 20 1999 5 37 PM...

Page 48: ...ng the warranty period take the product and the RadioShack sales receipt as proof of purchase date to any RadioShack store RadioShack will at its option un less otherwise provided by law a correct the...

Reviews: