background image

1.   How do I adjust the resolution? 

5.1   Troubleshooting   


Chapter 5

To change monitor resolution, click Start -> Control Panel -> Display. Select Setting tab to adjust the monitor resolution in 
Desktop Area. The available resolutions, "640 x 480", "800 x 600", "1024 x 768", "1152 x 864", "1280 x 1024", are deter-
mined by the display card in your computer. 

1.   Is interference signal appeared on LCD normal when shutting down the computer ?

In rare cases, interference may appear on the monitor. This may be caused by signal rate of VGA card and is considered 
normal. The image quality can be improved by adjusting the phase or pixel rate automatically or manually.

2.   The membrane power light is not ON

Press the power On / Off on LCD membrane to check if the monitor is in the ON mode.
Check the power cord is properly connected to the LCD keyboard drawer and power outlet.

4.   Is the LCD keyboard drawer hot-pluggable ? 

The LCD keyboard drawer is hot-pluggable, but components of connected devices, such as the servers and KVMs, may 
not be hot-pluggable. We suggest turning off the power to all devices before connecting them. Apply power to connected 
devices again only after the LCD keyboard receives power.

3.   Screen image is not centered or sized properly 

Press the        button for two seconds to automatically adjust the image.
Adjust the H-position and V-position settings via On-screen menu.

2.   How do I adjust the resolution in MS Windows operation system? 

To change monitor resolution, click Start -> Control Panel -> Display. Select Setting tab to adjust the monitor resolution in 
Desktop Area. The available resolutions, "640 x 480", "800 x 600", "1024 x 768", "1152 x 864", "1280 x 1024", are deter-
mined by the display card in your computer. 

1.   How can I adjust the monitor resolution to 1152 x 900 for SUN Micro system ? 

The NS solution LCD keyboard drawer will automatically detect the 1152 x 900 resolution, so no user con

fi

 guration should 

be necessary.

3.   The Stop-A hot key is not work in Trusted Solaris 

The keyboard combination Stop-A (L1-A) is not available in Trusted Solaris by default. The security administrator can 
change this.

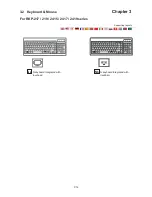
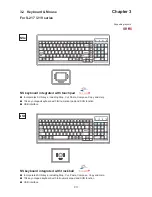
For RKP-217 / 219 / 2415 / 2417 / 2419 series


For “S” series


P.22

Summary of Contents for RKP-217 Series

Page 1: ...ard Drawer 15 17 19 screen size Models RKP 217 219 Series With KVM Options 2U 17 19 screen size Models RKP 2415 2417 2419 Series Short depth version Models S 217 219 Series With KVM Options 2U 17 19 s...

Page 2: ...ce 10 1 13 S Series Single console Use CB 6 to connect to KVM via USB interface 10 1 14 RKP Series Single console Use CE 6 to connect to server via PS 2 interface 11 1 15 RKP Series Single console Use...

Page 3: ...Optional Specification 4 1 KVM Options 19 4 2 DVI D Input Option 19 4 3 BNC S Video Option 19 4 4 Audio Option 20 4 5 DC power Options 21 4 6 Touchscreen Options 21 Chapter 5 Troubleshooting 22 Chapt...

Page 4: ...re water lightning or other acts of nature unauthorized product modifi cation or failure to follow instructions supplied with the product Repair or attempted repair by anyone not authorized by us Any...

Page 5: ...wer outlet to prevent being damaged by transient over voltage Keep all liquids away from the equipment to minimize the risk of accidental spillage Liquid spilled on to the power supply or on other har...

Page 6: ...r S series or CE 6 Combo 4 in 1 KVM cable x 1 pc for RKP series User manual x 1 pc Power cord x 1 pc Auto switch power adapter for external power version x 1 pc Mounting bracket x 2 pcs M6 15mm screw...

Page 7: ...D keyboard drawer comes with the standard parts shown on the package contents Check and make sure they are included and in good condition If anything is missing or damage contact the supplier immediat...

Page 8: ...8 port KVM Matrix IP DB 15 8 port KVM Matrix DB 15 16 port KVM Matrix IP DB 15 16 port KVM Combo Cat6 KVM U 801 U 802 U IP802 U 1601 U 1602 U IP1602 U 3201 U 3202 U IP3202 Combo Cat6 8 port KVM Combo...

Page 9: ...sher x 6 pcs included Caution Leaving the screws slightly loose until you complete the installation in step 2 Pick up the LCD keyboard drawer Insert the LCD keyboard drawer into the mounting bracket P...

Page 10: ...is for RKP 2415 2417 2419 series only Installation procedures of NBK 02 are same to that of NBK 01 4 3 Tighten all 8 pcs of M6 screw to complete the installation Attach front left and right mounting e...

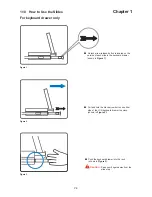
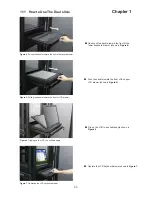
Page 11: ...gure 2 Pull and hold the black arrow button on either side of the LCD keyboard drawer to unlock shown in Figure 2 Figure 1 A black arrow release button is located on the outside of each slide in the k...

Page 12: ...g the handle toward the front of LCD drawer Push the handle toward the front of the upper LCD drawer shown in Figure 5 Gently pull the handle toward the front of the lower keyboard drawer shown in Fig...

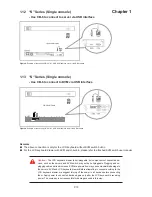
Page 13: ...and LCD keyboard drawer Before attempting to connect anything to the LCD keyboard drawer we suggest turning off the power to all devices before connecting them Apply power to connected devices again...

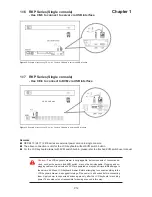
Page 14: ...ble damage to the servers KVM and LCD keyboard drawer Before attempting to connect anything to the LCD keyboard drawer we suggest turning off the power to all devices before connecting them Apply powe...

Page 15: ...sible damage to the servers KVM and LCD keyboard drawer Before attempting to connect anything to the LCD keyboard drawer we suggest turning off the power to all devices before connecting them Apply po...

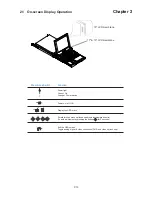
Page 16: ...creen Toggle analog digital video connection DVI D and video options only Scrolls through menu options and adjusts the displayed control To auto adjustment by pressing the button for 5 seconds Display...

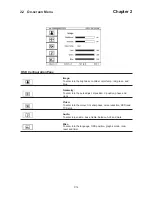
Page 17: ...d green and blue Geometry To enter into the auto adjust H position V position phase and clock Video To enter into the colour tint sharpness noise reduction DCDi and TV Setup Audio To enter into volume...

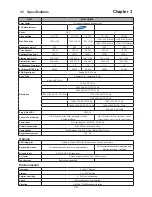
Page 18: ...60 70 72 75 Hz 1024 x 768 60 70 75 Hz 1152 x 864 60 70 75 Hz 1280 x 720 60 70 75 Hz 1280 x 720 60 75 Hz 1280 x 1024 60 70 72 75 Hz 1280 x 1024 60 70 75 Hz 1152 x 900 66 76Hz Plug Play DDC EDID 1 3 Con...

Page 19: ...P 16 3 2 Keyboard Mouse Chapter 3 N keyboard integrated with trackball Nb N keyboard integrated with touchpad Ne For RKP 217 219 2415 2417 2419 series Supporting layouts...

Page 20: ...104 key notepad keyboard with full numerical pad and SUN function USB interface NS keyboard integrated with touchpad Incorporates SUN keys including Stop Cut Paste Compose Copy and Help 104 key notep...

Page 21: ...Key pad behaves as a SUN Solaris system administration command mode Num LED in Green color Key pad behaves as a normal key pad mode Three Audio Display keys are located in the upper right corner of t...

Page 22: ...480mm 18 9 to 530mm 20 9 DVI D 3 in 1 VGA KB mouse console port 3 in 1 VGA KB mouse console port S Video BNC Our KVM is designed to seamlessly integrate into the rear of our full range of LCD drawer s...

Page 23: ...Audio input is 35mm audio plug The speaker is sharing the same power with LCD Power Audio Speaker 4 4 Audio Option Chapter 4 Internal power version External power version 3 in 1 VGA KB mouse console p...

Page 24: ...ce USB serial Optical transmittance 80 3 Surface hardness 3H JIS K5400 Operating system Windows 98 2000 ME XP NT CE DOS Linux e Capacitive Model 15TCB 15TCS 17TCB 17TCS 19TCB 19TCS Screen size 15 17 1...

Page 25: ...as the servers and KVMs may not be hot pluggable We suggest turning off the power to all devices before connecting them Apply power to connected devices again only after the LCD keyboard receives pow...

Page 26: ...18 kg 40 lb 24 kg 53 lb S 219 series 442 x 600 x 88 mm 17 4 x 23 6 x 3 5 581 x 753 x 216 mm 22 9 x 29 6 x 8 5 18 kg 40 lb 24 kg 53 lb RKP 2415 series 442 x 480 x 88 mm 17 4 x 18 9 x 3 5 584 x 616 x 2...

Reviews: