background image


accessories and before servicing. 


Keep handles dry, clean and free from oil and grease. 


Be concentrated when using the tool. Look at what  you do, make sense and  do not use 
the tool when you are tired. 


Remove the blade guard before using the tool. 


A  damaged  guard  or  other  part  must  be  properly  repaired  or  replaced  by  an  authorized 
service center, unless otherwise specified in this instruction manual. 


Do not use the tool if the starter is not working (if it cannot be turned ON and OFF). 


Place  the  equipment  in  a  well-lit  area  on  a  flat,  stable,  dry  and  well-ventilated  surface, 
away  from  flammable  materials  and  with  plenty  of  space  for  sparking  and  sharpening 
waste. 


Do  not  allow  anyone,  especially  children,  to come  within  a  radius  of  at least  five meters 
around the work area when all work is in progress. 


Immediately stop the tool in the event of a malfunction of the motor or the ON/OFF button 
or in case of unusual noise. 


Do not use the tool if the starter is damaged. 


Do not move the chain with your hand with the wheel moving. 


Do not stop the chain with your hands or other objects. 


Treat the chain teeth with caution during operation; they can cause severe cuts. 


When not in use, the machine must be stored in a dry,  locked place  out of the  reach of 
children. 


Before  using  the  product  and  after  any  shock,  please  check  it  for  signs  of  wear  or 
damage. Please carry out repairs if necessary. 


Always switch off the machine: 

o


Every time you leave the device unattended; 

o


Before releasing an obstruction; 

o


before checking, cleaning or working on the product; 

o


after hitting a foreign object; 

o


Every time the product starts to vibrate abnormally. 


Pay attention to foot and cutting injuries. 


Inspect  and  regularly  service  the  product.  Repairs  should  be  carried  out  only  by  an 
authorized service center or a similar qualified specialist. 


When not in use, store the product out of the reach of children. 


Children should not play with plastic bags, sheets  and small parts! Keep them out of the 
reach of children. There is a danger of suffocation! 


When  transporting  the  tool,  always  add  the  blade  guard  to  the  blade.  Always  carry  the 
tool by holding the handle, never the blade. 


Do not use the product on a slippery surface. 


Do not use the product on steep, slippery slopes. 


When  planning  your  work  schedule,  allow  enough  time  for  rest.  Limit  continuous  use  of 
the  device,  eg  use  30  ~  40  minutes  per  session,  and  take  10  ~  20  minutes  of  rest 
between work sessions. Work a maximum of two hours per day 


If  the  machine  has  struck  foreign  objects,  check  if  the  tool  is  damaged  and  bring  it  to 
repair if necessary. 


Do  not  place  any  part  of  the  body  on  the  chain  when  the  chainsaw  is  operating. Before 
starting the chain saw, make sure that the chain is not in contact with anything. A moment 
of inattention during use may cause your clothing or body part to stick to the chain. 


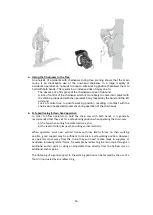
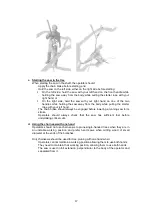
Always hold the chainsaw back handle with your right hand and the front handle with your 
left hand. Hold the chainsaw by inverting your hands increases the risk of personal injury 
and should never be used. 


For the chainsaw designed with the chain guide on the left side, the reference to the "right 
hand" and "left hand" positions is reversed. 


When  cutting  a  branch  that  is  under  stress,  pay  attention  to  the  risk  of  elastic  return. 
When  the  tension  of  the  wood  fibers  is  released,  the  spring-loaded  limb  may  strike  the 
operator and / or project the chain saw out of control. 


Exercise extreme caution when cutting brush and young shrubs. Fine materials can grip 
the cutting chain and be thrown as a whip in your direction, or you lose balance under the 
effect of traction. 

Summary of Contents for RAC2525-1

Page 1: ...1 ORIGINAL INSTRUCTIONS CHAINSAW RAC2525 1 INSTRUCTIONS MANUAL Read the instructions before use the tool 32 rue Aristide Bergès ZI 31270 Cugnaux France MADE IN PRC 2018 ...

Page 2: ...2 CONTENTS 1 SECURITY INSTRUCTIONS 3 2 YOUR PRODUCT 7 3 ASSEMBLY 10 4 FILLING THE FUEL TANK 12 5 OPERATION 13 6 MAINTENANCE AND STORAGE 20 7 DECLARATION OF CONFORMITY 24 ...

Page 3: ... this tool should not touch it and handle it Keep them at least 15 m from the machine during operation Use the product only under daylight or under good artificial light When using the machine always wear full protective equipment including a helmet protective mask ear protection gloves non slip footwear and protective clothing Wear appropriate clothing Do not wear loose or unbuttoned shirts Do no...

Page 4: ...rly service the product Repairs should be carried out only by an authorized service center or a similar qualified specialist When not in use store the product out of the reach of children Children should not play with plastic bags sheets and small parts Keep them out of the reach of children There is a danger of suffocation When transporting the tool always add the blade guard to the blade Always ...

Page 5: ...g fuels They are flammable and the vapors are explosive Use only an approved container Never remove the fuel cap or add fuel while the machine is on Turn off the unit and allow the engine and exhaust components to cool before refueling Do not smoke Never refuel inside a room Never store the tool and the fuel tray indoors where there is a naked flame such as near a water heater If fuel has spilled ...

Page 6: ... by a qualified professional and have repairs carried out if necessary before using it again There are harmful health consequences resulting from the emission of vibrations if the product is used for long periods of time or not properly managed and properly maintained There is risk of injury and property damage due to attachments or broken the sudden impact of hidden objects when using cutting Ris...

Page 7: ...7 Wear gloves of security Wear security shoes 2 YOUR PRODUCT a Description ...

Page 8: ...ty protection 2 Chain 3 Chain Guide 4 Fastening nut 5 Engine 6 Ventilation opening 7 Safety Trigger 8 Handle 9 Accelerator throttle 10 Cable starter 11 Handle 12 Oil reservoir 13 Fuel Tank 14 Switch 15 Starter ...

Page 9: ...in Weight empty tank without accessories 3 5 kg Cutting length 200mm 10 Chain pitch 9 525mm 0 375 Gauge of chain 1 27mm 0 05 Type of chain 3 8LP 40 Kangxin Type of guide bar AP10 40 509P Kangxin Sprocket number of teeth x pitch 6 teethes 9 525 Carburetor WT962 Walbro 1E34FC Jingke 1E34FC Ruixing MC14B HLIC Spark plug L8RTF LD L7T LD BM6A LD L8RTF Torch Sound Pressure level Uncertain K LpA 99dB A U...

Page 10: ... the bracket to the rear of the engine assembly with a screw 4 Install the guide and mount the chain on the pinion and guide in the direction shown in the diagram 5 Loosen the nuts and remove the chain cover Attach the bracket to the back of the motor assembly with a screw Install the guide and mount the chain on the pinion and guide in the direction shown in the diagram 6 Adjust the chain tension...

Page 11: ... properly tightened Repeat the installation if the chain is not tight b Adjusting the chain tension The tool motor must be switched off before adjusting the chain tension Make sure that the chain is inside the groove of the guide Hold the guide by its tip Adjust the tension of the chain with the tension adjustment screw until the chain teeth touch the bottom of the guide Turn the chain tension adj...

Page 12: ... is 40 1 make sure the mixing ratio is correct before filling the product a Mixing Mix in a clean empty container supplied Pour the oil into the container Pour the fuel into the tank Mix the mixture long enough more than one minute to get a good combination b Filling the fuel tank Unscrew the fuel tank cap and remove it Fill the tank slowly with the mixture Do not exceed the maximum capacity fill ...

Page 13: ... the engine a Press the priming pump continuously until the fuel enters the pump Set the switch to position I b Pull the starter button The starter will close and the throttle will be moved to the starting position Hold the chainsaw firmly against the ground Put the chainsaw Either on the left side of your body holding the handle firmly with your left hand Use your right hand to pull the starter r...

Page 14: ...ly the brake is automatically activated by the inertia force It is also manually tightened by pushing the brake lever down and forward When the brake is running a yellow sign comes out from the base of the brake lever To release the brake pull the brake lever up until it clicks into place When the brake is working release the throttle lever to slow down the engine speed Continuous use when the bra...

Page 15: ...off the ground The oil flow of the chain is adjustable to obtain the proper flow Insert a screwdriver on the clutch side Turn the adjuster to obtain the correct flow rate for the job The chainsaw must essentially consume the contents of the oil tank between each full of fuel Do not forget to fill the oil tank when filling the machine with fuel 4 Work with wire and harness NOTE It is necessary to h...

Page 16: ...of the chain saw b Safe positioning for two hand operation In order to allow operators to hold the chain saw with both hands it is generally recommended that they aim for a safe working position when operating the chain saw At the hip when cutting horizontal sections and At the level of solar plexus when cutting vertical sections When operators work near vertical trunks with low lateral forces on ...

Page 17: ...hand The chain brake should always be engaged before lowering a running saw to its stroke Operators should always check that the saw has sufficient fuel before undertaking critical cuts d Using the chain saw with one hand Operators should not use chain saws to prune single handed trees when they are in an unstable working position and prefer hand saws when cutting wood of small diameter at the end...

Page 18: ...lications Do not attempt to remove the chainsaw when it is stuck during operation Stop the machine and remove the wedge blade with a wedge Stick your feet well keep a good balance and do not climb on the tree trunk Try not to work on a slope However if you have to work on a slope always stand higher than the tree trunk Before bending a branch or trunk in bending observe the direction of bending an...

Page 19: ...first part from below and then from above Then on the second part repeat this operation f Pruning of a felled tree Observe first the direction of flexion of the branch Make a first notch on the side in flexion and finish the cut on the opposite side g Pruning a tree Begin pruning by nicking the tree from below and then finish at the top ...

Page 20: ...se Clean the engine block louvers with a blower Check the chain brake if it is working properly Clean the plastic parts before wiping with a damp cloth Check the use of the chain guide Check the auto lubrication circuit if it is obstructed or not Check sprocket condition Clean the cylinder fins with a compressor b Cleaning the air filter Use a compressor to blow dust and chips To clean the filter ...

Page 21: ...erwards e Guide bar Cleaning Remove bar guide to remove dirt from grooves and oil inlet Regularly grease the pinion Check Reverse the bar from time to time to avoid the effects of wear The bar rail should always be in place Use a ruler to observe it If a gap is observed between them then the rail is normal Otherwise the rail is worn out A bar must be corrected or replaced ...

Page 22: ...ce it with a new one Do not install a chain on a worn or damaged sprocket Do not install a worn chain on a pinion g Spark plug Clean the electrodes with a wire brush and set the gap to 0 6mm if necessary h chain saw Check each time the cutter and cutting angles are as shown below ...

Page 23: ...ot straight Vibration increase Fuel consumption has increased Sharpening method The chain saw must be switched off and locked before sharpening Use a round file or sharpening device see in store Place the file on the tooth and push straight Shift with the same movement After sharpening all teeth check if the teeth are sharp 2 STORAGE When storing the tool must be turned off cooled emptied of fuel ...

Page 24: ... complies with the following European directives EMC Directive 2014 30 EU RoHS Directive 2011 65 EU Noise emission Directive 2000 14 EC Annex V and Directive 2005 88 EC Measured sound power level LwA 110 4 dB A Guaranteed power level LwA 113dB A Also complies with European standards national standards and provisions following techniques EN ISO 11681 2 2011 EN ISO 14982 2009 EC type certificate num...

Page 25: ...25 Philippe MARIE PDG ...

Reviews: