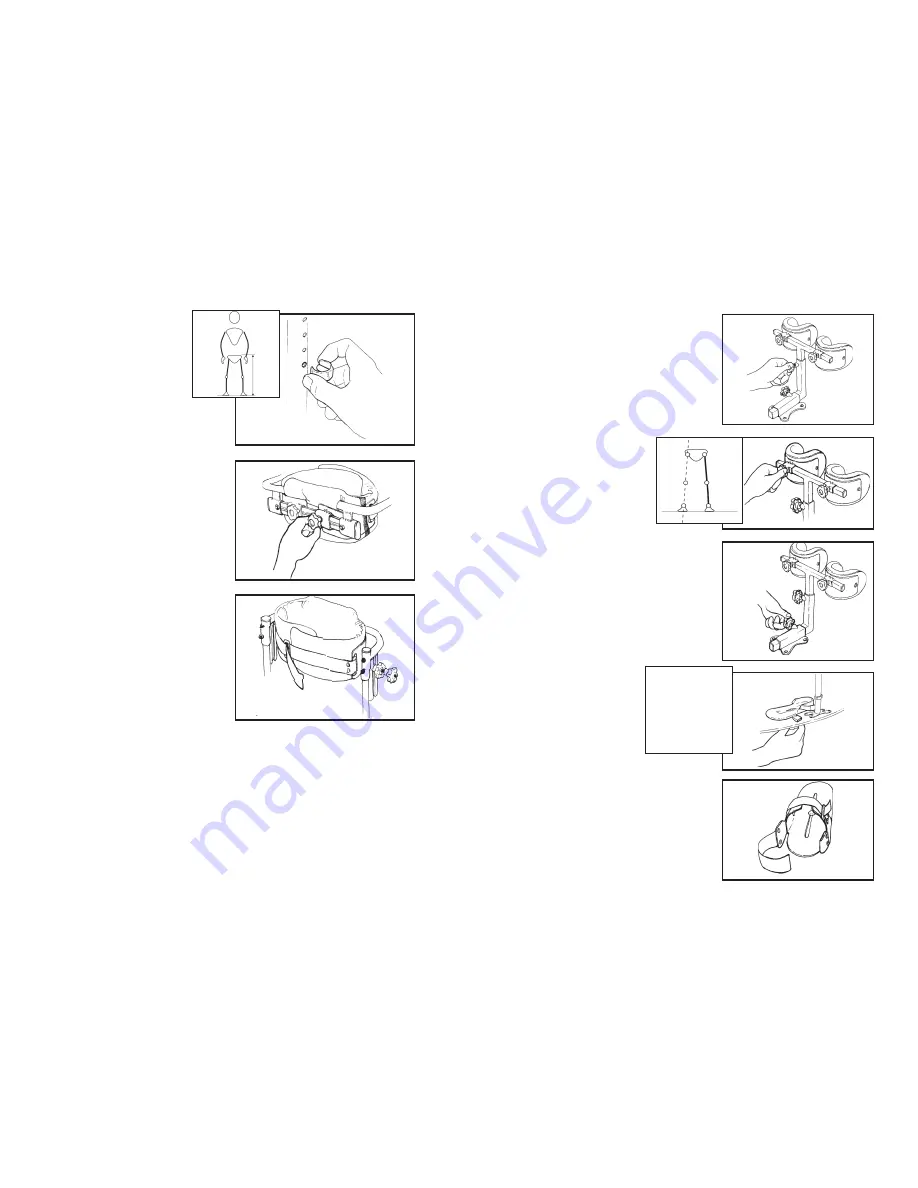
using the circle pins
upihipnst.p65-iss1. GJ:10/02
2
upihipnst.p65-iss1. GJ:10/02
3
Setting Hip Height
Take the user’s measurement from
foot to the top of the iliac crest (the
bony prominence at the top of the
pelvis). The pelvic support is held
in position with two circle clip pins.
Remove the circle clip pins and adjust
the hip support so that the height to the
top of the support is the same as the
measurement just taken.
Fit the circle clip pins through the nearest set of
holes, ensuring the pins fit securely through the
tubes and hold the hip support in position.
Lateral Pad Adjustment
T
he adjustment of lateral pads is best achieved
once the user is on the UPI. In order to make
positioning easier it is suggested that the lateral
pads are brought out to their maximum width
settings. To do this, undo the knobs on each set
of lateral pads and gently pull them apart. Once
the user is in place, push the pads into position
so that they fit snugly against the user’s pelvis
and tighten the knobs.
setting lateral pads
Using Hip Strapping
Once the lateral pads have been adjusted, the
strapping on the hip supports can be positioned
to firmly control posture. Wrap the padding around
the user, folding the flap with the fluffy Velcro over
the flap with the rough Velcro 'hook'. The safety
straps can then be fitted through the 'D' rings
attached to the lateral supports and folded back
on themselves to be fixed in position. On the hip
support, the safety strap should fit across the
lower half of the buttocks.
using the hip and thoracic strapping
Knee Cup Positioning
The position of the knee cups is essential to keep legs straight and correctly abducted. It is also
essential that knee cups support the whole knee to avoid excessive loading or stress in a single part
of the joint. Aim to support the tibial tuberosity (bony ridge below the knee) and the whole patella
(knee cap). Abduction refers to the angle between the thighs which governs the position of the knees
and the stability of the pelvis while standing. Adducted knees (held together) can be straightened, to
provide a more stable and comfortable standing position, by abducting them with the knee cups.
Knee Cup Height
Knee cup height should be set so that the top edge of the knee cup is at the same height as the top
of the patella (knee cap). Measure the height from foot to top of patella for the user. Release the
small knob on the height adjustment tube of the knee control unit. The chromed T-piece will be free
to move up and down and should be set as described above. Lower leg length discrepancy can be
accommodated by sliding the appropriate knee cup off the T-piece and turning it upside down so that
when it is replaced it sits higher or lower on the T-piece than the other knee cup. Ensure all knobs
are fastened tightly before use.
setting knee cup height
Knee Cup Abduction
Depending on user condition the knee cup position can
be neutral, so that hip, knee and ankle joint are in line
vertically, or abducted. To set the amount of abduction,
release the knobs on the knee cup sliders and move
the knee cups to the desired angle. Ensure the knobs
are tightened firmly before use. Also ensure that foot
positioner location corresponds so that hip, knee and
ankle joints are always in line.
Knee Cup Depth
The legs need to be as straight as
possible when standing. With feet and
pelvis accurately located the knees
need to be pushed back to extend the
joints and to bring them in line with
the hips and ankles. To adjust knee
cup depth, release the knob on the
depth adjustment tube and slide the
knee control assembly forwards and
backwards in the tube to the desired
position. Ensure the knob is tightened
firmly before the UPI is used.
setting knee cup abduction
setting knee cup depth
Foot Positioner Positioning
The position of the foot positioners establishes the
stability of the rest of the body while standing. A correct
standing posture stacks the weight of the body in a
column and distributes it through a neutrally positioned
ankle into the foot. If the foot is flat on a surface and
the ankle is extended or flexed, then pressure points
may develop in other areas of support e.g. at the knees,
sacrum or axillas.
Adjust the foot positioners so that the hip,
knee and ankle joints are in line and
neutral. To adjust the foot positioners,
undo the two knobs on the underside
of the wooden footplate and move
the foot positioners into the desired
position. Ensure the knobs are
tightened firmly before the UPI is
used. The foot positioners have two
points of adjustment, the strap over
the foot and the heel strap. Tension
the strap over the foot by loosening the velcro strap,
pulling it to the desired length through the D ring and
folding it back on itself to hold the position. The heel straps
are adjusted once the user's feet are in the positioners.
Before transferring the user onto the standing frame,
open up the heel straps. Slide the user's feet into the
positioners and fasten the heel strap around their heel,
ensuring that the foot is firmly heel in place.
positioning the foot


